
Yaesu makes some high-quality radios that can really be a joy to work with. And honestly, they have some pretty great manuals as well. But what do you do if you’re a visual learner and you need to be shown how to do something to get a better grasp on the process? What if the stock manual seems like there’s too much confusing information?
If that sounds like I’m describing you to a tee, this simple Yaesu VX-6R instruction manual I’m outlining below will help you conquer the simple tasks in using it and while there is more to this great little radio, what I cover below will meet 99% of your needs.
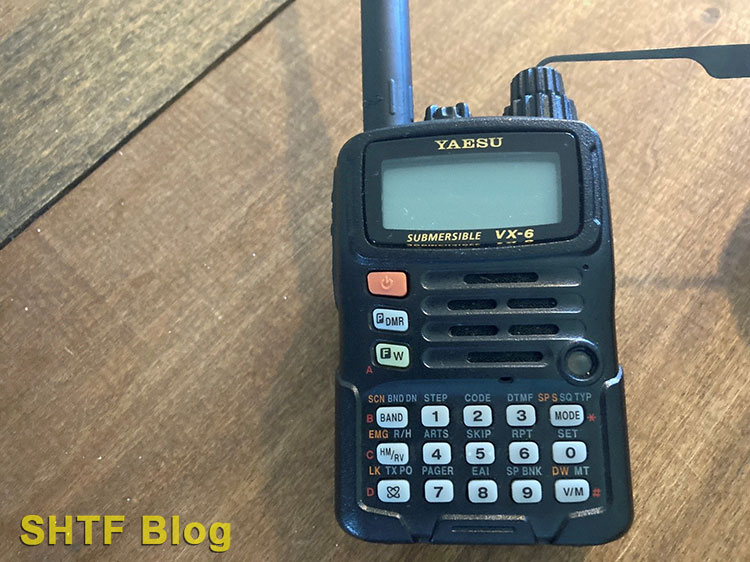
Yaesu VX-SR – A Solid Choice
I’ve had such a positive response to my Baofeng UV-5R instruction manual that I was prompted to write this article. The Baofeng is a wonderful little radio as well, and it is a common introductory ham radio for beginners given its exceptionally low cost (under $25). Every prepper should consider owning one, if just for emergencies.
It’s not uncommon, however, for people who have the Baofeng UV-5R to then look at upgrading. They want something similar in size but higher quality and more power. Enter the Yaesu VS-SR.
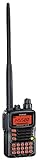
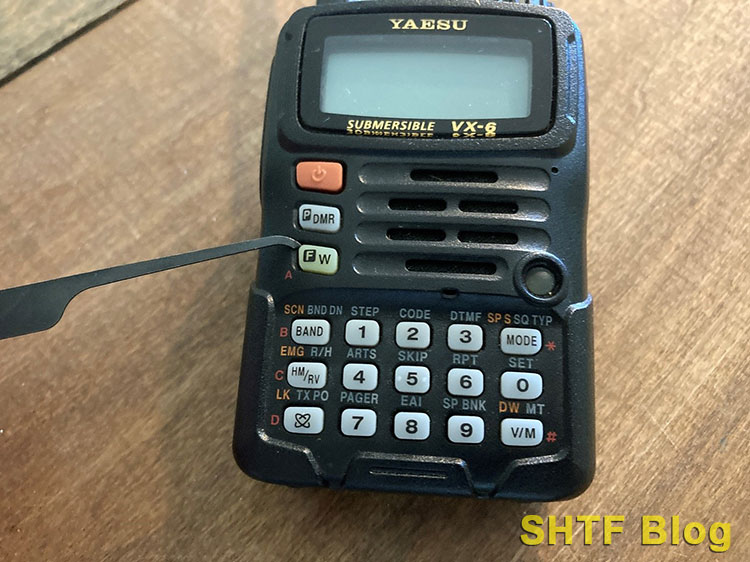
- Compact, Mil-Spec, Waterproof & Submersible Tri Band Ham Radio!
- Transmits the 144, 220 & 430Mhz Amateur Ham Radio Bands, & receives 0.5-999Mhz!
- Output Power is 5 Watts on 2 meter & 70cm, & 1.5W on 222Mhz, with multiple lower power settings!
- Additional features include a convenient access key for Vertex Standard's WIRES (Wide-coverage Internet Repeater Enhancement System), a transmit Time-Out Timer (TOT), Automatic Power-Off (APO...
I assume most people reading this article probably already own one and are now looking to better understand it (it can be overwhelming to the novice). The official user manual for this radio (link below) can be equally overwhelming. It’s a 112-page document after all!
There’s a reason that manual is so long, however. There are a host of things that you can do with a VX-6R. Many of the possibilities aren’t even listed here. My goal with this instruction manual is to show you how to use the features that people use the most. I don’t ever use DCS tones, the CW trainer, the front end attenuator, or a number of other fancy sounding features. I suspect many others don’t either.
Some of the reasons for this is because I simply haven’t found a need for them. Honestly, another reason I don’t use some of them is because I don’t understand them (radio can be a complicated subject), but with the information below, you’ll be able to use this knowledge to get out there and start practicing with a really cool tool.
I think this guide will help most people get started in a more user-friendly manner.
How to Adjust the Volume
Are things too loud/too quiet? You can easily adjust that with the top dial on the top of your radio. Turn it clockwise to make things louder and turn it counterclockwise to make things quieter.
How to Change the Frequency by Dial
Let’s say you want to search through the radio band you’re in by dial, old-school style. To do that, all you have to do is to twist the bottom dial on the top of your radio. Twist it clockwise to move up in numbers and twist it counterclockwise to move down in number.
How to Scan
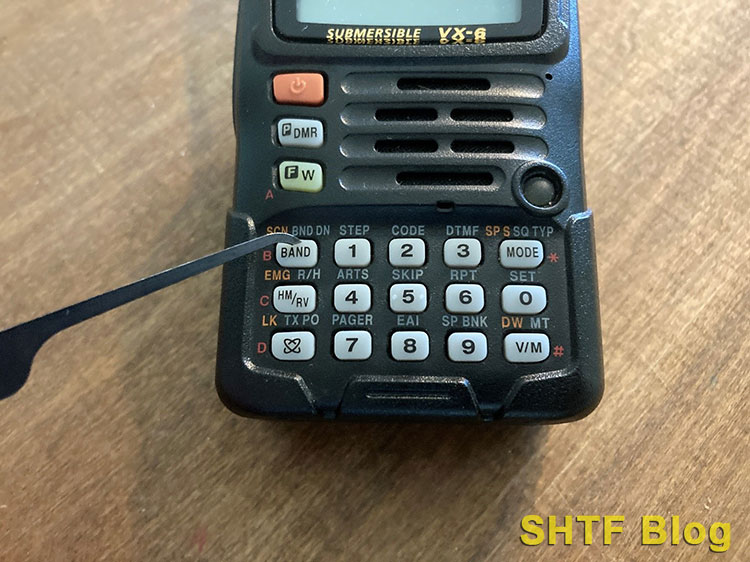
This is simple. All you need to do is to press and hold the ‘BAND’ button for a second or two. The stock way this is set up is that the radio will scan through the band that you are currently in, beep when it reaches the end of that band segment, and then start over again.

If you’re in memory mode, this will scan through all of your saved channels instead.
How to Change from Frequency Mode to Memory Mode
Your radio has a Frequency Mode and a Memory Mode. Frequency Mode is “free.” You can go through the whole part of the spectrum that you’re in that way. Memory Mode is a bit more locked in. You can only go through the frequencies that you’ve already programmed into your radio.
You need to know how to access both of these modes. If you are currently cycling through your stored channels but want to go back to frequency mode, all you have to do is hit the ‘V/M’ button at the bottom right of the face of your radio.
How to Type in the Frequency You Want to Listen To
First, make sure that you are in Frequency Mode. If you’re not already, hit the ‘V/M’ button to get there. All you have to do here is type in the frequency by hitting the number pad. So, if I wanted to listen to 146.440, all I would have to do is hit the ‘1,’ ‘4,’ ‘6,’ ‘4,’ ‘4,’ ‘0’ buttons. There is no decimal button on your radio, so you don’t need to type in a decimal button.
If you want to listen to a frequency that doesn’t have six digits to it – let’s say you want to listen to 0.850 MHz – then all you have to do is add some zeroes in the front. So, you would then hit ‘0,’ ‘0,’ ‘0,’ ‘8,’ ‘5,’ ‘0.’
How to Transmit
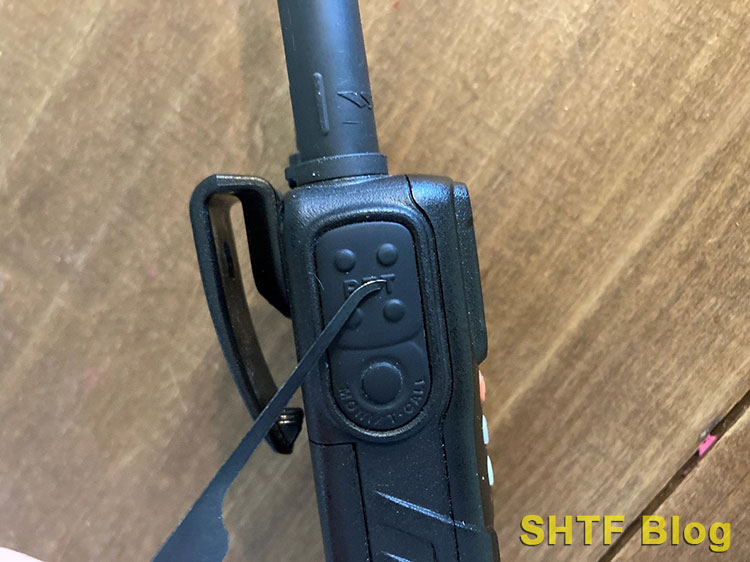
For starters, your VX-6R can only transmit on ham frequencies. When you want to transmit, all you have to do is press and hold the ‘PTT’ button on the side of the radio. Release the ‘PTT’ button when you’re done talking.

If you are a regular user of this radio, want to use it in a vehicle, etc., it’s worth buying a handheld mic. It can make your voice clearer and more pronounced for the listener at the other end.
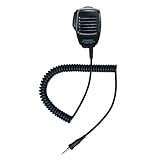
- Use with any Standard Horizon handheld VHF that has a speaker mic jack connection.
- Model No: SSM-17H
- Package dimensions: 7.0 L x 6.0 W x 3.0 H (inches)
- item package weight: 1.0 pounds
You may also need the male/female connector.
How to Change the Band that You’re Listening To
Your VX-6R is virtually a wideband receiver. It can listen to a huge swath of the radio spectrum. To change the current band that you are listening to what you need to do is first ensure that you are in Frequency Mode. If you see a “b1” or something of the like at the top of the screen on your radio, you are in Memory Mode. To get out of Memory Mode, hit the ‘V/M’ button. Then, hit the ‘BAND’ button on the face of the radio.
When you do this, the radio will cycle through the various bands that your radio can listen to. There’s a whole lot of them. (If you’re listening to NOAA weather broadcasts, marine band frequencies, or the shortwave broadcasts, you won’t be able to switch back to ham radio bands by hitting the ‘BAND’ key repeatedly as the stock manual may lead you to believe. You’re going to have to first hit the ‘F/W’ key and then hit the number 9. This will take you back out of the special memory banks.
How to Change the Transmit Power Level
You have four different levels of power you can transmit on here. I will say that you won’t be able to access the high-power settings if you don’t have enough juice in your battery either (When you hike out for a radio contact atop a mountain and find out your batteries are low, you learn this the hard way).
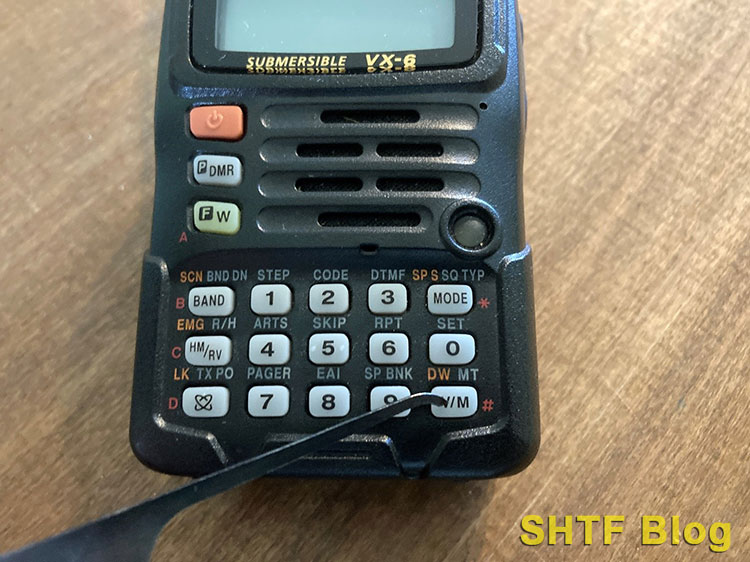
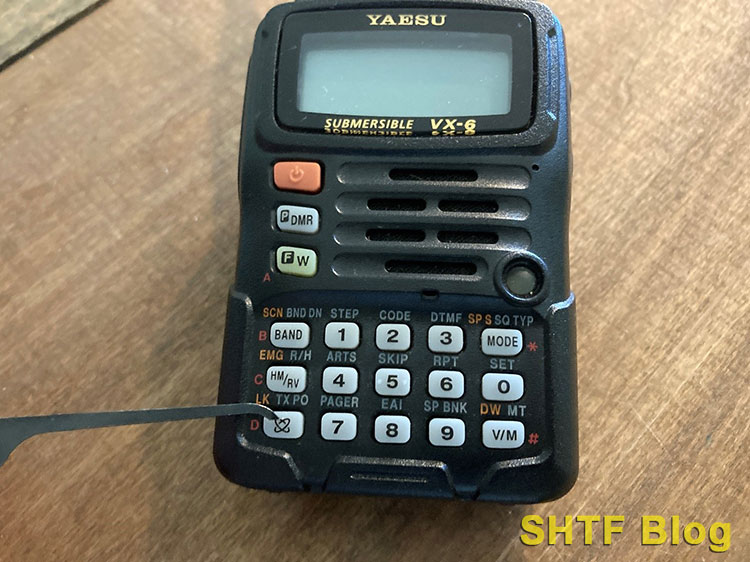
All you have to do to cycle through the power levels is to first hit the ‘F/W’ button and then hit the little button that looks like something from a chemistry textbook in the bottom left of the keypad. Keep hitting that atom button to cycle through the different power levels.


How to Listen to NOAA Weather Broadcasts, Shortwave Broadcasts, and Marine Band Frequencies
First hit the ‘F/W’ key. Then, hit the ‘9’ key. You will now be in the “Special Memory Channels” section of your radio. That basically means that you now will be able to cycle through NOAA weather broadcasts, Voice of America style shortwave broadcasts, and marine band frequencies.


You can now hit the ‘BAND’ button on your radio to cycle through NOAA, shortwave, and marine band frequencies. Let’s say I’m at the lake and want to scan marine band frequencies, I hit the ‘BAND’ button until the radio says ‘MARINE’ on the screen, and now I’m there. I can then hold the ‘BAND’ button again for a second or two and the radio will then scan through the marine band frequencies.
This process can be repeated for the shortwave frequencies or for NOAA broadcasts. Or, if you don’t want to scan through here, but want to change the frequencies manually, you can easily do so by twisting the bottom knob on the top of the radio.
How to Listen to AM/FM Broadcasts
This is somewhat redundant here (it’s somewhat covered above), but if you want to listen to Chris Stapleton and his guitar, just first make sure you’re in Frequency Mode (hit the ‘V/M’ button if you’re not there already). Then, hit the ‘BAND’ button until you get to the AM or FM part of the spectrum. That’s all there is to it.
How to Lock the Keypad
There are a couple of steps to changing this, but if you’re worried about buttons getting hit you don’t want to get hit, you have a myriad of locking features with your VX-6R. To lock the radio, all you have to do is hold the weird little comet/atom key in the bottom left of the keypad for two seconds. You’ll see a little padlock pop up on the screen once the radio is locked. Want to unlock the radio? Just repeat the process. Hold that same little comet/atom key for two seconds, and you’ll have unlocked the radio.
If you want to change what buttons on your radio get locked, you’ll have to follow the below process:
First, hit the ‘F/W’ button. Then, hit ‘0.’ Now, rotate the bottom dial atop your radio till the screen says “LOCK.” Then, press ‘0.’
You can now rotate the bottom dial atop your radio to select in which manner you want to lock your radio.
- You can lock out the keypad (KEY)
- You can lock out the top panel (DIAL)
- You can lock out both the keypad and top panel (K + D)
- You can lock out the PTT button (PTT)
- You can lock out the keypad and the PTT button (K + P)
- You can lock out the top panel and the PTT button (D + P)
- Or you can just lock out every dang thing here (ALL)
After you use the bottom dial atop your radio to select whatever option you want, you can then press the ‘PTT’ button to make your selection.
How to Make Each Button Press Quit Beeping
Let’s say you’re working deep in outer space on a spaceship that is carrying a bizarre alien that lays babies inside of peoples’ chests. You are in an area where you need to be as quiet as possible. Having your radio audibly beep each time you press a button could get you into trouble in that environment.
(Or, perhaps more realistically, your girlfriend is tired of listening to your radio beep as you fiddle with it in the car.) You can make this beep quieter by pressing ‘F/W’, pressing ‘0,’ rotating the bottom dial atop your radio until the screen says “BEEP,” pressing the ‘0’ button, rotating the bottom dial atop your radio till the screen says “OFF,” and then pressing the ‘PTT’ button.

You will now be able to fiddle with your radio to contact your fellow astronauts without having a xenomorph find you.
How to Change the Squelch
This can be useful if you’re trying to use your radio for things like Winlink.
To change the squelch, hit the ‘F/W’ button, hit the ‘0’ button, rotate the bottom dial atop your radio till the screen says “RF SQL,” press the ‘0’ button, and then rotate the bottom dial atop your radio to cycle through your various options.
Once you reach the squelch level that you want, hit the ‘PTT’ button.
How to Use CTCSS
Trying to hit a local repeater that needs a CTCSS tone to be accessed? First, make sure that you know what the specific CTCSS tone is that you need to hit that particular repeater. I would recommend RadioReference.com or RepeaterBook.com for this. There are paperback repeater directories you can purchase to accomplish this as well (very useful if you’re traveling). Press ‘F/W’, press the ‘MODE’ button, and rotate the bottom dial atop your radio till the screen says “TONE.”


Now, hit the ‘PTT’ button.
You’ve now made it so that your radio can send out a CTCSS tone.
You now need to select what the tone is that your radio sends out, though.
To do that, hit the ‘F/W’ key, press the ‘2’ button, and then use the bottom dial atop your radio to make the selection for the CTCSS tone that you need to hit that repeater. Once you find the tone you want, hit the ‘2’ button. Now, when you hit the ‘PTT’ button, you will have that CTCSS tone incorporated with your transmission.
To turn off CTCSS, hit the ‘F/W’ button, hit the ‘MODE’ button, and rotate the bottom knob one click counterclockwise so that the screen reads “OFF”. Hit the ‘PTT’ button to save everything. The letter ‘T’ at the top right of your screen should disappear. This means that the CTCSS tone has been disabled.
How to Store a New Channel
You can store information in your radio so that you don’t have to manually type in every setting each time you turn it on. If there are 15 repeaters in your area that you want to be able to quickly scroll through after programming just one time, using the memory of your radio is a great way to do this.
Without a doubt, the easiest way to program the memories of VX-6R is with the programming software and cable that will connect to a computer, but you can program by hand as well if that’s the only option available to you.
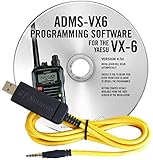
- Programming Software w/ USB Cable for the Yaesu VX-6R Amateur Ham Radio Handheld.
- USB Cable directly connects to radio.
- Allows programming of Frequencies, Alphanumerics, ctcss/dcs & more.
- Req. PC w/ Windows 10, 7, XP or Vista.
Here’s how you do that.
First, go to VFO mode. You may have to hit the ‘V/M’ button to do this if you’re not in VFO mode already. Now, type in the frequency you want to store as well as if there is a CTCSS tone for it (as a repeater is likely to have). Then, hold the ‘F/W’ key one second.
Press ‘F/W’ again, and the settings of the frequency will be stored as the next available channel (so, if you have five channels used already, what you just programmed will now be channel six.)
How to Select a Saved Channel
Let’s say you have fifteen repeaters you’ve stored the settings to on your radio. There’s a net you like to listen to every night, and you’ve programmed that repeater into your radio as channel 3 in Bank 1. If you want to quickly access it, here’s what you do.
Go to Memory Mode if you’re not there already. You may need to hit the ‘V/M’ button to do this. The words “BANK 1” will appear on your screen. Your radio has multiple memory banks available to it, but we’ll assume that this repeater is in Bank 1. All I have to do now is rotate the bottom dial atop the radio until the number three appears at the top of the screen. You’ll now have selected the repeater you were looking for.
Let’s say that you want to quickly access the repeater that you have saved on channel 67, however. It would be a pain in the butt to have to rotate the knob until you reach 67 clicks later. You can quickly access channel 67 by pressing the numbers 67 into the keypad and then hitting the ‘V/M’ key.
How to Change the Memory Bank That You’re Currently In
One of the things I really like about this radio is how you have different places that you can store frequencies. You actually get 24 memory banks that you can work with here, each capable of holding 100 channels. So you could have Bank 1 be all of your local simplex traffic, Bank 2 be all of your local 2m repeaters, Bank 3 be all of your local police frequencies, Bank 4 be all of the repeaters in the town your daughter lives, and so on.
It really helps to make things organized for you.
By default, when you turn your radio to Memory Mode (by hitting the ‘V/M’ button), you’ll typically be in Bank 1. What do you do if you need to be in Bank 6? Here’s what to do.
Press the ‘BAND’ button. Press the ‘F/W’ button. Press the ‘BAND’ button. Now, use the bottom knob atop the radio to scroll to your desired memory bank. Once you’ve reached the bank you wanted, hit the ‘BAND’ button to confirm your choice. You will now be in that bank of memory channels.
How to Scan Through Your Memory Banks
I really like this feature because of how fast the VX-6R scans compared to some other radios I’ve used. If you’ve already programmed in all of the relevant frequencies into your radio by using RadioReference.com and RepeaterBook.com, this makes for a quick and nifty (yes, I said nifty) means of scanning through all of the main areas where radio communications in your area are going to occur.
There are a couple of different settings for this feature, but I personally set my radio up so that it scans every memory channel within the bank I’m currently in when I scan the memory channels. This is how you can do that too.
Go to Memory Mode. You may need to hit the ‘V/M’ button if you’re not there already. Hold the ‘BAND’ button for one second. The screen should briefly show “ALL CH.” This means that all the channels in your memory bank will be scanned. You’ll now be scanning all of the memory channels in the memory bank that you’re currently in.
If your radio doesn’t say “ALL CH” when you go to scan, but you want it to, here is what you do.
Make sure you’re in Memory Mode. You may need to hit the ‘V/M’ button if you’re not there already. Hold the ‘BAND’ button while you twist the bottom knob atop the radio until the screen says “ALL CH.” Then, let go of the ‘BAND’ button and your radio will scan.
There are a couple of ways to quit scanning, but I normally just hit the ‘BAND’ button again.
Yaesu VX-6R Instruction Manual Further Reading
Once you’ve mastered these simple tasks, you may want to dive into the official instruction manual. Be forewarned, it’s massive. Print a copy off and take it piecemeal.
I highly recommend, if you don’t already have it, buying the Ham Radio License Manual. Even if you don’t plan on seeking your ham radio license anytime soon (you can listen to a ham radio without a license), it contains tons of useful information on operating a ham radio generally.

- ARRL Inc (Author)
- English (Publication Language)
- 288 Pages - ARRL Inc (Publisher)
I also recommend checking out some good ham radio forums out there as well to learn more about what it takes to make successful contacts. But what are your thoughts on everything? Did you like the manual? Tell us what you’re thinking in the comment section below.