Proper food storage is essential to proper disaster mitigation. If you’re going to prep, and you’re going to prep right, you need to know what it takes to keep your food good for the long haul. You’ve likely bought and put a few boxes full of MREs (Meals-Ready-To-Eat) down in your food larder at this point. Did you know though that it’s possible to make your own MREs?
Why Make Your Own MREs?
This topic of “how to make your own MRE” is hardly new among hikers and campers. It’s also a common topic among preppers looking to stash quick, long-lasting food. For those of you who may not already know, MREs are handed out in the military and stands for Meal Ready to Eat. MREs have an interesting history. Military MREs come with many different entrees.
By making your own MREs you have an incredibly efficient, pre-planned, and space-conscious means of keeping an entire meal at hand at all times. If you’ve ever done a significant amount of backpacking you’ve likely come to the realization that food ends up taking a lot of space within your pack. Considering that space is already at a premium within a backpacker’s gear, this is unfortunate.
Within prepping, that pack on your back is likely a bug out bag (BOB) backpack. This bag is going to be filled with everything you need to live off of and defend yourself should you need to leave your home as fast as possible. It will contain everything from bug-out specific cookware to fire starters to even bug out guns.
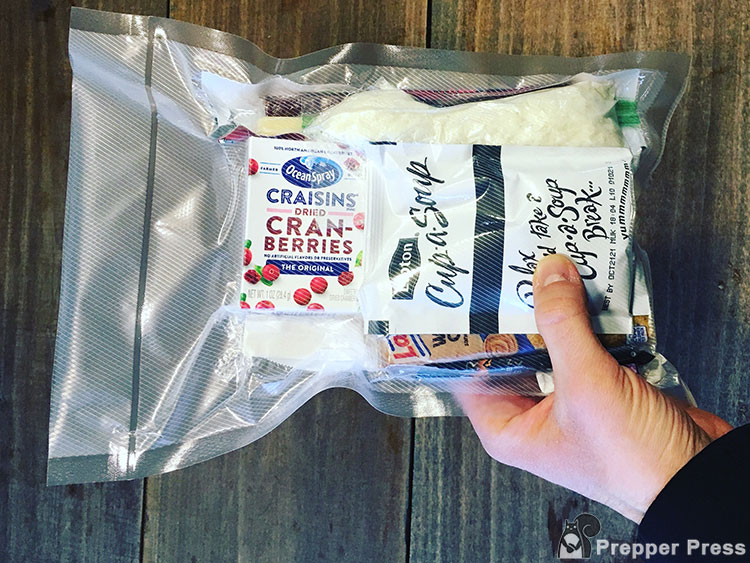
Making your own MREs helps to solve the space dilemma. All of the food that you’ll have within your BOB will be vacuum sealed into a little plastic bag. This will save you a LOT of space. Homemade MREs also improve the convenience of eating while on the move.
Of course, you could go the easy route and just buy a big box of MREs, or you can take the route I’ll describe here and make your own. What you can put into it is limited only by your imagination. The one I put together here is pretty basic, but should give you a good idea of how to go about making your own.
Lastly, sealing food in a bag helps it last much longer. It reduces the presence of oxygen, which can speed up the decomposition process with some foods. By vacuum sealing, you’re going to suck all of the air out of the bag! It won’t make your food last indefinitely, but it will make it last exponentially longer than it otherwise would.
Quick Disclaimer: The homemade MREs within this piece are going to be more along the lines of a “just-add-water” recipes than they are to be a true MRE. If you buy a civilian version of an MRE, you can literally just rip open a package of beef stroganoff and eat it cold right then and there.
The armed forces recognize that not many people want to do this, and as a result, they include what you need to heat up your meal within the MRE as well. Typically, this involves a fuel tab to be used with one’s mess kit while out in the field. For the sake of this article, we’re going to assume that you have a mess kit handy as well when you’re using your MREs.
5 Steps to Making Homemade MREs
This process is probably much easier than you might realize, but (beyond food) you will have a spend invest a small amount of money.
My all-time favorite outdoor recipe list comes from the National Outdoor Leadership School (NOLS). To me, they’re the gold standard when it comes to anything outdoorsy. So, for the homemade MRE I’m going to show you here, I’m going to use NOLS’ Meal-in-a-Mug approach (from NOLS Cookery).
Step 1 – Buy a Vacuum Sealer
The first thing that you have to have is a vacuum sealer and the bags to seal your food in. I bought the Geryon Vacuum Sealer off Amazon. It came with a good number of bags already, so I was all set right out of the box. As mentioned above, this is a necessity if you’re going to make your own MRE. Once you have that, you need some foods and recipes.
Step 2 – Assemble Your Ingredients or Foods
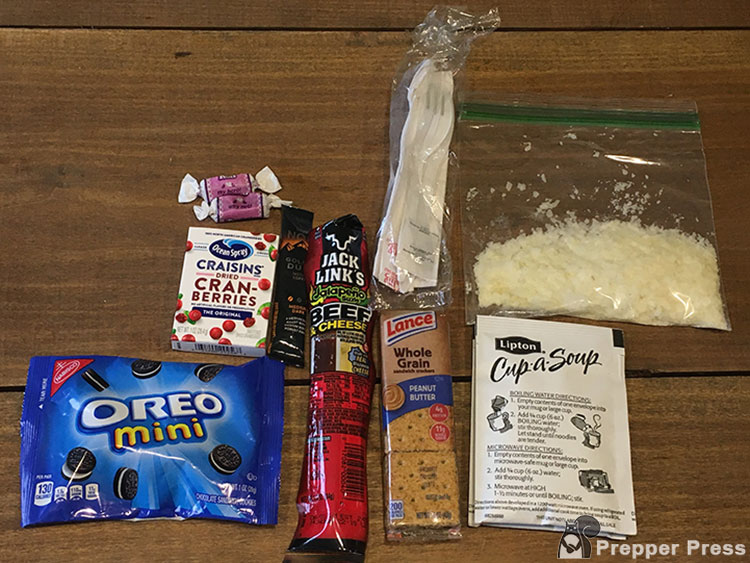
In this case, again just an example, I’m using:
- 2-3 Tbs potato flakes [80 calories]
- 2 packages of cup-of-soup [100 calories]
- 2 Tbs cubed cheese (I used a beef jerky/cheese combo from a gas station) [140 calories for the pack]
- 2 Tbs cubed meat (This was from that gas station combo)
- 12-16 oz boiling water
All you have to do is empty the cup-of-soup packets into the water and stir. Then stir in the potato flakes until you reach the thickness that you want. After that, dump in the meat, cheese, and whatever other seasonings you want to put in there.
With any of your MREs you’re going to want to print or write out the recipe for the main course on a little piece of paper, and then include that in the MRE packaging. This will save you a lot of guesswork in the future.
Other Items I Included
- Pre-packaged mini Oreos (130 calories)
- A little box of Craisins (90 calories)
- Peanut butter cracker pack (200 calories)
- One instant coffee packet
- Two tootsie rolls (51 calories)
- Pre-packaged plastic silverware and napkin from a prior fast food meal.
Step 3 – Pack it All in a Vacuum Seal Bag
Once you have everything laid out, you can put it in a vacuum seal bag.

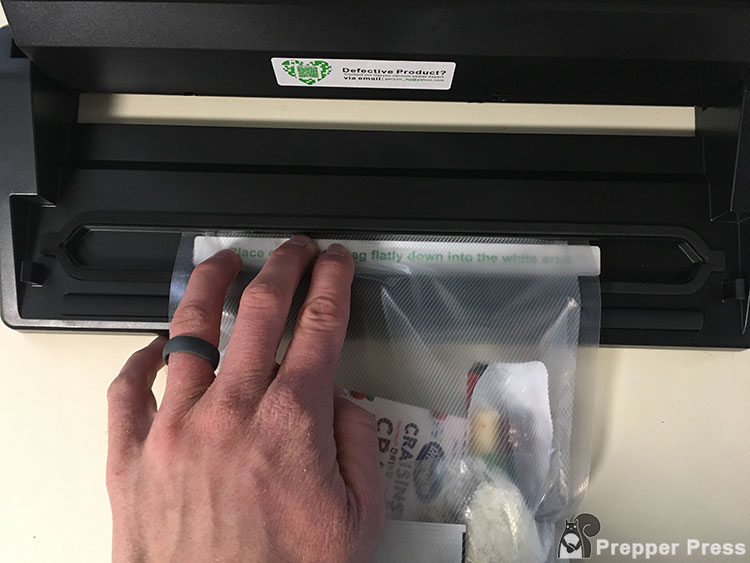
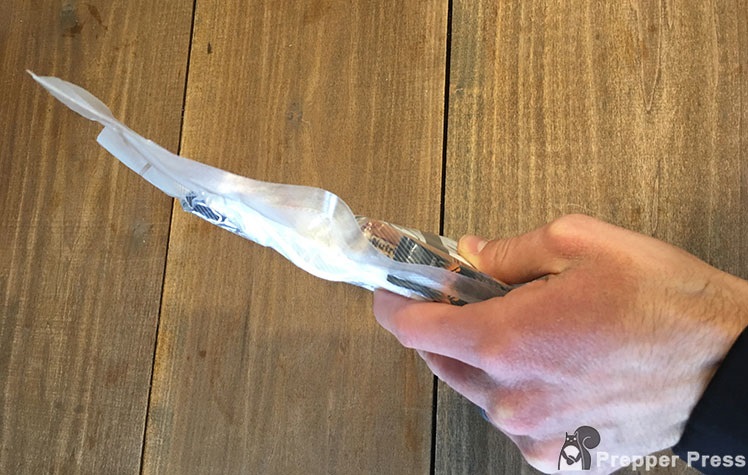
Step 4 – Suck Out the Air with a Vacuum Sealer
Once all of the items were in the bag, all you have to do is…
- Place the open end in the designated slot on your vacuum sealer.
- Hit the vacuum button until there is no air left.
- Hit the seal button.
Once you have everything assembled it literally just takes minutes to prepare a bunch of meals for later use.
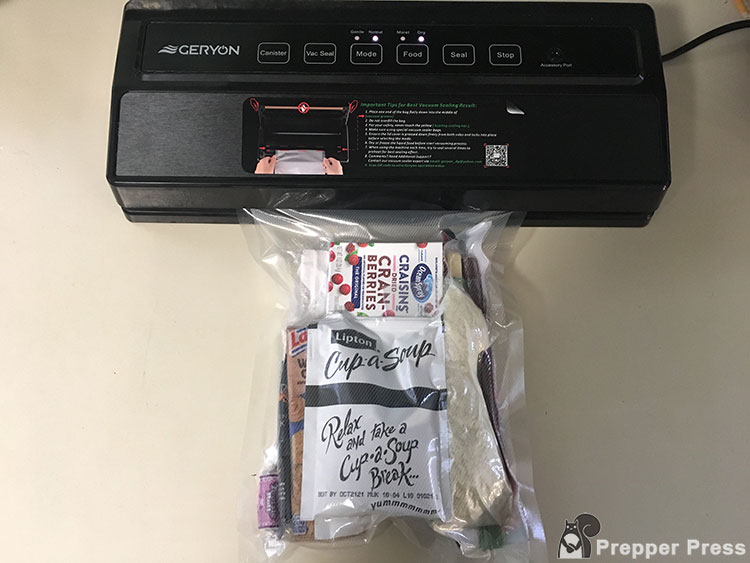
And voila – your own homemade MRE! The one I made here is around 791 calories. So that’s a bit less than a typical military MRE, but I’m happy with the amount that’s in there.
Step 5 – Label Everything
The last thing I do is put a date on the package so I’ll know what date they were prepared on. I usually give them a two year expiration although I’m pretty sure they’d be good for a long time after that.
With any MRE that you make, the shelf-life is only going to be as good as the weakest ingredient. So for my meal-in-a-mug example above, the cheese stick/jerky combo is going to be my weak link. That will easily go bad before anything else within that MRE. Thankfully, those ingredients are in their own packaging, so if they did go goopy, they wouldn’t ruin the rest of the meal.
While your food will last longer stored in a vacuum sealed bag than it would if it were just left in its original container, still keep basic food safety principles in mind. If it doesn’t look, smell, or taste right, don’t eat it. Also remember that storing your food in incredibly hot areas will lead to much quicker degradation than food that’s stored at cooler temperatures.
If you keep these basic principles in mind however, you can potentially save yourself hundreds of dollars, and a lot of space on your families’ emergency food storage. So let us know what you think in the comments below! Have you made your own MREs in the past? Are there other factors that you think we should have discussed? Keep us posted! And don’t forget to check out some of our other great articles that we have on the subject of food storage as well!
Final Food for Thought
Other ideas I’ve had for these were to put in tuna packs, nuts, prepackaged rice meals, a single serving of Gatorade or something along those lines. I’ve also taken nuts and/or GORP and divided them out into baggies and put those in the meal. I figured with the air removed they’d stay fresh for a long time even after they’ve been removed from the original packaging.
In another article about the Coffee Can Survival Kit there was some terrific feedback from you readers, so I thought I’d push my luck and see what you would put in your MREs. Be creative, but keep in mind you’ll have to carry these meals when you’re hiking or bugging out, so you’ll want to keep them somewhat light.
So here’s my question: What would you put in your MREs?
55 comments
Hmm, Cool. Im gona have to get one of those baggie sucky things?!
Spook,
I bought one at Costco and they are great, I use it all of the time – especially when storing sugar, flour and other items. I made MRE’s for my kids when we would be gone a day or two – it keeps things simple and organized. Be sure to shop around for the replacement bags.
Spook, I totally forgot!!!
It is a great way to marinade meat, chicken or fish. You put it all in the bag, suck the air out and your marinade is then forced into the meat item, it works really well and in a fraction of the time! (I do it for my kids since I am a Veg head).
Also, it works great as a dry bag for any item you don’t want exposed to moisture like a first aid kit if you are on a river or get caught in the rain while hiking.
You need to be careful with “stuff” that is dusty. The vacumn doesn’t seal well and you can mess up the vacumn works with the dust.
Oooh, I dry a lot of local fruit every summer. I would put some little baggies of mix dried fruit in.
I’ve also dried squash, and I would play with that a bit, see if I could get a dried squash that would reconstitute well with hot water, into something close to edible.
I could see homemade deer jerky going in as well.
I put a deck of cards in the “community kit”. Two reasons- 1) you can pass the time with a large number of games with a single deck, and 2) if you are lost, start a game of solitaire. Someone will be around to tell you your next move
Oatmeal, either the instant or the regular rolled oats, could be real easy. Add a dash of salt, some cinnamon and raisins, viola, MRE breakfast. 😀
That’s one of the things I have in my BOB’s. I measured out a little bit more than the usual amount my family eats for breakfast, added spices and dried fruit and sealed it up.
Did y’all know you can make your own “instant oatmeal”? Go to Budget101.com and get the directions. I’m not affiliated in any way. I just love this website! Loads of frugal and prepping ideas!
How about those foil pouches of tuna, less weighty than a can. I know they are pricey, but you can often pick some up for free if you combine a good sale with a coupon. (yes, I am one of those “crazy coupon” stockpilers)
condiments the freebies you get at every fast food joint and or convience store. Peanuts or prepacked nuts of any kind, slim jims or better jerky strips, fruit leather, hard candy{carb sup] chewing gum.
Having had to rely on MRE’s as an only food source on several occasion
spicing them up with stuff helps.
we make our own like you suggested here for our scouting adventures the cool thing is the boys customize theres and so do I. Sams has lots of Ind prepacked stuff.
Great topic……….
Here’s something I do for home use……..When I go fishing I bring my catch home and place single serving sized portions (covered in butter, garlic salt, pepper) in a vacuum seal bag and toss it in the freezer. I simply toss this package in a pot of boiling water for about 10 minutes, open and eat. It’s absolutely delicious, easy to cook, and no dirty dishes! The same thing may be done with eggs, veggies, small cuts of meat, etc. It also works good for camping as the frozen foods are good for keeping drinks cold for the first few days of a trip. The vacuum sealer also comes in handy for packing clothing for a bug out bag as it reduces the bulk considerably.
I have been trimming the extra tops from Mylar bags when I fill 5 gallon Buckets. I cut this into pieces about 8″ x 8″ then seal up three edges with a clothes iron.. I put in mac and cheese or Soup base in small bags and then dehydrated veggies. Then seal it up with my seal a meal. These fit really nice into a BOB or in the BOV.
I am going to try this method. I am wondering though about those pakages of crackers. doesn’t the Vacumn break the crackers up?
Carl,
Check this video, it may be helpful for larger storage buckets – the guy is pretty goofy, could stand to lose a pound or 50 but his point is good.
https://www.youtube.com/watch?v=sIRBzACoPB0
that is pretty much how i do it. There is alot of bag left over and you can make smaller bags from the waste.
No offense to anybody but I am sure glad that guy has his own food storage because i would hate to have to feed him. Big Boy…
Carl
It doesn’t crush the crackers up, but it does round the edges off a little! Depends on how you vacuum seal them too. I try to make sure they’re flat when I do the sealing.
These are great ideas Jennie. Thanks!
This is a terrific idea! I’ll bet I could put all that into a baggie and get the air out of it before putting it into the package to be sealed so that I wouldn’t get dust in the machine like Carl mentions below. (I didn’t know that.)
Jarhead… Man you stole my thunder…. I was gonna say the same thing!
Another option is made by Food Saver, its called the Game Saver Pro. I use it for packing up the game and fish that I get while hunting/fishing. If you buy some of the little oxygen absorbers it helps to keep dried stuff like jerky, oatmeal, rice, dried hash-browns, ect. tasting fresh for a lot longer than packing them without it.
My wife use to seal her Christmas cookies in regular ziplok bags. She would use a straw to seal them. This might be a way to deal with the dust.
For wet vacuum sealed items, place a couple of paper towels just inside the bag to keep moisture out. This can also be used for dry powdery things. I sealed flour in a jar and it said to use a coffee filter to keep fine dust out of the sealer.
I’ve actually used those before and they work great. I also put in one of those single serving of mayo and just mix it up right in the package. Delicious!
Be careful with the little condiment packs, in the restaurant industry we call them P.C.’s (personal containers). They usually have a shelf life of about 6 months, mayo is especially hazardous if it goes far beyond the expiration date because of possible salmonella, Campylobacter and botulism growth. All of which can make you miserable at best, dead at worst!
Hey Chefbear – I always wondered how long those mayo packs are good for. I think I used one after about 8 months or a year! It seemed to be ok, but I’ll be mindful of that in the future. I don’t mind eating tuna straight up.
We always took a little tobasco sauce to the field when we went to spice them up. Salt and pepper packs are a good idea though… I’ll have to order extras next time I go through the McD’s drive through.
That was a pretty instructional video. I might try that method with a few of my buckets and see how it works.
Someone mentioned sealing up individual portions of fish with seasonings and then putting them into a pot of water to cook… This method is actually starting to gain more popularity in the culinary field, by folks who practice “molecular gastronomy”. Most of them use an immersion circulator to “poach” the sealed food at a constant temperature, but a pot of water works to. For the best results when poaching food in a bag like this keep the water between 140-145F, it will cook slowly, but will also make the food cook evenly and retain a lot of the natural juices/flavors.
I like to use the vacuum sealer to pack my own instant meals, similar to the backpacking meals by mountain house and other companies. You can make your own by simply buying freeze-dried and dehydrated fruits, veg, starch and meat in bulk and adding in different seasonings to suit your taste. One of my favorites is chicken noodle soup, just put 2/3 c. noodles, 3-4 tbsp dried mixed soup vegetables, 1/4 c. freeze dried chicken and 3 tbsp chicken stock base. Seal all f this stuff into a pack, when you are ready to eat it, just add in a couple cups of boiling water and let it sit for a few minutes. Then just eat it once the noodles are cooked through.
I tried a new recipe idea for a homemade freeze-dried meal this weekend, well actually its a dessert. It is for a berry cobbler, I am going to try replacing the berries with freeze-dried peaches and bananas next time.
-Berry mix/filling-***
1/2 c freeze dried berries (I used raspberries and blueberries)
1/4 tsp powdered vanilla(or vanillin, artificial vanilla powder… I use Watkins powdered vanilla)*
pinch of salt
1 tbsp granulated honey*
2 tbsp raw sugar
1 tbsp A.P. flour
-Crumble topping-
1/3 c quick-oats
2-3 tbsp brown/raw sugar (I used raw)
1 tbsp granulated honey*
pinch of salt
1.5 tbsp powdered milk
1 tbsp powdered buttermilk*
1/2 tsp powdered vanilla*
2 tbsp A.P. flour
4″x4″ piece of tin-foil, or the smallest size needed to cover the top of your canteen cup
If desired put 1/3 of a bar of freeze-dried ice cream in a separate bag and seal inside the main container *
***I kept the berry mix separate from the other ingredients, I did not pack this batch since I was testing the recipe but the plan is to pack the berry mix into a small zipper bag and then seal it inside the pack with the “crumble” ingredients.***
-Add up to 1.5 cups boiling water to the topping mixture inside of the vacuum seal bag and stir just enough to combine (it may take more or less water depending on the weather, humidity, elevation, ect.), fold the top of the bag over and let sit for about 5 minutes or until the oatmeal is softened.
-Combine the filling mixture with up to 1 cup of boiling water in a canteen cup and gently stir until combined, allow to set for 2-3 minutes. Be careful not to blend the berries into a paste, if you do the texture of the final product will be affected.
-Top the prepared filing with the prepared topping however you like, I prefer to make it into a “pancake” and top the berry mix with it. Some might prefer to simple “crumble” the topping onto the berry mix
-Cook on your camp stove, or even better beside the coals of a campfire for up to 5-10 minutes, to crisp up the topping and ensure the filling “sets”
-Let rest up to 5 minutes and serve
-If you have freeze-dried ice cream, add 1-3 tbsp water to the bag it is packed in and gently stir to rehydrate it, to achieve the desired texture and use it in place of whipped cream or ice cream on top of the finished cobbler
The ingredients with a *behind them indicate that they can be omitted, but it won’t taste as good. If you don’t add the granulated honey, replace it with 1/2 the amount of whatever sugar you are using
This recipe feeds up to 4 and tastes pretty damn good (if I do say so myself!), but 2 will be able to easily eat all of it.
Sorry it took up so much space! Hope you guys get a chance to try it, and I hope you like it!
What a great idea! I’ll have to get one of those seal a meals though. I would pack dried fruit, individual Spam, trail mix; make breakfast ones with oatmeal packs, dried fruit and nuts, small can of juice etc.
OK I also do some of my mre stuff……….But I do a lot of dehydrating ….I used to put them into 1 big bad…..split them into smaller bags ( in case there is some bacteria…it won’t wipe out all) NOW did you know the “vacume sealer has a hose sealer for all large and small mouth canning jars) I put my dehydrated food into small reg bags and then into a jar…..you can do this over and over….be careful opening the jar lid….This is especially good for bisquick,gravy mix etc…..anything that can mess up your system….the jar systems are inexpensive and well worth it…….by the way learn the way to make your own gravy mixes, sauces, liquid soaps etc…..it is so much cheaper and easy….. this works great for making MRE’s …pluse just keeping your own food on hand……I would also recommend a inexpensive slicer and a dehydrator with a blower…..slicer keeps food the same size and a good dehydrator is a must….I have 3 now…gl PS Food Sealer bags are very expensive……when I do bags for a jar I use any small food bag..punch a couple of pin holes in bag before you seal inside jar…..reseal each time you open the jar
‘+1 on using the mason jar attachment. It does a great job storing dehydrated and dry goods.
It also works off grid, just hook one of those manual brake bleeders up to it and vacuum 🙂
I must be clear this is only good for dry foods, cake mix,bisquick,grany stuff etc…..also great for M& M’s just to be clear…..if it needs to be canned,pressure canned…..this is not the way to go……but for all else is great…..just wanted to make sure we were all on the same page.
where did my other email go…about the jar sealers for the seal a meal…..why did you take that out??
I didn’t, for some reason it was thrown in the comment moderation bin. I just approved it. The new anti-spam feature does this once in a while, but it seems to be better than having people enter captcha codes before each comment is accepted.
DEFINITELY like the new version compared to typing in that code! For some reason it wouldn’t take the codes sometimes, and I had to get into the habit of copying the comments before posting them.
I can’t make survival kit fit a coffee can. I buy the plastic shoe boxes and put my kit in those boxes. The sterno stove usually is the kicker on size. But bit more size lets me add a lot in ponchos and emergency blankets, food and 1st aid stuff.
I’d seal up a few supplements along with it. It would give you a bit of redundancy and it’s convenient not having to dig into your first aid kit every meal.
Some ideas (per pouch):
1 whole children’s multivitamin or 1/3 of an adult one-a-day.
2 or 3 papaya enzymes (digestive aid/after dinner mint)
and then whatever supplements you’re already taking with meals.
I’d wrap the supplements in cardboard or something similar since they’re sensitive to light. Of course, they’re also sensitive to moisture but you wouldn’t want to wet pack a MRE anyway.
This is another idea I’ve been playing with but haven’t tried it yet. I would make a master spice kit that is not included in the individual MREs. I was thinking about taking those little hobby (2×2 “, 3×3”, etc) ziploc bags and filling them with various herbs and spices – salt, pepper, chili powder, turmeric, garlic salt, powdered butter (Butter Buds), lawry’s seasoning, montreal steak seasoning.. you get the idea. Now take all of those individual packs, place them in a sandwich sized ziploc and vacuum seal that.
If you run low on rations and have to forage, you may have to eat some fairly nasty stuff – a single packet of salt and pepper wouldn’t be sufficient.
A couple modifications:
Scratch the cardboard supplement wrap, use aluminum foil – duh. It’s too early in the morning for me to be commenting. Aluminum foil is also pretty nifty and can be used to make a lot of things.
You might also consider adding a really small measuring spoon (sub-teaspoon size) to the spice kit. It would lower the risk of spillage and you wouldn’t contaminate your spices by having to use your fingers, knife blade, etc to dip spices out.
You’ve just discovered the 41st use for that aluminum foil hat you wear.
Should never mess with a genius ….. that could be a 2 way street. Figure that one out my friend!
🙂
My system works pretty good. I keep the hat on to keep big brother from reading my thoughts and compromising my plans by pre-positioning agents at my future location.
Once I get deep enough underground, the hat comes off and I can cook my food in it etc.
Well done – eeeeeeextremely funny!!!!
Excellent read!
Sorry, but a tru MRE has to have a John Wayne bar. And a heater pack so you can seal it in a bottle of water and make a bomb when you’re bored.
Actually, really good post. As obvious as it would seem, I never thought about using my vacuum sealer for this purpose. Now I’ll have to go out and buy all kinds of little goodies to toss in.
Yukon
Another thing you can make up to add some diversity to your home-made MRE is home-made hot chocolate mix.
1.5-2.5 tbsp cocoa powder (I like Ghirardelli dark, but Hershey’s works or whatever you like)
2-3 tbsp powdered milk
1-2 tbsp brown/raw sugar
pinch of salt
Cinnamon, nutmeg, pumpkin/apple pie spice, cardamom, clove, dried orange/lemon zest, chocolate chips, for an extra creamy flavor/texture you can add powdered coffee creamer
This is for a 8oz cup of hot cocoa, but I like mine pretty rich. You can scale this recipe up to make a big batch and portion it into individual servings. They will be good for up to about 1.5 yrs, but taste best if used before 1 yr.
I bet if I added a couple of ground up Vivarin to that mix I’d never have to go to Starbucks again.
Thanks for the tip. That sounds SOOOOO much better than the stuff in the package.
The store bought mixes don’t even come close! A word of warning, if you try it, you probably won’t want the “swiss miss” and other brands anymore!
Try the seal-a-meal with just about anything…
I sealed a bunch of cartons .22LR rounds in several bags way back in 1999 as a prep for Y2K and the seals on the bags are still holding…
I have also sealed documents like titles to vehicles, birth certificates and passports and such for long term preservation with zero problems. If you seal papers like the titles and birth certs mentioned, you will need to put a piece of stiff cardboard in as a backer. Believe me when I say this unless you want your document to be preserved as a waterproof, tightly compressed wad of paper… 🙂
I seal my lightweight bow-hunting suit in one of those packs with a dirt-scented dryer sheet after the season every year. I have also used them to pack extra long underwear, socks, underwear, shirts and gloves in when planning kayak/canoe trips; I pack each item in a separate bag to decrease the chances of having it all get soaked. I also keep tinder and fire-starters sealed in “1-3 fire” packs, which I keep in my hunting pack and in an emergency box in my JEEP. I usually have enough tinder (combination of dryer lint, wax and cedar shavings/bark) and strike anywhere matches in each single pack, like I said for 1-3 fires, but seal the individual packs inside a larger one (usually 4-6 smaller packs) with a magnesium & steel fire-starter. With 4 smaller packs in it the larger one gives me about 12 fires easy to start, and more if I find/gather tinder from wherever I am.
Good idea with the documents though… I bet my fireproof safe doesn’t keep water out extremely well!
GREAT idea. I am totally liking this….but at roughly $4.00 per meal (prior to shipping) and a 7-10 year shelf life you can buy MRE’s from me. REAL MRE’S made to US Mil Spec. Im just saying, ya know… 😉
Hello Everyone,
Being a single mother of an 11 year old girl I have restarted my emergency stash. Since we are such a small family I chose to package a little differently. My meals are usually enough for 2 and my staples such as flour, coffee, Bisquick, etc…. are enough for a couple of meals at a time. This way if I open up a package I can use it up before it goes stale or get bugs in it of some kind. Something I haven’t seen mentioned is taking your flour, Bisquick etc and freezing them for two weeks before you package them. What this does is kills any chance of ending up with weavels in your package. All flour has weavel eggs there is just no way of getting rid of them because they are so small. By freezing you are killing these eggs and will never have them show up when you open a package. While vacuum sealing will also prevent this once it is open they may start hatching.
This is a little off the beaten path of survival food however I have two granddaughters who live with their mother and she is giving them lunchables for their lunches which are probably not the best choice nutritionally and the older ones says she is always hungry (a lunchable for an active 8 year old ). I would like to let the girls make a supplement lunch package for school as an activity. It would serve two purposes a fun activity and make lunch a little better for them. It would also help me stay out of trouble with their mom. I was thinking, trailmix, raisins and I am open to other ideas if you have them thanks-
Awesome post. You all just inspired me to run out and buy a vacuum sealer food saver gadget.
vacuum sealing was invented as a freezer burn preventative for the normal freezer storage of meat >>> 6 months …
poly is air permeable – in any form – that includes the poly film used for vac sealing >>> it was never intended as a long term air void storage environment – and – IT’S NOT
if you disagree or a non-believer – do your own testing >>> make an “air pillow” using your regular poly and your vac machine – set it aside somewhere and watch it deflate – it’ll be noticable within the first month >>> single ply mylar party balloons are more air resistant and they will only stay inflated a few days – don’t be expecting miracles ….
please don’t discount vacuum packing – great for many prepper uses – just know it’s limits >>> good revision for this “MRE” practice would be to use 1/2 gallon mylar bags instead – they even make a version to use with your vac machines – otherwise a 300CC 02 absorber will do the job nicely ….
Alot of packaged products were use for the MRE. Sinced they are already prepackaged does air sealing really affect it? And if it does how long after the expiration date could it last?
You mean traditional MREs? Yes, those are set to go. This article is about making your own version of an MRE.
I have made these a few times. The biggest problem I have, however is that most of the things I added to mine had very short best by dates. So I think it is important to rotate these and label with the shortest best by dates. I am OK with things past the date but not years later!!! Also, my experience with crackers/cookies being vacuum sealed is that 1) the packaging on those don’t actually vacuum seal unless you poke a hole in the packaging and 2) if you do poke a hole, they tend to become a bit crunched!! While I like crackers and cookies, I leave those out.