Studying history can prove to be a great source of knowledge for the modern man seeking to improve his bushcraft and survival skills. When electricity and gunpowder are not an option, how do you put meat in the pot? By doing what people have done for millennium, of course: fashioning primitive weapons.
Spears, bows, blowguns…and the humble sling. These are all weapons that are not firearms. Meaning you can use them long after the ammo runs out. (Hint: buy ammo cheap and stack it deep to make it last as long as possible.)
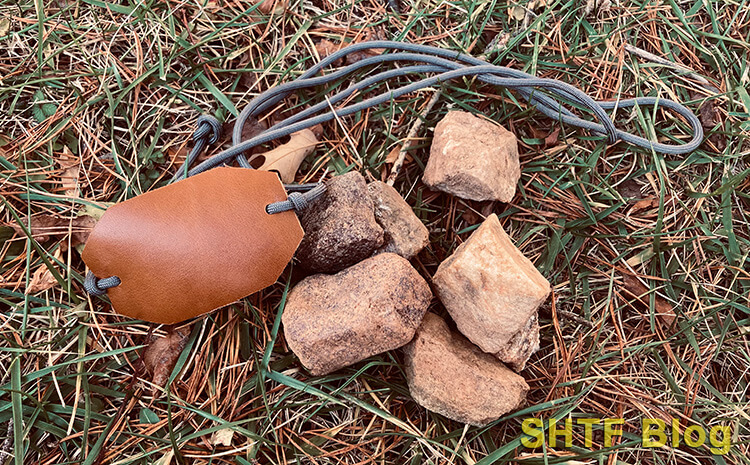
How to Make a Leather Sling in 8 Steps
In this article I’ll show you how to make a leather sling for life after the apocalypse – or to just for a little fun today.
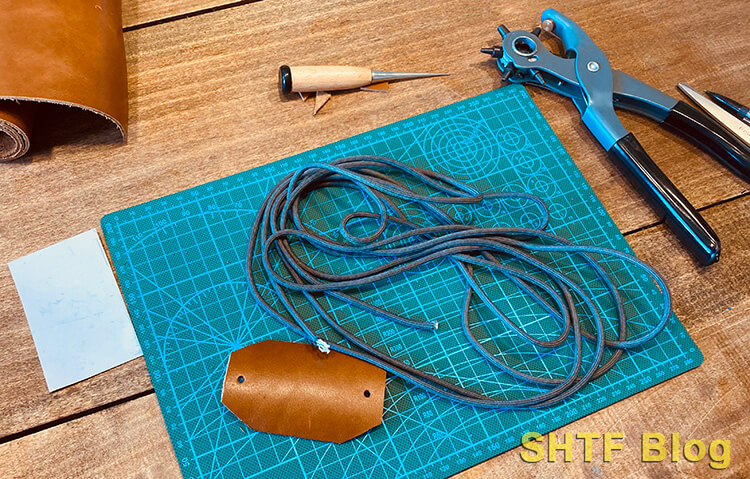
Step 1 – Collect Your Supplies
We can fashion a functional leather sling out of very few materials. Here’s what you should be on the lookout for.
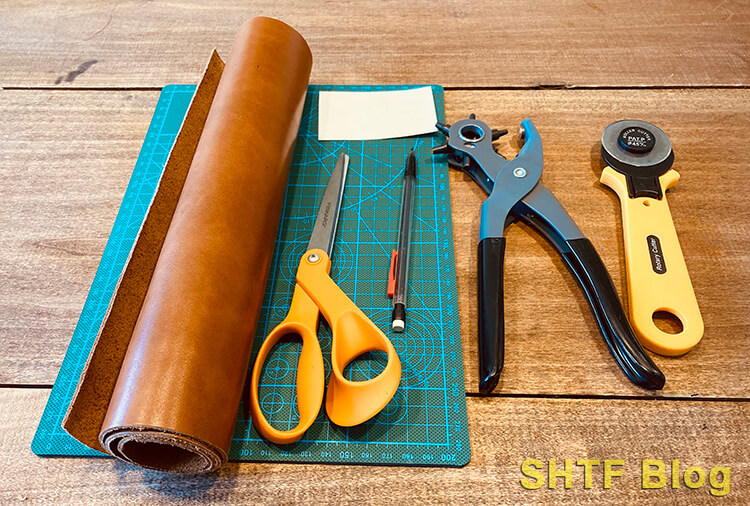
- Scrap Leather
- Some means of cutting the leather
- 5-7′ of Paracord
- Leather punch or awl (or something else to make holes in leather)
All of these supplies are readily available online. Tandy Leather is probably the most well-known leather outfitter within America and is a fantastic place to source your equipment from. Alternatively, you can look for low-cost leather remnants.

- 100% GENUINE LEATHER: No faux, PU, or bonded leather here. You will receive 3 lbs of high-quality, authentic cowhide sourced from upholstery furniture manufacturing. Includes a mix of Full Grain, Top...
- LARGE, USABLE SIZES: Unlike competitors who sell tiny trimmings, our scraps are hand-sorted for usability. Sizes average between 8"x10" and 12"x18". Perfect for making wallets, journal covers, coin...
- SOFT & WORKABLE: These are upholstery-weight remnants (flexible chrome-tanned leather). Thickness: 4-8 oz (approx. 1.6mm - 3.2mm), with most pieces falling in the 5-7 oz range. Ideal for sewing by...
- EARTH TONE VARIETY: Each bag is a random assortment of classic colors. Expect a mix of Browns, Blacks, Tans, Greys, and Creams. The varied textures and natural grains add a sophisticated, rustic touch...
Once you have your leather sling materials and tools collected, you’ll be all set to start making your sling.
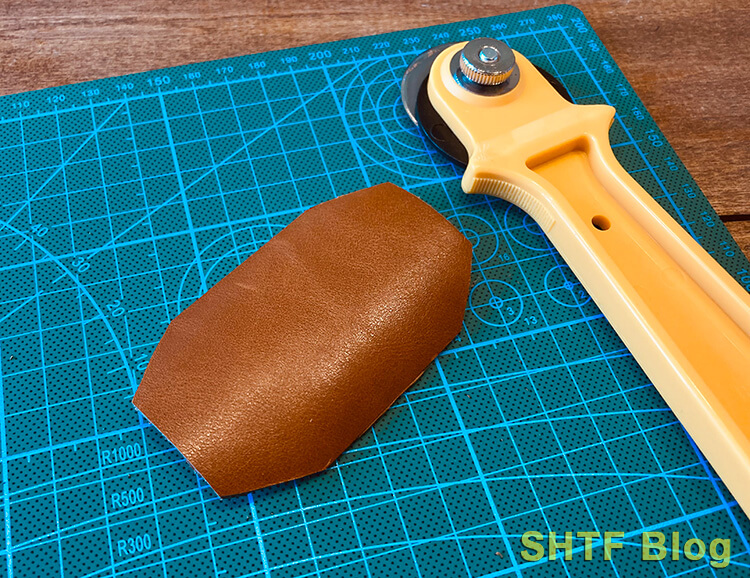
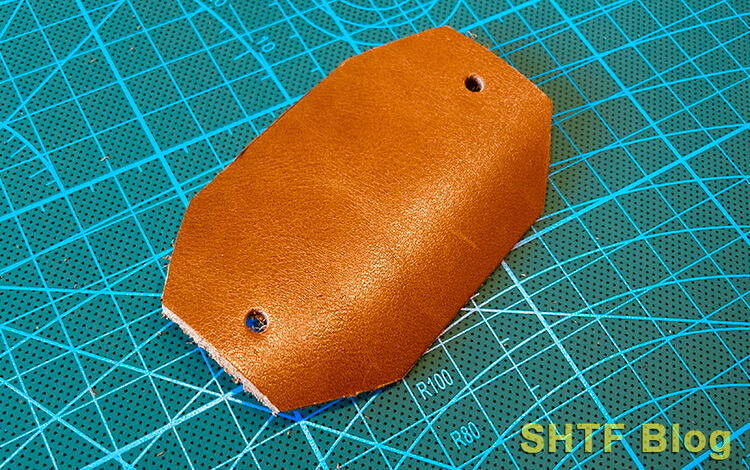
Step 2 – Prep the Shape of Your Sling Pocket
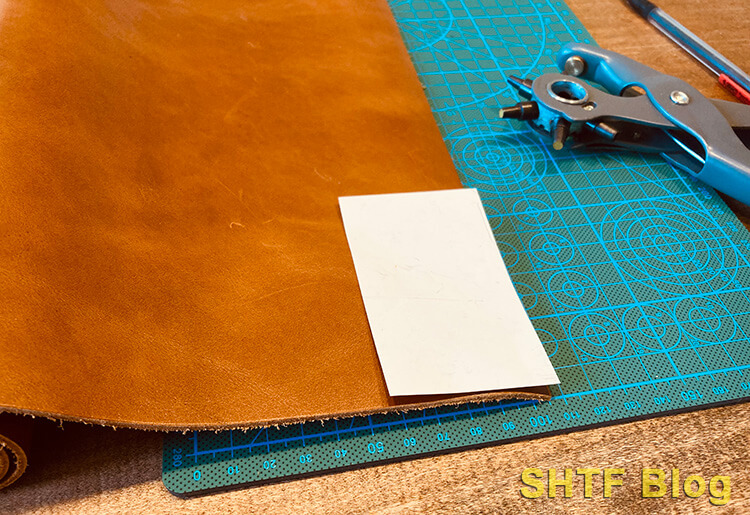
You can really do just about whatever you want here, but I went with a simple rectangle design – which I then cut the corners off of. Just know that the smaller you make the pocket, the smaller size of projectile you’ll be able to reliably hold.
In this instance, I made my leather pocket about the same size as a standard business card. When completed, this sling may be slightly smaller than what you would want to use to harvest, say, a beaver – but a small sling allows for plenty of practice without having to worry about a boulder flying through a window (especially when the kids practice with the sling!)

I’ll also note that the material used for the pocket doesn’t technically have to be leather. If you’re in a survival situation and have a material at hand that you can fashion strong enough to make into a sling pocket, go for it. Leather will last longer/be safer to others around you than denim or cotton – but in a survival situation, you use what you have available.
Step 3 – Punch the Holes for Your String
I used an actual leather punch for this, but if you’re out in the wild you would likely be using some form of awl – such as a sharp, pointy stick or a knife point – to slowly carve these holes out.
Do your best to ensure that these holes are positioned in a location of the pouch that leaves enough “meat” between the hole and the edge of the leather pocket to prevent tears.

You also want to make sure that the holes are as symmetrical as you can manage. In other words, don’t make these holes in your leather pocket incredibly offset to one another; you’ll end up with a lopsided sling when you load it.
I was really tempted to add metal grommets in the pocket,, as the grommets will protect the holes and prevent tears – but in a survival situation you’re lit likely to have spare grommets kicking around so I left them out. A sling will still function without grommets, it just won’t last as long.
Step 4 – Cut Your Cordage to the Proper Length
Ancient slingers used to carry numerous slings with them into battle, with different lengths having different purposes. Some were for longer distances or launching heavier projectiles. String length may have varied as a function of payload. For the purposes of our example’s build, I just cut two lengths of paracord that reach from my palm to the ground when I’m standing up.
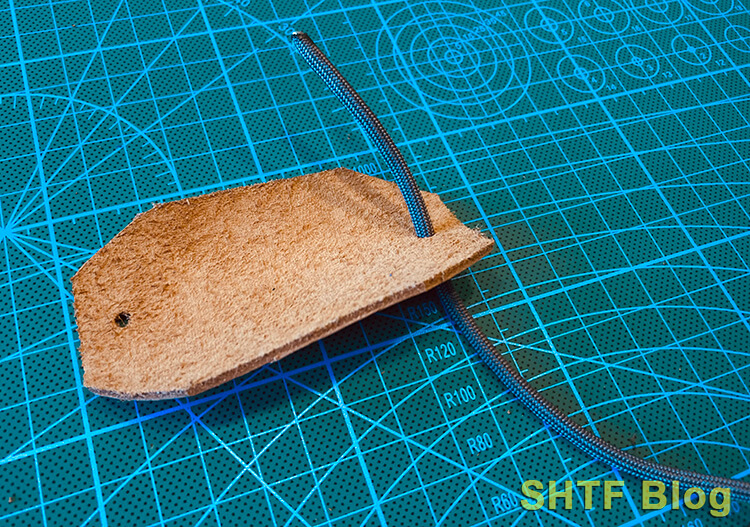
Step 5 – Thread Your Cordage
I’m using regular 500 Paracord for my cordage in this example. Ideally, you should always have some of this with you when going out into the wild. If you’re ever in a pinch, you could always attempt to use your shoelaces instead.
If shoelaces aren’t an option, you’re going to have to figure out a way to fashion cordage from the environment around you.
Can you use strips of braided clothing? Can you cut more strips from your pocket leather? Are there forms of bushcraft cordage you can fashion from the world around you? Will your wife’s long hair work (mine said ‘no’)?
Necessity is the mother of invention, and this proverb needs to be remembered in a survival environment.
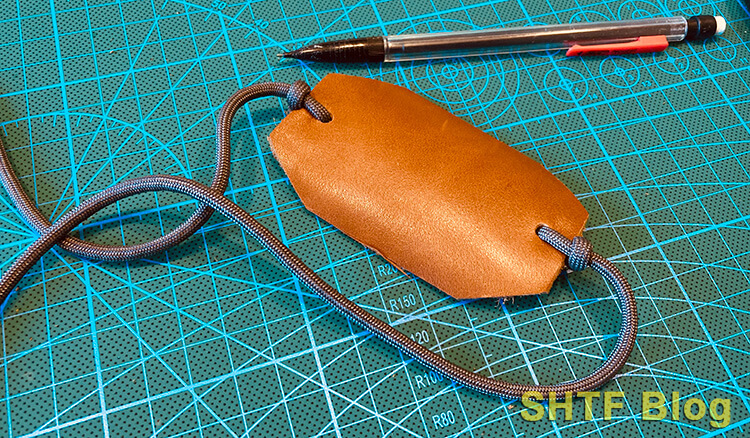
Step 6 – Secure Your Cordage to Your Sling
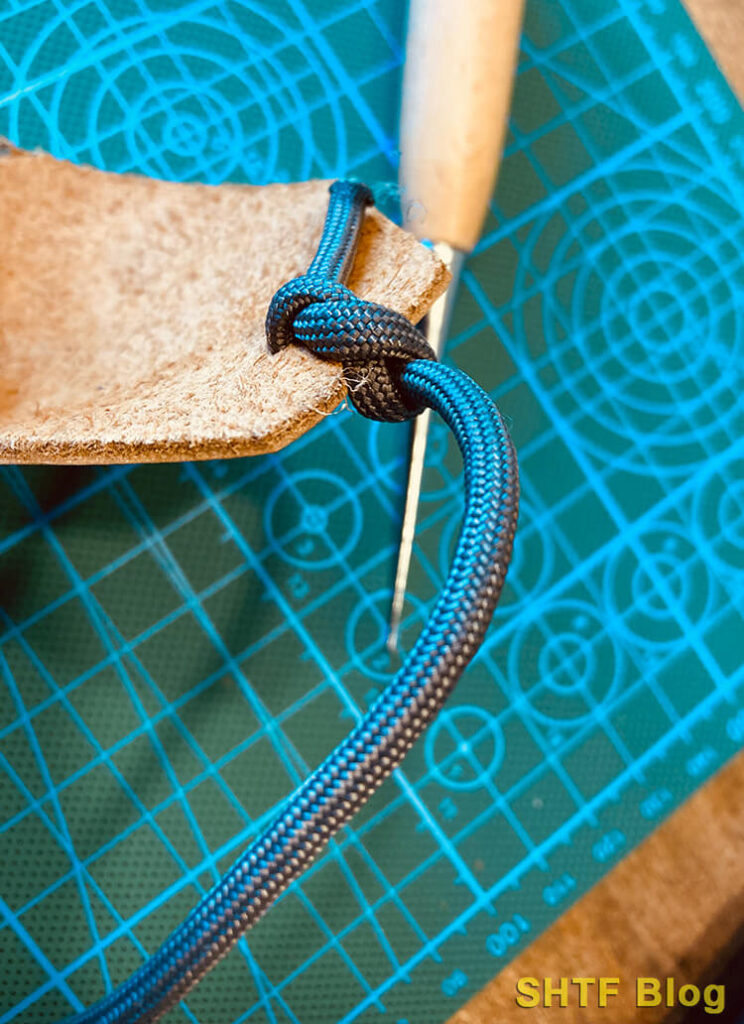
Personally, I don’t think it really matters which knot you use to secure your Paracord to your leather pouch, just make sure it’s a solid knot that’s going to stay put. I used a figure eight knot, but I see no reason why a simple slip knot wouldn’t work as well. If anything, a slip knot would only cinch down tighter as the sling is spun around the head, so there shouldn’t be an issue.
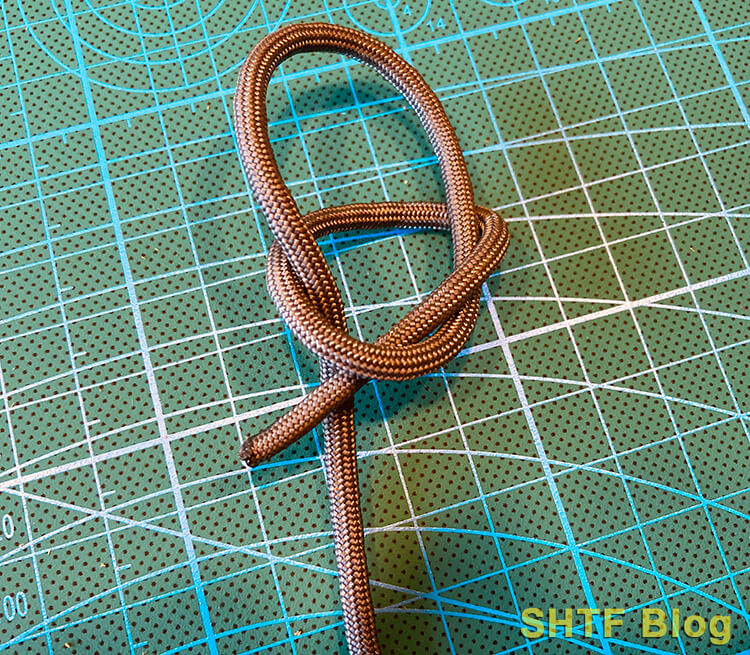
Step 7 – Tie Your ‘Anchor’ Knot
In one of the strings (it doesn’t matter which one), I like to tie a slip knot. I then insert my index and middle finger of my dominant hand through the slip knot. When I release the sling, this anchor knot helps to keep the sling in my hand rather than flying through the woods somewhere.
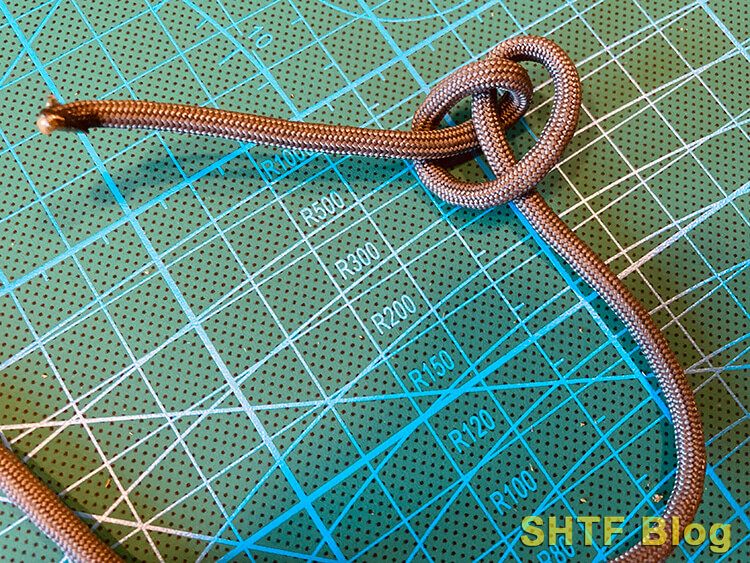
Step 8 – Tie Your Granny Knot
In the other string I tie a granny knot.
But there’s a process – and reason – for the granny know placement. To start, first put the slip knot on your fingers as you would to prepare to sling something.
Now pick up the other string and make a hammock or cradle with the pocket. You’ll notice that the leather pocket will be unevenly situated one way or the other depending on how much of the string you pick up, right?
You want to tie a granny knot in that other string at a location which allows that pouch to stay level when you’re holding both strings at the granny and anchor knots.
That little knot is going to give your hand some purchase on the rope – something to hang onto – as you’re rapidly swinging it over your head. I pinch that knot between my thumb and the side of my index finger as I’m swinging the sling.
And that’s it! You’ve now made a sling!
How to Use a Sling
Traditionally, the sling is spun around with the arm overhead. I’ve found that swinging at a 45-degree angle is more comfortable to me than attempting to swing a sling parallel with the ground.
By spinning the rock in the pocket, you’re simply applying centripetal force. If you can reliably hit your target by slinging parallel with the ground, then go for it. In theory though, it really shouldn’t matter what your spinning angle is.
Spinning isn’t the tricky part though. The trick comes with releasing your sling at the right time. Many people start off with the mistaken notion that one releases the sling when everything is extended in a straight line in front of your head, pointed towards the target.
This is only natural. We’re used to throwing things. It’s intuitive to release when aimed at the target. A sling is different though. The centripetal force means we have to release the sling when we’re perpendicular to our target. That’s the point where force wants to launch the rock forwards and towards the target.
If we wait to release the sling when it’s pointed straight ahead, the motion imparted by the sling in its overhead arc will carry your stone through the circle and launch it towards your side.
For the visual learner, this video may help:
Choosing Projectiles for a Sling
The rounder and smoother the projectile, the better it flies. Yeah, aerodynamics are a big part of this, but I think the chief reason is many times strangely shaped rocks will “grab” onto the sling pocket when I release. This changes their trajectory.
Other than than the rounder-is-better suggestion, you can really throw anything appropriately sized from a sling – no matter the shape. It may not be as reliably accurate launching bananas as it would golf balls, but if you can fit it in the pocket and swing it over your head, it will probably fly.
Personally, I prefer river rocks. They’re heavy enough to fly far, and round enough to fly true. I’ve often found that stones seem to stay in the pouch better than other objects when I’m practicing.
Unless You Practice, You’ll Never Hit Anything
A sling is going to be a terrible means of defense/meat procurement if you just make it and stuff it into your bag to be forgotten about. Much like afirearm or bow, a sling demands frequent practice if you want to be able to use it as an effective tool.
A sling takes a lot of practice to master, and even though I’ve personally spent hours out in the woods while backpacking fiddling around with hitting distant trees and bushes, I still have nowhere near the accuracy I would need to reliably hit a rabbit, squirrel, or raccoon.
There’s a reason that the ancients required their future soldiers to begin training with a sling as children: a sling truly does take a lot of practice to master. All that said, practicing with a sling is a lot of fun, and there’s not a boy alive on this planet who wouldn’t enjoy getting one of these as a gift.
Who knows? Maybe, in a future survival situation, it could be your son or daughter that is harvesting all the possums and rabbits you can stuff in the stew pot… and all thanks to the gift of a simple, DIY leather sling you gave them many years ago.