Handgun marksmanship is a challenge for many shooters. Frustration is not uncommon. Here we’ll cover some simple ways to improve your handgun skills.
We’d all be great shots if someone sold a hole-eraser. But since I haven’t seen one yet, today’s topic is off-the-mark bullet-holes – a common aggravation for new handgunners, as well as some with much more trigger time. For purposes of this article, the assumption is safety and operation are already understood.
Tactics (holster skills, load management, cover-strategies, etc.), is a subject for another day – largely moot anyway if marksmanship skills are marginal. Each shot will wind up somewhere and, if we shoot it, we own it – along with the inevitable legal consequences.
It’s just hard to shoot a handgun well, certainly more difficult than a rifle – the better starting point for a new shooter. And if it happens to be a .22 LR, the mild report and recoil will allow full focus on shooting skills.
Still, with a handle on the fundamentals, decent handgun accuracy is possible within a relatively short period of time – something I witnessed on a regular basis.
Following these tips and improving your handgun marksmanship is an essential step to master before moving on to concealed carry tips.
New Technologies – Familiar Issues
I managed a firearms training unit for many years, which involved teaching entry-level handgun classes through higher-speed tactical range sessions. This era witnessed a progression of handguns from double-action revolvers through metal-framed D/A semi-autos, culminating in today’s striker-fired polymer models.
Although the firearms and faces changed, marksmanship issues remained surprisingly consistent, and nearly all could be connected to struggles with established “fundamentals.”
Handgun Marksmanship – The Fundamentals
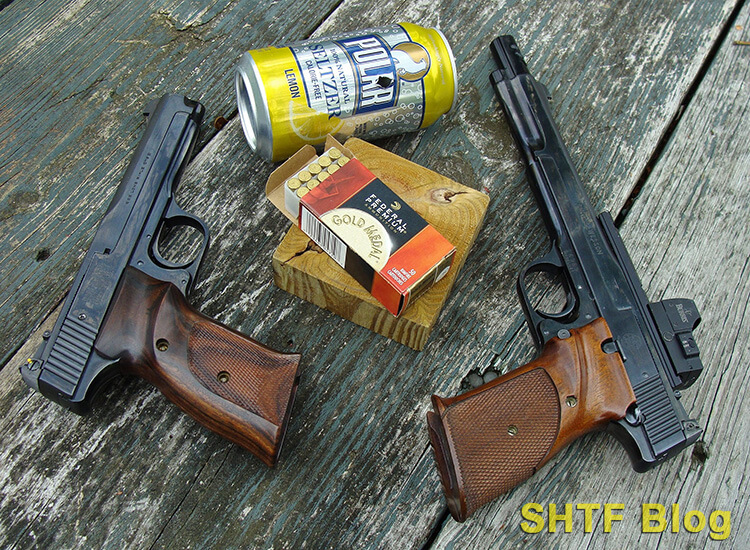
To set the stage, let’s envision a challenging target; a beverage can, perched on a post at twenty paces. From that distance, spray and pray won’t work. Predictable hits will require a sharply focused front sight (or dot sight), and a carefully controlled trigger; two of the key “fundamentals.”
If the sights are properly regulated, as long as they wobble within the target before and during the shot, expect a hit – that is, assuming the handgun has the requisite accuracy. For extra incentive, let’s put $10 on this shot.
But first, the “fundamentals.” Actually, I’ve seen several slightly different versions, to include ours. We add “stance” because it serves as a foundation for others. But, for purposes of drilling the can, the NRA’s Basic Pistol Fundamentals work well.
1) Aiming (Sight Alignment/Sight Picture)
Proper alignment of the front sight in the rear sight is the key to handgun marksmanship (see diagram below). Your odds of hitting your target will increase through sharp focus on the front sight!
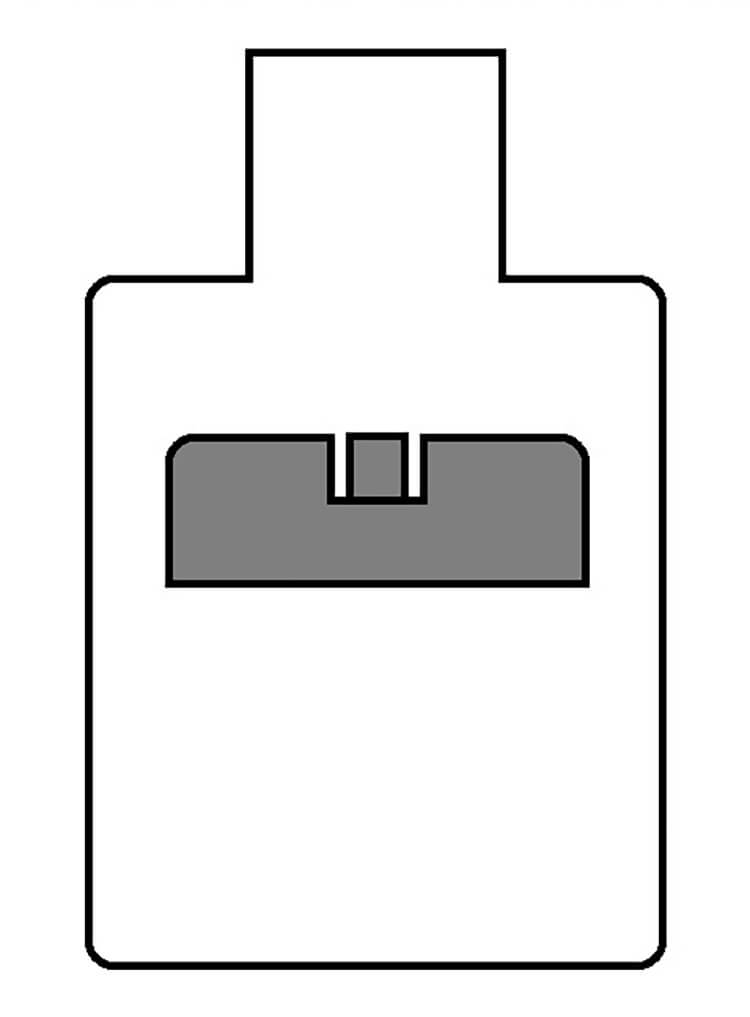
Close-quarter defensive shots can be made using a “flash sight picture” – but not this one.
It’s okay if the rear sight and the target appear a bit fuzzy; however, the front sight should be crystal clear. For this reason, my ten bucks hangs on a set of prescription shooting glasses.
Red-Dot Sight Note: Focus on the target instead of the dot. Simple, and quick – with practice.
2) Breath Control
The standard techniques call for a few preliminary deep breathes followed by a hold, or gradual exhalation. Using either method, the shot should break within eight seconds. If not vision tends to suffer while wobbles increase.
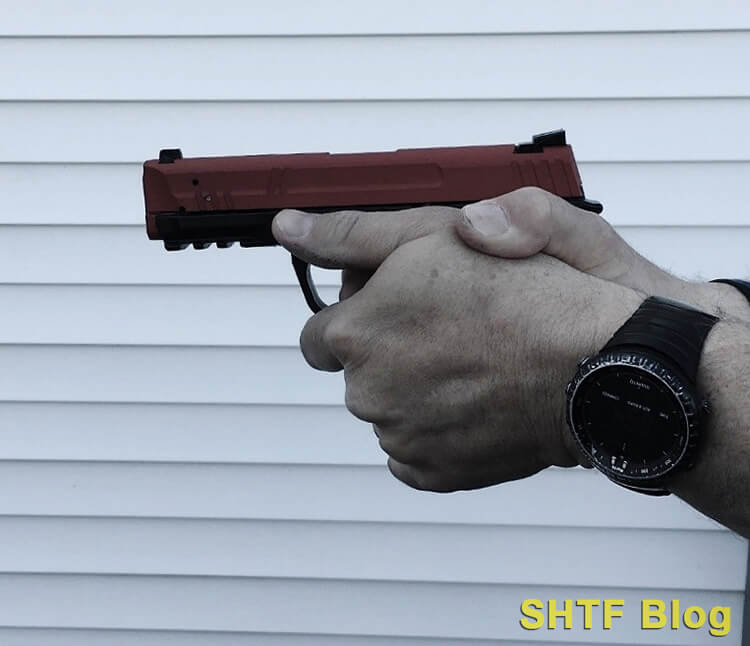
3) Hold Control (Grip)
As far as I’m concerned, the can is a two-handed shot. Opinions vary somewhat regarding tension. We teach a solid grip, with at least 50% of the pressure coming from the support hand, a technique that improves consistency, recoil control and function.
Actually, with enough pressure – too much for most of us – you could yank the trigger and make a good hit. The better compromise is enough pressure to establish a pre-compressed grip (stay tuned).
4) Trigger Control
Often described as a squeeze, it could also be a controlled press. Do not crank or yank the trigger. The idea is to load pressure until the shot finally happens.
If the handgun is a semi-auto, you may even be able to catch the trigger/sear reset point. This technique is now passe in some defensive circles, but it’s still worth trying, simply because it’s only doable via finesse – trigger control.
5) Follow-Through
Rather than make the shot happen, let it happen, and allow the gun to recoil!
Believe it or not, the bullet spends enough time in the bore that the sights must compensate for muzzle climb. If fired correctly, a recoilless shot (from something like a wax bullet) would strike low.
Check off all of the above boxes and the result should be a $10 hit, again, assuming the gun shoots to the sights (another topic worthy of a separate post). Best not to start with the can though. Accuracy will improve more quickly if every shot can be captured for analysis. But first, some psychology: the Zen of shooting!
Mind Over Matter
Perhaps the greatest challenge is exercise of trigger control, much easier said than done! A firing line of new shooters will often grasp the basics within a few hours of structured dry-firing – but some will regress to trigger-jerking as soon as live-firing commences.
Interestingly, almost everyone’s first shot will be right on the money. After that, anticipation of recoil and noise kick in to cause involuntary loss of control. However, the gun doesn’t care what our reaction will be; it’ll be just as noisy and kick just as much either way.
Ideally, if a misfire should occur, no muzzle movement will be evident.
Delivery of an Accurate Shot
A predictable hit really boils down to this: We need to release the trigger in such a manner that the sight picture remains undisturbed before and during the shot!
Sounds simple and in theory, it is! However, of the above fundamentals, trigger control is the hardest to teach, in part because it can’t be diagramed or demonstrated. This explains why many shooters will articulate a well-delivered shot as one that “felt right.”
Improper/inconsistent grip is another source of varying impacts, but it can be easily observed and corrected. The dreaded flinch (accompanied by a downward shove) is the most common malady of all, but it’s often not perceived by the shooter due to recoil. And flinch-itis often intensifies in direct correlation with pressure, to include stringent time standards.
Accuracy vs Speed
Shot placement counts, but defensively, it must be balanced against speed. You can’t miss fast enough. You need to learn how to shoot well before you can shoot fast and well.
Some Rambo-types have trouble with this despite consistently poor target results so. Here’s the deal: If you feel like you’re shooting out of control, guess what? YOU ARE!
Better down-shift one or two gears while concentrating on the basics.
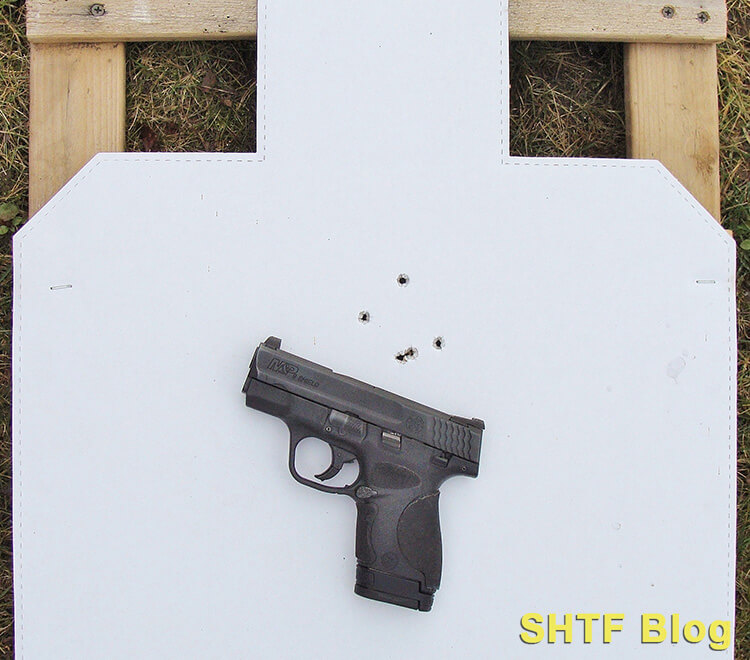
Correcting Shot Placement
Paper plates can work if surround by a larger, contrasting backer, but a large white IPSC target with an 8” black circle in its “chest” is the better diagnostic target. Bullets that don’t hit the circle will still provide useful information for remedial efforts. Plenty of extra use can be wrung out if bullet holes are circled with a felt-tipped Magic Marker (different colors are handy). This system is quicker than fooling with adhesive pasters and the bullet holes won’t lie!
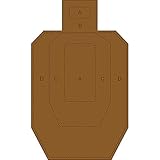
- IPSC Targets - Official USPSA/IPSC CARDBOARD target. White on one side and brown on the reverse. Size: 18" x 30"
Before long you’ll notice a trend from which corrective steps can be developed. Might as well cut the distance in half to start, ten yards is far enough.
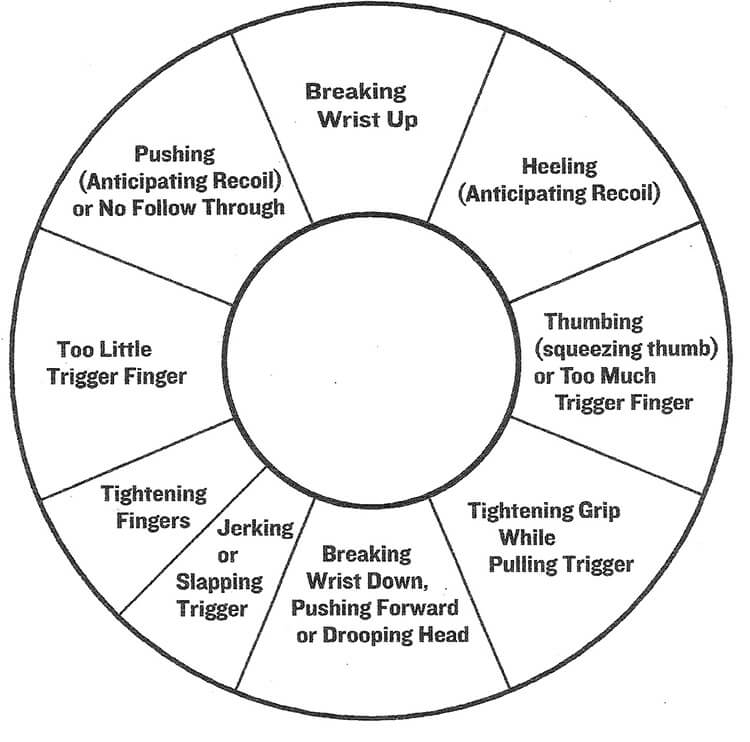
Diagnostic chart note: We’ve been to a few instructor-based handgun schools where spiffy diagnostic clocklike charts were handed out. Trouble is, they’re intended for single-handed target shooters.
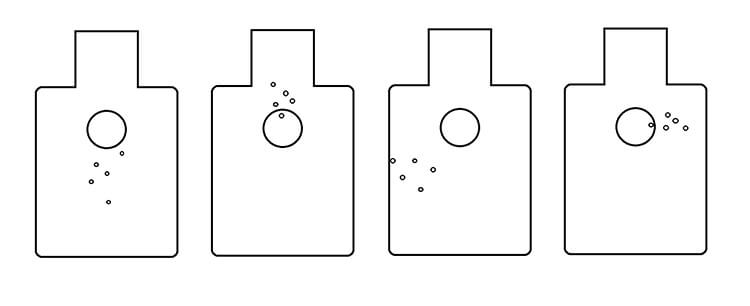
High Hits
Target watching will ensure the appearance of bullet holes above point-of-aim (POA). In fact, “appearance” means you may see the hits as they occur – not good.
Easy fix: focus on the front sight! Look for the holes afterward, once the gun is off target. And, maybe, try a set of reading glasses.
Right Hits (For a Rh Shooter)
Good chance it’s a case of trigger-yanking. Slow down and smooth out. A solid and consistent grip helps.
For pistol shooters: maintain control of the trigger and try to find the reset point. If you feel it, stop, and load pressure to fire another controlled shot (can be practiced dry-firing through manual slide-cycling).
Left Hits
The culprit could be too much finger on the trigger, especially if it has a longer D/A-type stroke. The finger should travel rearward with the trigger. The fix could be as simple as repositioning of the shooting hand – or a swap to a different sized grip.
Low Hits
By far the most common occurrence, bullets that strike inexplicably low are usually the result of flinching, an involuntary reaction to recoil and noise.
Otherwise referred to as anticipation, the dreaded flinch can present challenges. The best solution is a series of “ball & dummy drills” (see below), reinforced via ongoing dry-fire sessions.
Low-Left Hits
A version of the above, it most often appears during shooting stages with stringent time standards. Odds are the gun is being fired by the fingers of both hands (sorta like milking a cow), probably with flinching thrown in.
The trigger finger needs to work independently and with finesse. That, and a solid pre-established grip, go a long way toward eliminating low-left shots.
Large Buckshot-Type Groups
A loose and inconsistent grip is the likely offender. Think about a firm handshake, and don’t break your grip during a shot-string. If that happens, tighten up – or get a different handgun.
Shaking
While it’ll affect group size to some extent, results are less than imagined. A solid position with some trigger-jerking and/or a flinch is far worse. Aim at a target (like the 10-yard circle), while deliberately imparting a tremor. Watch the sights and you’ll see that they probably remain within its periphery. If the gun somehow unexpectedly fired, the hit would still be good.
It’s not uncommon to see several issues develop simultaneously. While sorting them out, don’t expect perfection right out of the gate. If you’re having trouble making centered hits at ten yards, move forward to a more comfortable distance, maybe five paces.
The closer range will inspire greater confidence, and angular divergence will be halved, but it won’t solve every issue. Fortunately, we have a cure.
Ball & Dummy Drill
This highly educational on-range drill incorporates a random mix of live and inert cartridges; the latter either commercial dummies, or handloaded primer-less “dummies.”
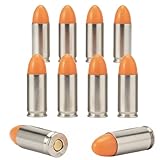
- 10-Pack 9mm Dummy Rounds –– Replicate the weight and feel of live cartridges for dry-fire, malfunction drills, reloading practice, and classroom instruction.
- Near-Normal Magazine Weight – When loaded, these inert trainer rounds give your magazine a near-normal, fully-loaded weight for realistic handling and drill fidelity.
- Durable & Completely Inert – Authentic nickel-plated casings and rugged construction; completely inert with no primers, propellants, or explosive charges—will not fire.
- Proven Industry Standard – Original Action Trainer Dummy Rounds, the recognized industry standard for over 20 years, designed by a U.S. military veteran and law-enforcement rangemaster.
It’s a great way to reveal trigger-jerking and/or flinching issues.
Revolver Shooters
Mix in fired brass with live rounds for “ball & dummy” practice. Insert two empties with four live rounds, look away and spin the cylinder before closing it. You won’t know if a bang or click is forthcoming. If the latter occurs your sights should remain stationary.
If they jump, it’s not due to some external seismic event. If the gun goes bang, you should be able to watch your sights climb in recoil – much easier with a revolver. Unlike a semiauto pistol, the sights won’t reciprocate with the slide.
Pistol Shooters
Randomly mix dummy cartridges with live rounds in a magazine. This is a good two-for-one drill because the duds can represent malfunctions, presenting opportunities to practice immediate-action (stoppage clearance) techniques.
Practice makes perfect, and a B&D drill is a great way to spice it up – especially through the buddy system. You can take turns setting up the other’s gun – sort of like safe version of Russian roulette. But here, the primary casualty is likely to be a bruised ego.
Parting Shots
Accomplished shooters can “call their shots,” meaning they’re fully aware of their sights, relative to the target, before, during, and after it’s fired. For others, the sight picture is likely to evaporate when the gun goes bang. If so, calling shots won’t be possible, and neither will top-notch shooting.
The ball & dummy drill is a great sight awareness tool, but dry-fire sessions are also valuable (verify the gun is unloaded!). This additional gun handling offers another great benefit: It’s much easier to work through the fundamentals when operation becomes second nature.
Everyone shoots iron sights a bit differently (less of an issue with a dot-sight). But, here, we’re talking about obvious and/or inconsistent impacts. And, regarding consistency, the “right” handgun helps. Little guns are less shootable.
An average-size revolver or semiauto with a barrel of 4” or longer is much more forgiving – especially in a manageable caliber. If it happens to function similarly to the centerfire gun and is chambered for .22 LR cartridges, so much the better for nailing the fundamentals.
Want to read more? Read Steve’s book, Handguns: A Buyer’s and Shooter’s Guide.
- Markwith, Steve (Author)
- English (Publication Language)
- 418 Pages - 07/13/2019 (Publication Date) - Prepper Press (Publisher)