I’ve written before about the importance of food independence. Perhaps you are evolving into an advanced prepper and are now looking at beekeeping and acquiring the associated gear as a way to diversify your food sources, supplement your homestead, and take yet another step toward self-reliance.
by Aden Tate, contributing writer and author of The Faithful Prepper
Perhaps you have come to the conclusion that raising bees may be a way to not only to improve your family’s resilience to disaster, but would be a fun hobby to learn along the way (and the honey is nice, too). What do you need to know before investing your time and energy into a potentially confusing pastime of raising bees? How much will it cost?
How Much Does Beekeeping Cost?
How much beekeeping costs depends on many factors, and it is a bit like asking How much is a car? Well, you can spend as much as you want. If you’re asking how much does it cost to get started, that’s a different answer – around $500.
That may sound like a lot, but I would argue that it’s not. Think about how much you, as a prepper, spend on gardening materials every year. Think about how much you spend on food storage. What about… guns? Ammo? How much have your preps cost you in total?
Beekeeping is an extension of prepping. If you keep bees, you are expanding your food sources, becoming more self-reliant, potentially creating another (small) income source, and – best of all – getting your own honey.
Beekeeping Starter Gear for Under $500
I’m going to show you how to get started in beekeeping without unnecessary spending, useless tools and gimmicks, or a lack of the things you need when you need them. You should be able to get started for around $500, so it’s a bit of an investment, but one I believe is well worth the time and investment.
The Beekeeping Suit – $20 to $60
The first thing that I bought when I decided to get into beekeeping was a bee suit. Now, there is the option to just buy a veil, which is essentially a big African exploring hat with a bee-proof wedding veil hanging off of the brim, but I’ve never felt comfortable enough to try this option. You’ll see a lot of older beekeepers just wearing a veil and gloves when they go out to take care of their bees, but I’m rather averse to being stung, so I opted to buy an entire bee suit.
Consequently, I look like an astronaut when I go to take care of my bees, and sweat like a sprinter, but the temporary discomfort is well worth the protection if you ask me.
Bee suit options include:
- Beekeeping Suit Pull Over for Beginners (lower end)
- VIVO Professional Cotton Full Body Suit (higher end)
Beekeeping Gloves – Around $20
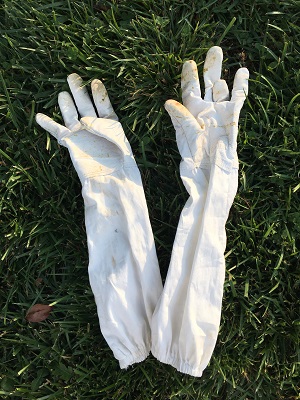
Believe it or not, a lot of suits don’t actually come with gloves, and a lot of beekeepers actually dislike wearing gloves completely when they’re working with their hives. The theory behind NOT wearing gloves is that people feel that they crush too many bees while they’re wearing them.
While I’ve come to realize the affinity a beekeeper can feel for a bunch of little bugs, I still view them as little bugs, and I don’t think of three bees being squished as too far of a trade for not having throbbing hands for the rest of the day.
Beekeeping glove options include:
A Bee Hive Smoker – $20 to $30
Yes, you do have to have a smoker. I’ve tried to take care of my bees without one, and they simply don’t behave as well without having been smoked first. Smoke causes the bees to think that the hive is on fire, and so they’ll rush to the comb and start gorging themselves on honey in preparation for escaping the hive and moving elsewhere with their honey stores safely stowed in their bellies. This isn’t a bad thing either. The bees aren’t all going to leave your hive after fifteen minutes of your working with them. The honey won’t all magically disappear during that time either.
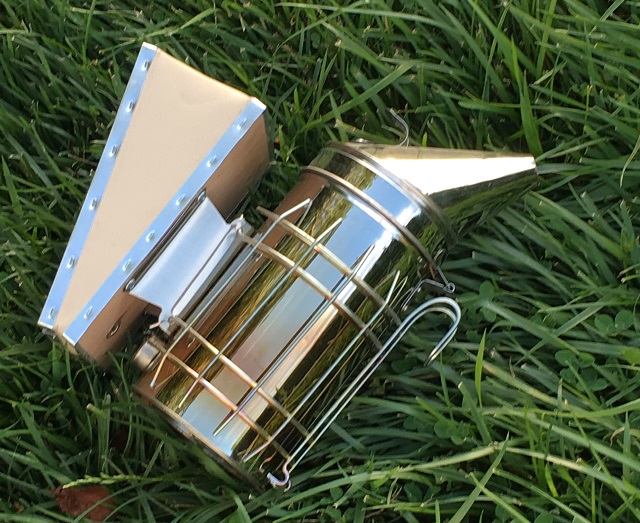
However, if you DON’T decide to smoke your bees, they’re going to spend all of their time buzzing around your face. Not only is this a bit unnerving, but eventually there’s a chance that one of them could find their way through your suit of armor. So, I like to smoke my bees with maybe three puffs into the hive entrance and then maybe three more into the top of the hive once it’s been removed to help them to be a bit more calm as I’m working with them.
Beehive smoker options include:
A Beehive Entrance Feeder – About $15
Some people don’t feed their bees, thinking that nobody feeds bees out in nature, and therefore, their bees don’t need to be fed either, but I believe that this is a mistake. My bees just seem to do better, especially in the colder months when I regularly feed them. Hives ARE lost during the colder months from starvation, so keeping a feeder filled is one of the ways that you can avoid this very sad fate to your bees.
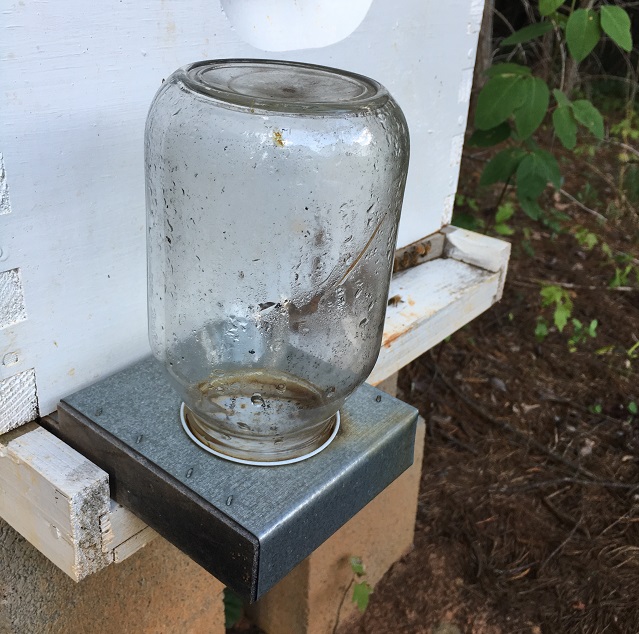
There’s all kinds of fancy versions of these available out there, but the one I like best is a glass Mason jar that nestles upside down into a little wooden ledge (a Boardman feeder). This ledge is then inserted into the hive entrance, and the bees are able to have access to sugar water from inside the hive whenever they want it.
Beehive entrance feeder options include:
A Hive Tool – Under $10
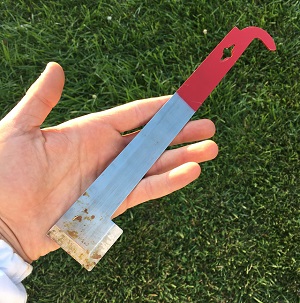
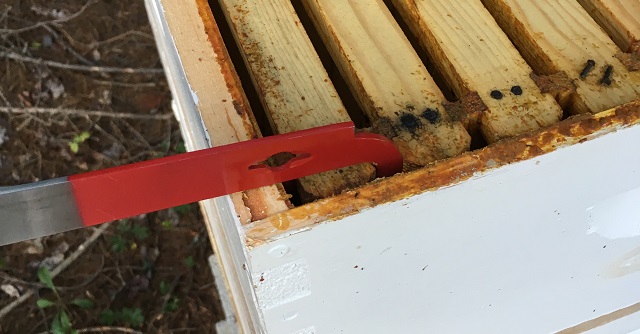
You need a hive tool. There are several configurations of these, but I do not like the crowbar variety. I feel like I do more damage to the frames with those. The one I like to use has a little metal hook on one end that easily fits down between the frames and helps me to separate them from the hive body easily.
You’ll use the hive tool much more than you’ll think, so you may as well buy one that you enjoy using.
The only hive tool I recommend:
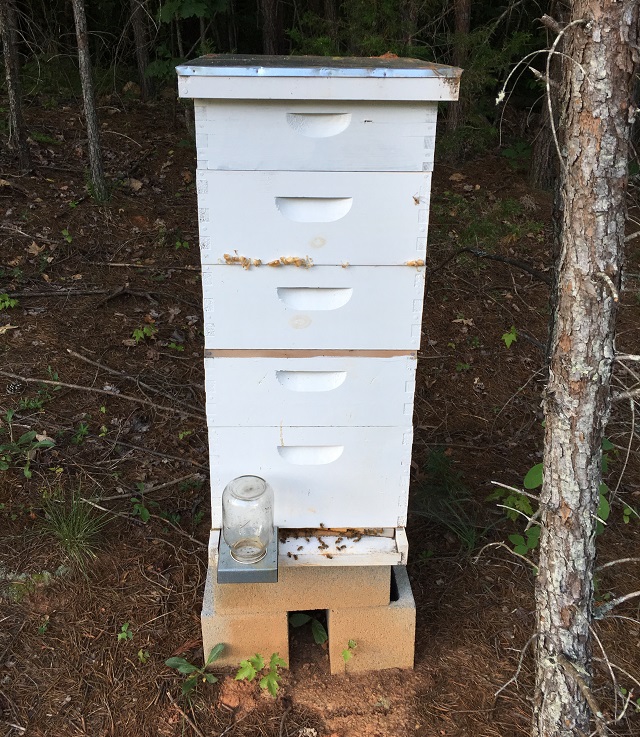
The Hive Itself – Prices Vary
When I first began getting into bees, understanding just what a ‘hive’ is was the most confusing part. There are companies out there that will sell you a completed kit for a hive, but I found it much cheaper to just buy the pieces separately. When you buy a hive, what you want to get are:
- a bottom board,
- a “deep”,
- two “supers”,
- frames for each super,
- wax for each frame,
- an inner cover, and
- an outer cover.
Sounds like a lot, doesn’t it? Let’s break down some of the terminology though to make it easier to understand.
Bottom Board – $35-$50
The bottom board is simply the wooden board that forms the bottom of your hive. Once again, there are all kinds of these available out there, but for right now just buy whatever is the most basic option.
Deeps, Supers, and Frames – $50-$100
A “deep” is the bottom layer of the hive, and it’s a big empty box. It gets its name because it’s a deeper box than the other boxes that rest on top (original, huh?) This is where the queen is going to spend most of her time making babies. I don’t ever collect honey from the deep.
Supers are the much shallower boxes that rest on top of a deep. I would recommend getting two of them right from the get-go. The first will go onto the hive immediately. The second super should be added in the springtime after the weather has begun to warm up a bit (the time of year to add the second super will vary a bit depending on where you live).
The additional super gives your bees room to expand. If the colony gets too large, and consequentially too cramped in their little chambers, they’ll swarm, which means that at least half the hive will just up and leave. Keeping adequate supers on the hive helps to prevent this.
Also, I always leave one super full of honey for the bees to overwinter with. The rest I take for myself. When the weather begins to get very cold at night, I remove as many supers as I can from the hive, bringing them inside my house, so that the bees don’t have as much space that they need to warm up to keep from freezing.
Frames are typically sold in ten packs due to pretty much all supers and deeps holding ten frames a piece. Just make sure that you buy frames that are the correct dimensions for your hive. You want to make sure that you have wax for each frame as well. Without the wax, the bees will build their own comb, but it takes them a lot more work, it’ll be a much bigger mess, and you probably won’t get as much honey either. The wax is a thin little sheet that helps to take a lot of the work off the bees’ plate when it comes to building up the hive.
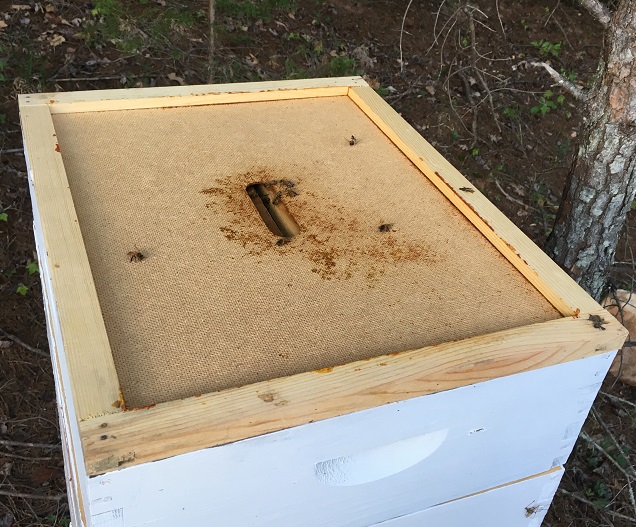
Hive Covers – $15-$75
Lastly, the hive inner and outer cover are simply the top pieces of your hive. One is a piece of particle board, the other will most likely have a sheet of metal nailed down around the top of it. The inner cover allows you to take the outer cover off easily, so you do need both.
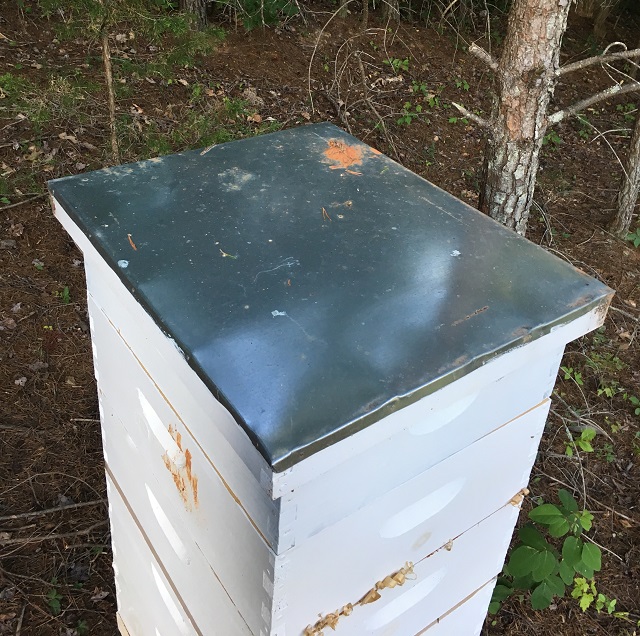
I do recommend that you paint the EXTERIOR of your hive with a weather-proof paint to protect the wood from the elements. DO NOT paint the interior of the hive. Bees do not like the smell of paint, and if you paint the inside of the hive, the bees may not decide to stick around.
- Busy Bees ‘N’ More 10-Frame Telescoping Top Cover
- Mann Lake 10-Frame Garden Hivery Cover
- Homestead Essentials Ultimate Hive Top Cover 2-Pack
- BEE Hive Wooden Inner Cover
- Harvest Lane Honey Inner Beehive Cover
Buying a Complete Hive – $125 to $200
If you want to save the time and hassle of buying parts individually, there are also plenty of complete hive options available that will still keep you under the $500 threshold in total start up costs.
- Complete Beehive Kit, Unpainted
- Complete Beehive Kit, Painted
- BeeCastle 8-Frames Complete Beehive Kit
- Hoover Hives 10-Frame Langstroth Beehive
Different Bee Species – $125-$225
You can’t have a beehive without bees, right? When it comes to buying bees, there are three main breeds that you’ll find: Italian, Carniolan, and Russian.
Italians are the easiest breed to find, and often the cheapest as well. You’ll typically be able to find three pounds of Italian bees for around $110-$130. They’re known for being good producers of honey, but they do show some vulnerabilities to disease. They don’t do as well in very hard winters compared to other bees either. If you live somewhere with a long summer though, Italian bees can be a pretty solid choice.
Carniolans are probably the next easiest to find breed in your community. Carniolans are known for being more friendly and docile than other breeds. When you take the hive apart to get to the honey, they don’t swarm you as angrily as others. Carniolans can fly about in colder and wetter weather than Italian bees, making them a suitable breed choice in northern climates. You’ll typically find them for the same price point as Italian bees.
Russian bees are the hardest breed to find, in my experience, but I like working with them the best. They’re incredibly vigorous and hardy, and not as susceptible to diseases as other breeds. However, that comes at a cost, as Russians (at least in my area) typically go for around $180-$220 for three pounds of bees. That’s worth it to me, because losing a hive can be rather depressing. I figured I’d rather have my equipment fail than my bees, and so that’s where I chose to invest the majority of my money.
Buying Your Bees
Your best bet for buying bees is to find conduct a basic online search. Bees can be picked up locally at certain stores or shipped to your home via online orders.
Other Bee Gear Thoughts
When it comes to collecting and processing your honey, there’s a host of other products that you can buy, but you’ll most certainly end up spending more than $500 for your startup costs. Many people buy bee brushes (to brush the bees off of the comb), wax uncappers (to cut off the cap to the honey cells), and various other pot looking contraptions that either spin the honey out of the frames or help to separate the wax and other impurities from the honey.
If you want to do all that, that’s fine. I don’t have an extra grand lying around to invest in that kind of infrastructure though. I harvest my honey in about as primitive of a method as possible. I take the frames inside, and then over the sink cut the comb into rectangles. I then put these comb chunks into large Mason jars. The honey is raw, unfiltered, and still has the comb in it, but that’s the way I like it. Heating up honey to separate the wax can kill a lot of the good little antioxidants and such inside the honey that has helped honey to be known for being such a healthy food.
Wrapping Beekeeping Gear Up
Getting into beekeeping is a bit of an investment, but it’s a process that I think you’ll enjoy, nonetheless. True, it can be a bit daunting, and a different world than raising livestock, but the possession of the above list of equipment will give you the bare bones of what you need to get your hive up and functioning.
If you’re really serious about starting up a hive I recommend reading everything bee related that you could get your hands on, and talking with as many beekeepers in your location as well. Just as in farming, there’s always somebody out there who has a creative solution to a common problem that you’ve never even thought of before.
As far as further reading goes, I’ve read several good books on beekeeping, but I find myself referring to The Beekeeper’s Bible and The Backyard Homestead Guide to Raising Farm Animals the most frequently.
3 comments
Timely for me as I’m about to get into beekeeping here in the next month or two. Thanks for the detailed breakdown.
Great – let me know how it goes.
You can make a better and cheaper hive feeder, take a big tub of sour cream pail with a lid, drill the smallest holes you can in the center of the lid and it will be a vacuum feeder on top of the inner cover hole, you can use a empty body box to hide it from the elements and sun and it will feed more sugar water.