September was National Sewing month so I’d like to share with y’all my DIY window quilt instructions.
by Jennie Erwin, contributing writer
Window quilts are exactly what they sound like, quilts made to hang over a window. Whether it’s an old window, a drafty window or all of the above, a window quilt will help you keep you heat where it belongs, in your house! Window quilts can be used year after year, unlike most plastic sheeting type covers. Window quilts went out of fashion as windows got better, energy got cheaper and the plastic options came on the market. Plus, they’re a little harder to make, and we all know how Americans feel about working to make a quality item.
How do You Size a Window Quilt?
First things first, measure the window that needs covering. You’ll want your finished quilt to be a couple inches bigger in all directions to best stop drafts. This is important.
If your finished quilt is a couple inches smaller than the window, you could end up with the opposite effect you’re aiming for. The warm air will get sucked behind the quilt, cool off next to the glass and then get pumped into the room, freshly chilled. All thanks to convection current and laws of physics. Don’t risk that, make it a couple inches big. (Try measuring the trim around the window instead of the window itself.)
Keep it Simple
For the sewing impaired, (or time impaired) this project can be done very simply. All you really need are 3 layers. The Front, the Back, and the Batting. The Front and Back don’t have to have cool patterns or fabric, they can be sheets, they can be old blankets, they can be cuts of fabric from the bargain bin at Goodwill. They just have to be the same size. (The same size you decided in the first step with the measuring.) The batting can be anything from store bought organic cotton batting, to cheap polyester batting, or as a commenter on the SHTF Quilts post pointed out, old quilts can be used as batting.
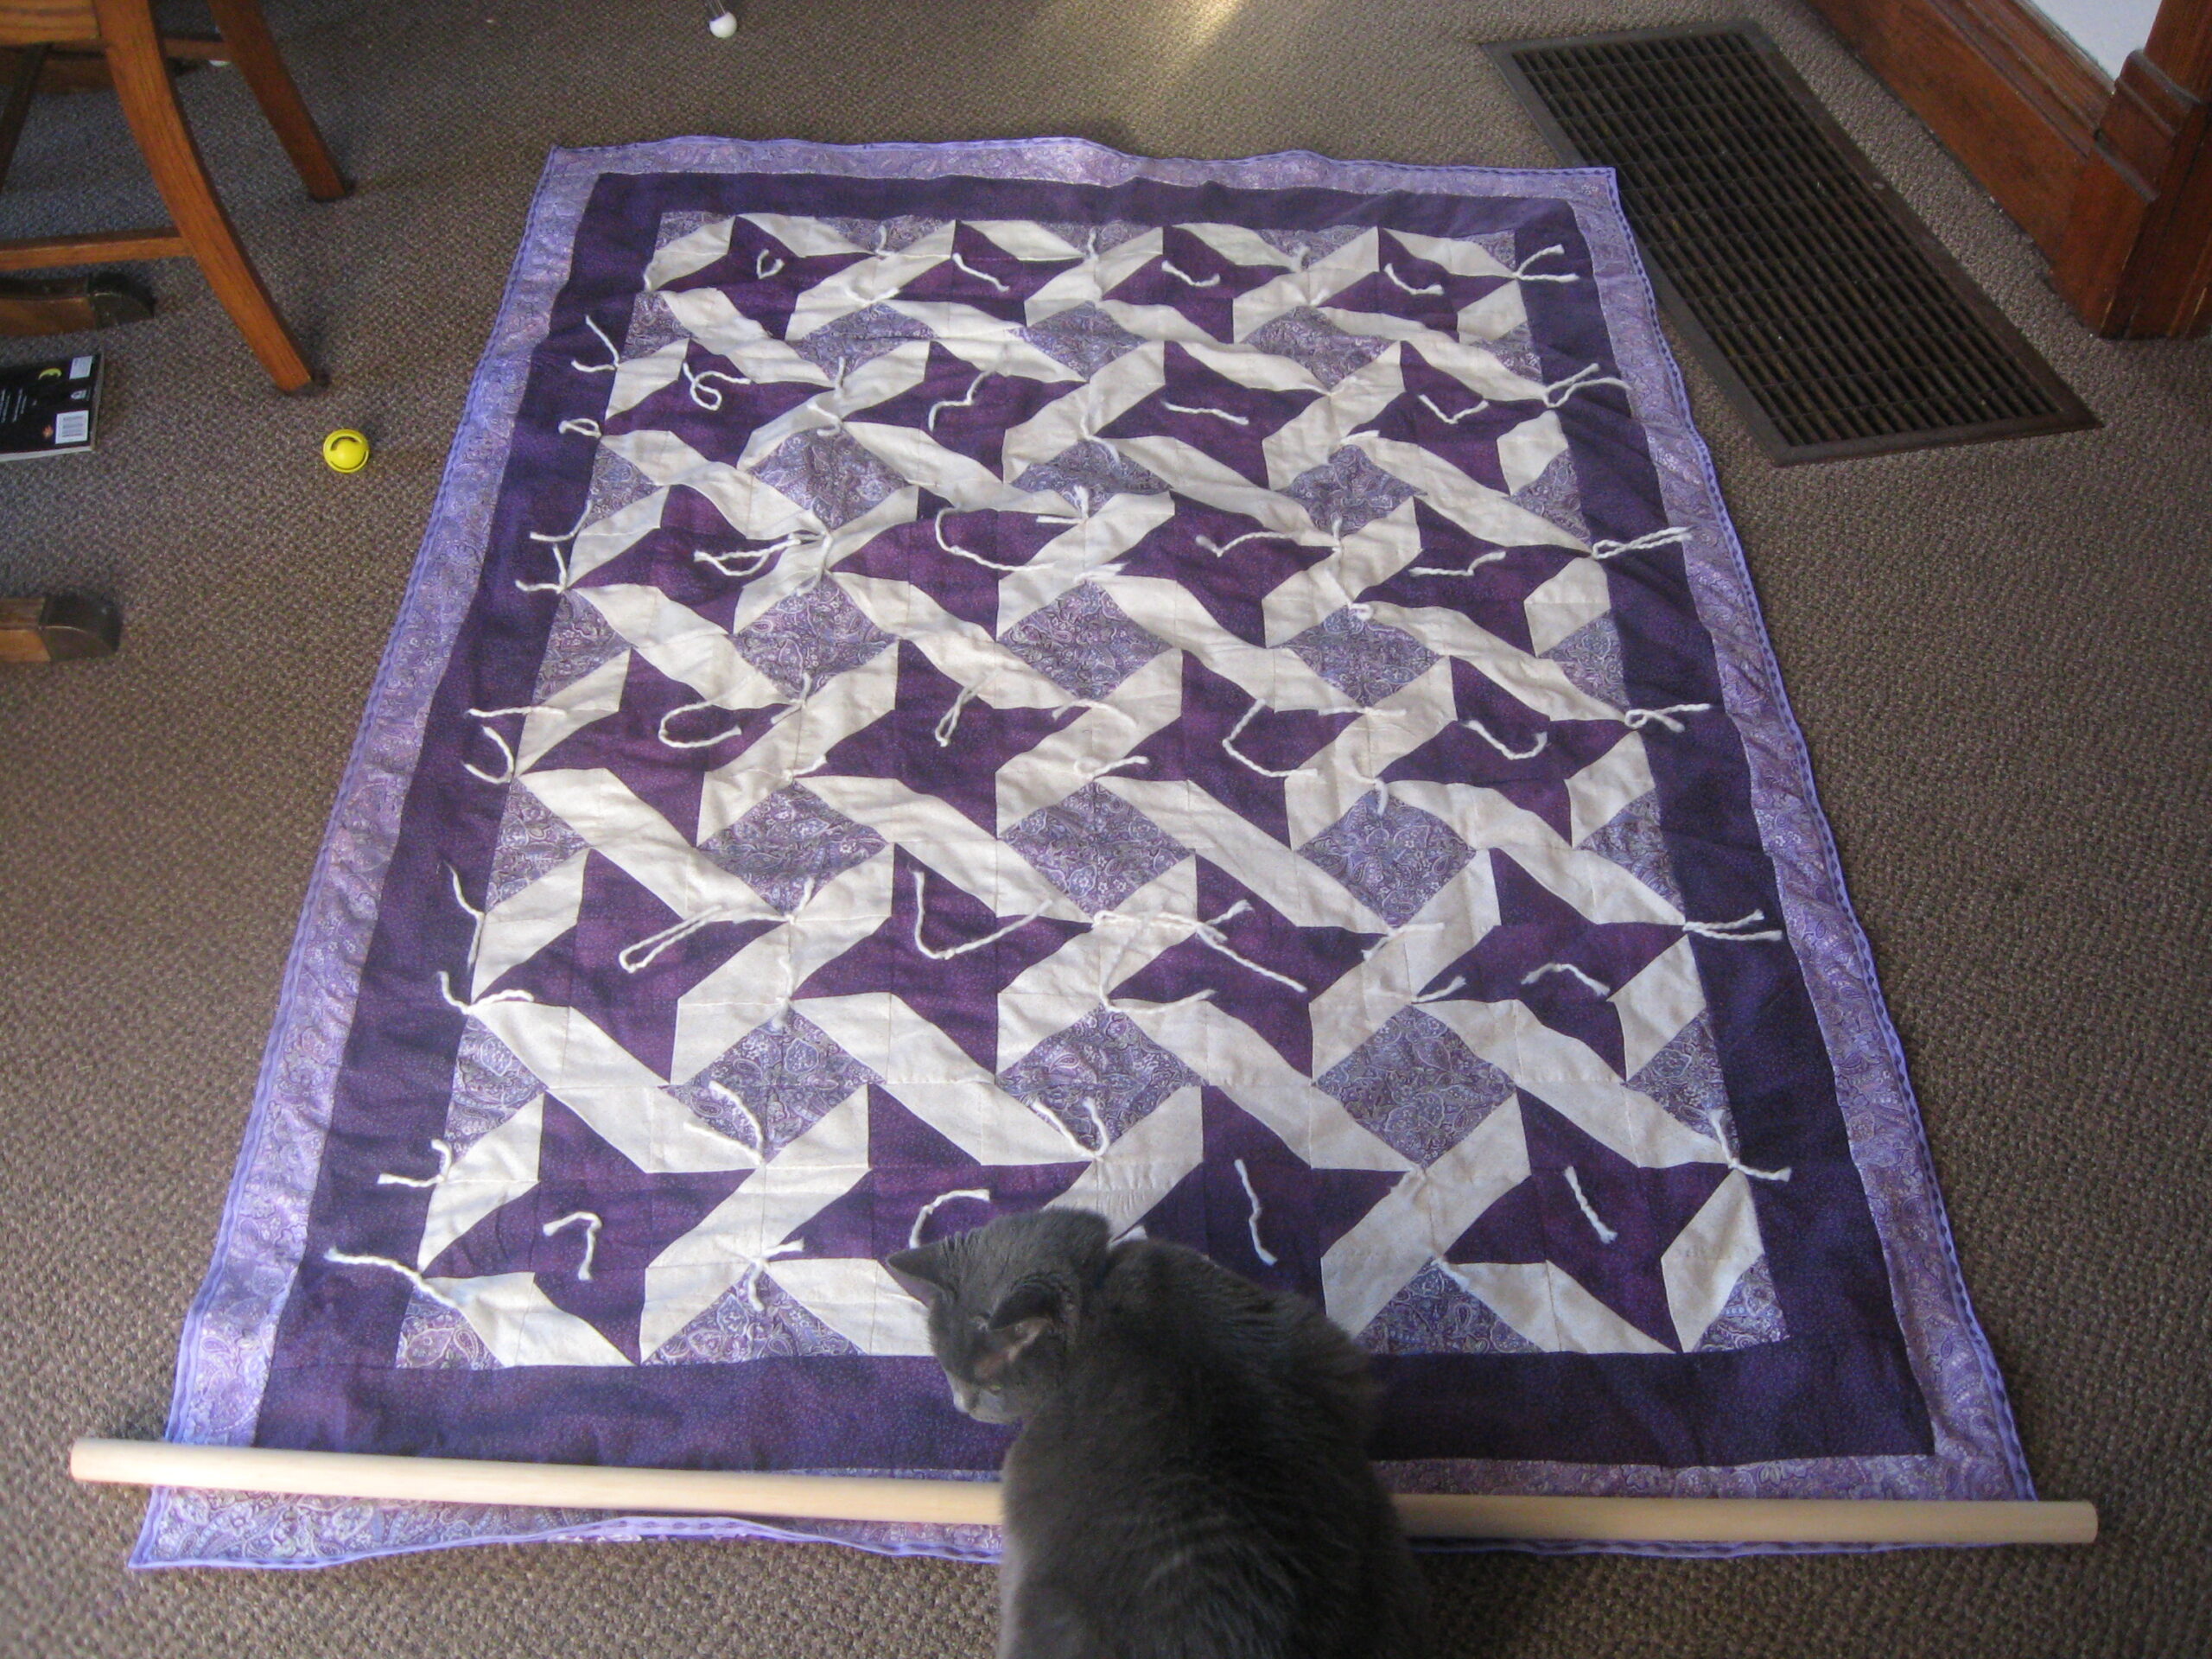
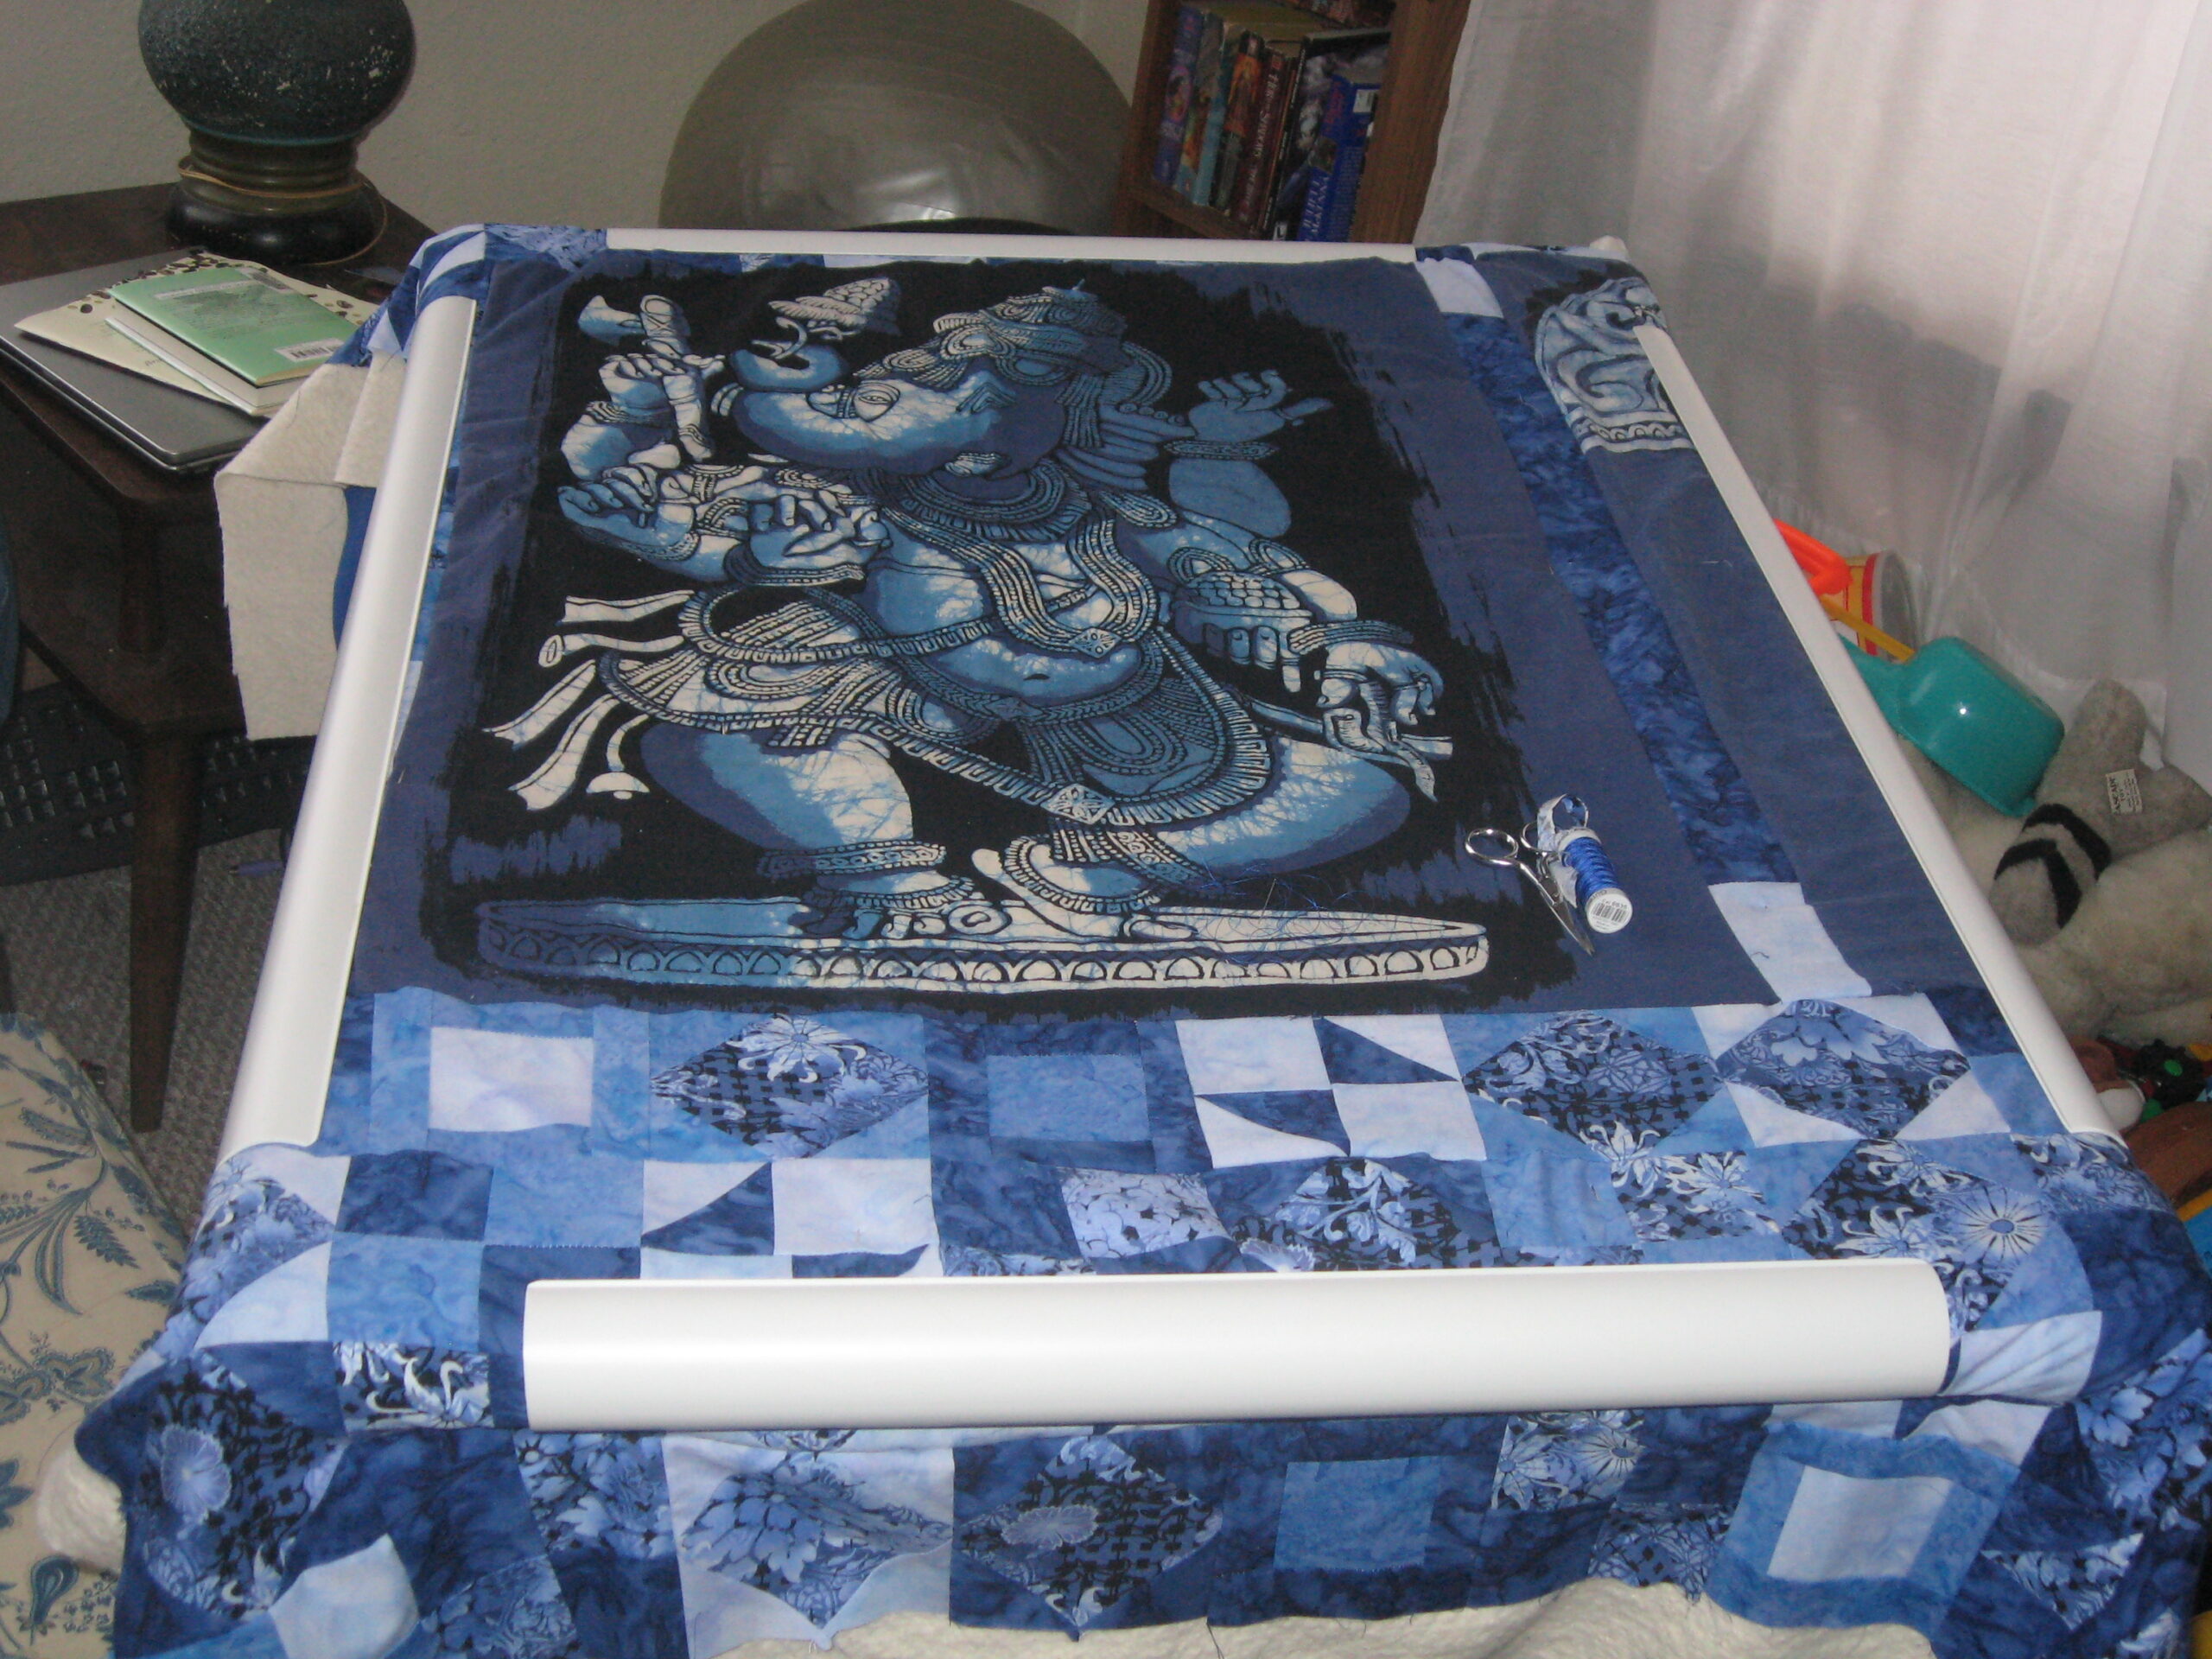
Quilting is nothing more than combining those 3 layers. The easiest way to combine them is to tie them. Yarn is often used, but anything strong enough to go through the 3 layers can be used to tie them together. 3 to 6 inches is a good distance between ties. That keeps the layers from shifting or bunching. Use a clean section of floor to line up all the layers before starting to tie. Safety pins can keep the layers in place while you’re tying. Don’t be tempted to leave the safety pins in as permanent layer holders, they’ll rust. Tie the whole quilt, corners, middle, all of it, otherwise your batting will sag or slip and not be as effective. I use a frame to help me manhandle the big quilts for tying or hand quilting. I love the plastic tubing frames that break down into small pieces when I’m not using them.
Finishing Your Window Quilt
For me, this is always the hardest part. You have rough unfinished edges on all 4 sides of your window quilt. You have to finish them or they’ll unravel/fray and the quilt will age prematurely. There are a couple of options for finishing them. The first option is you can turn the layers to the back by a quarter inch or so and stitch through all the layers, just a basic seam. The more time consuming, and prettier, method is to put a binding on the edge. Binding a quilt is tricky, and there’s no need to re-invent the wheel, if you want quilt binding instructions, go HERE. 🙂
Hanging Your Window Quilt
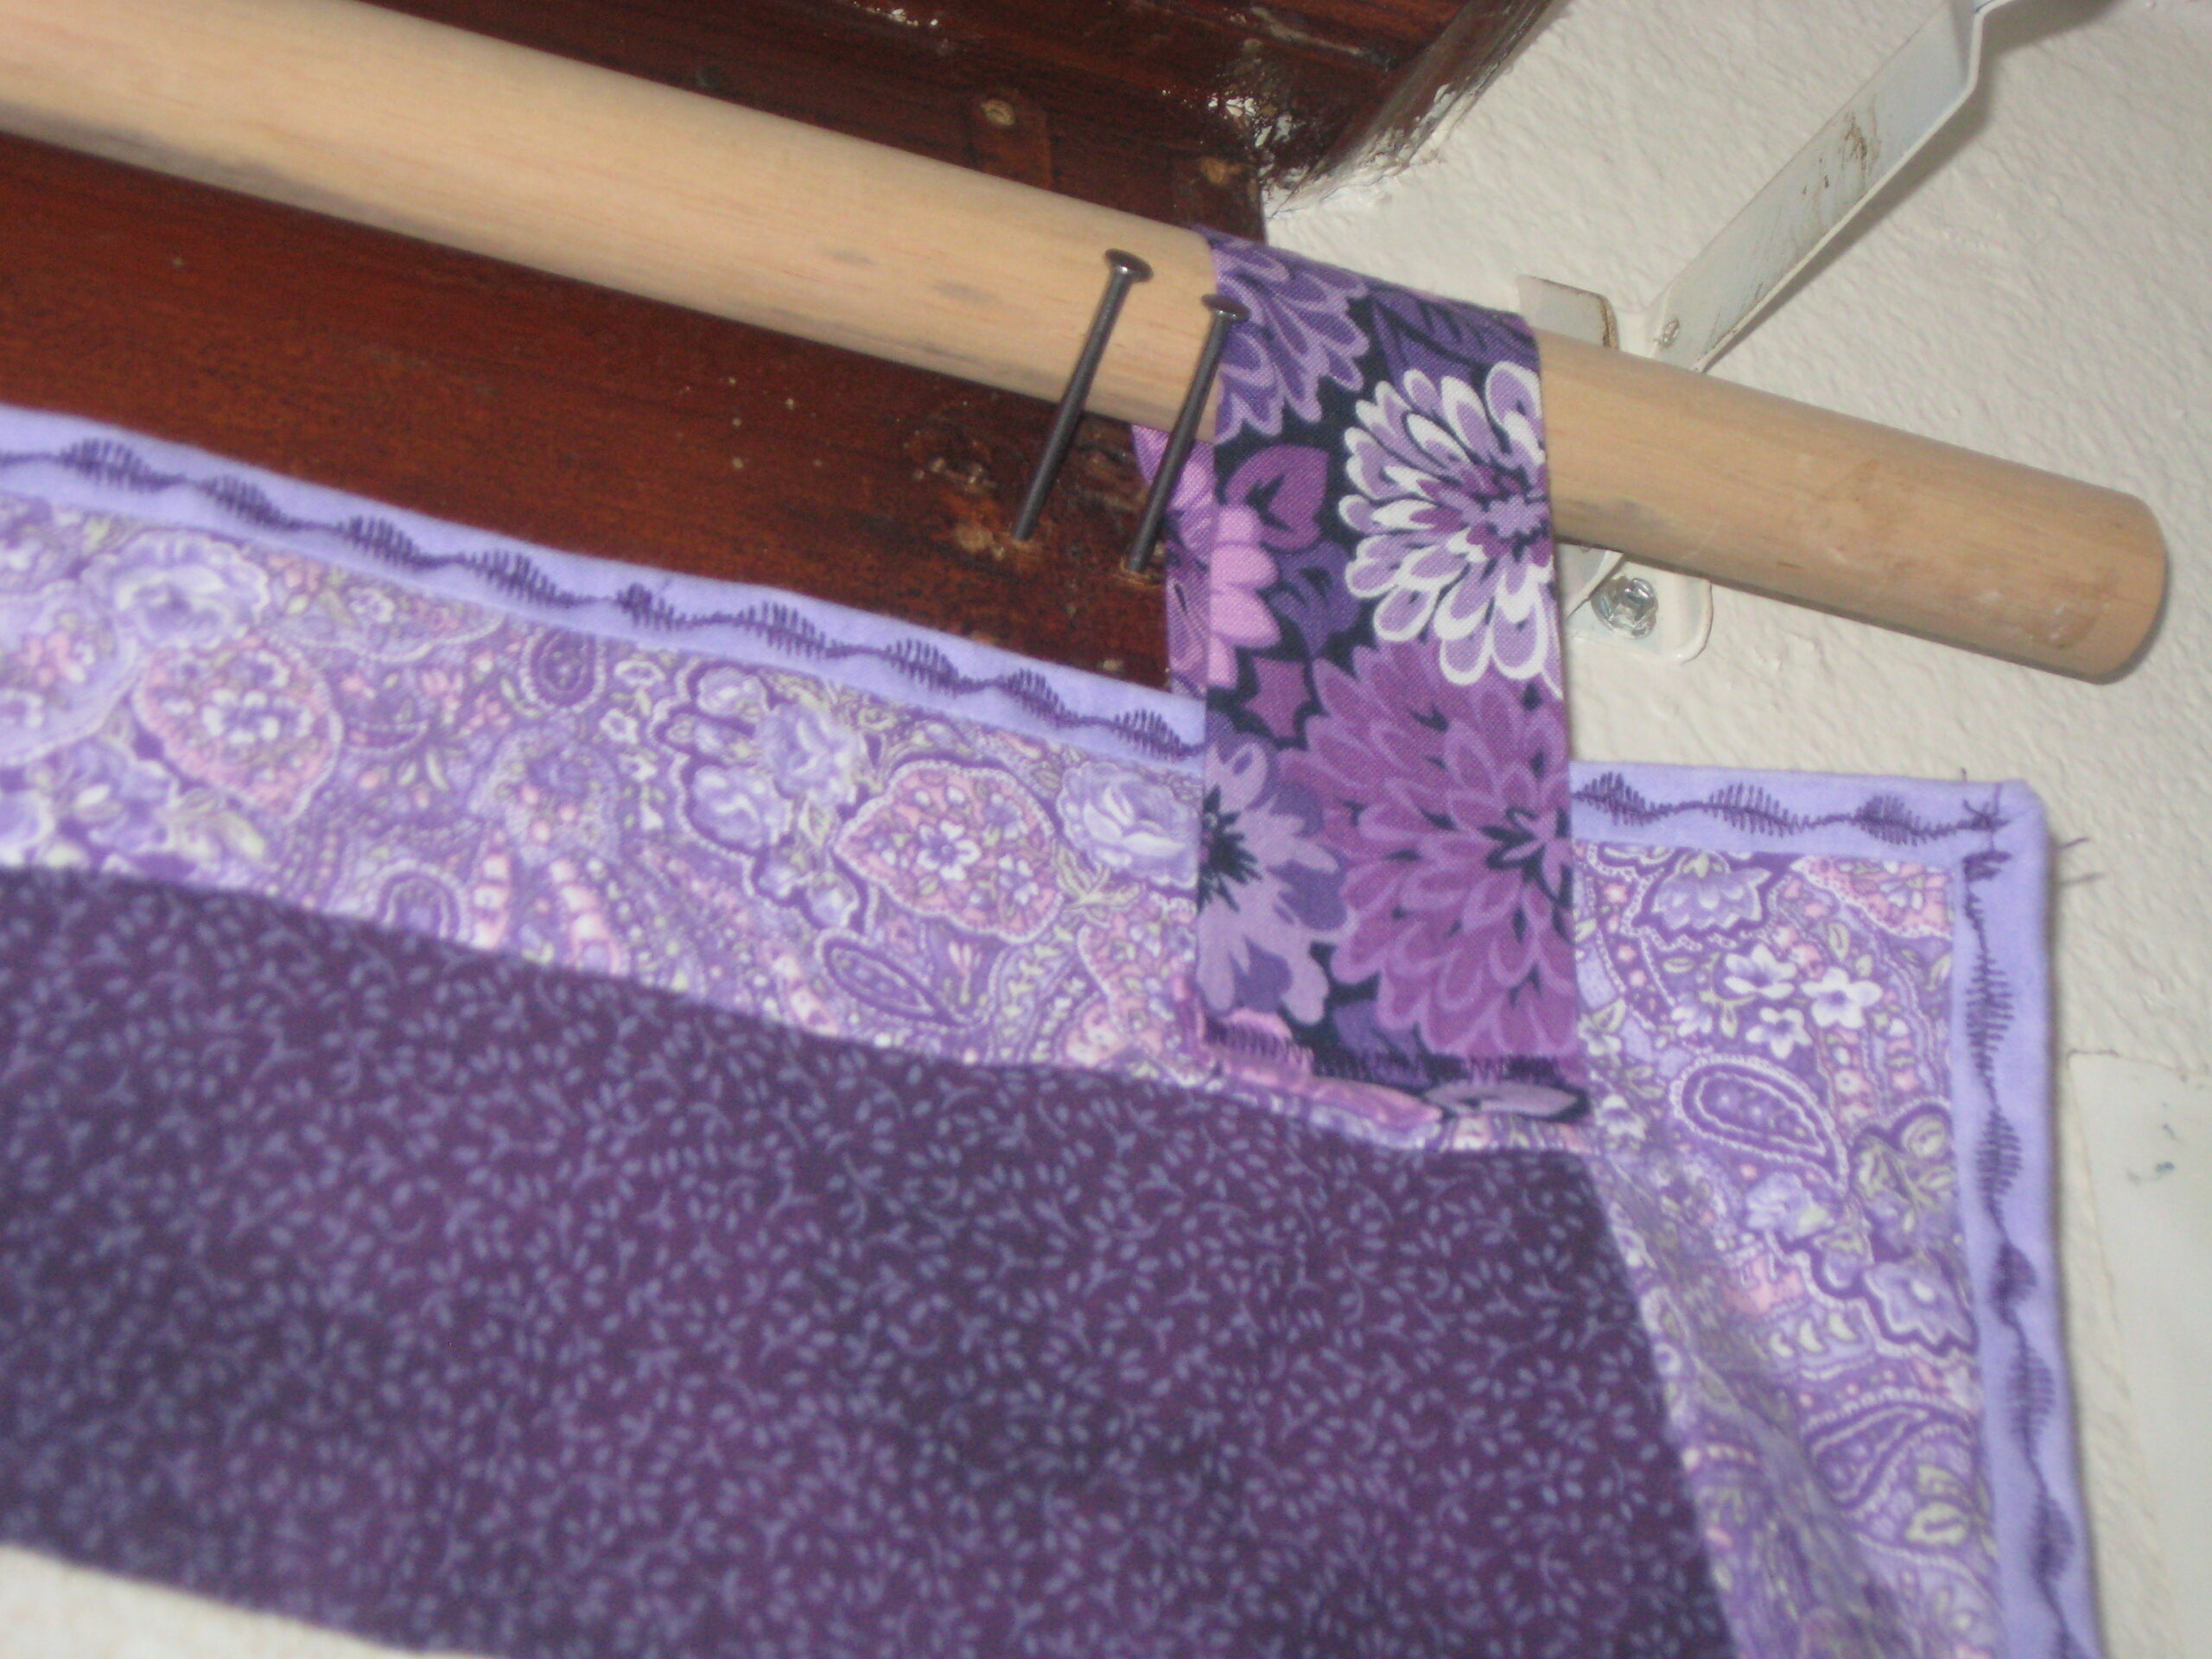
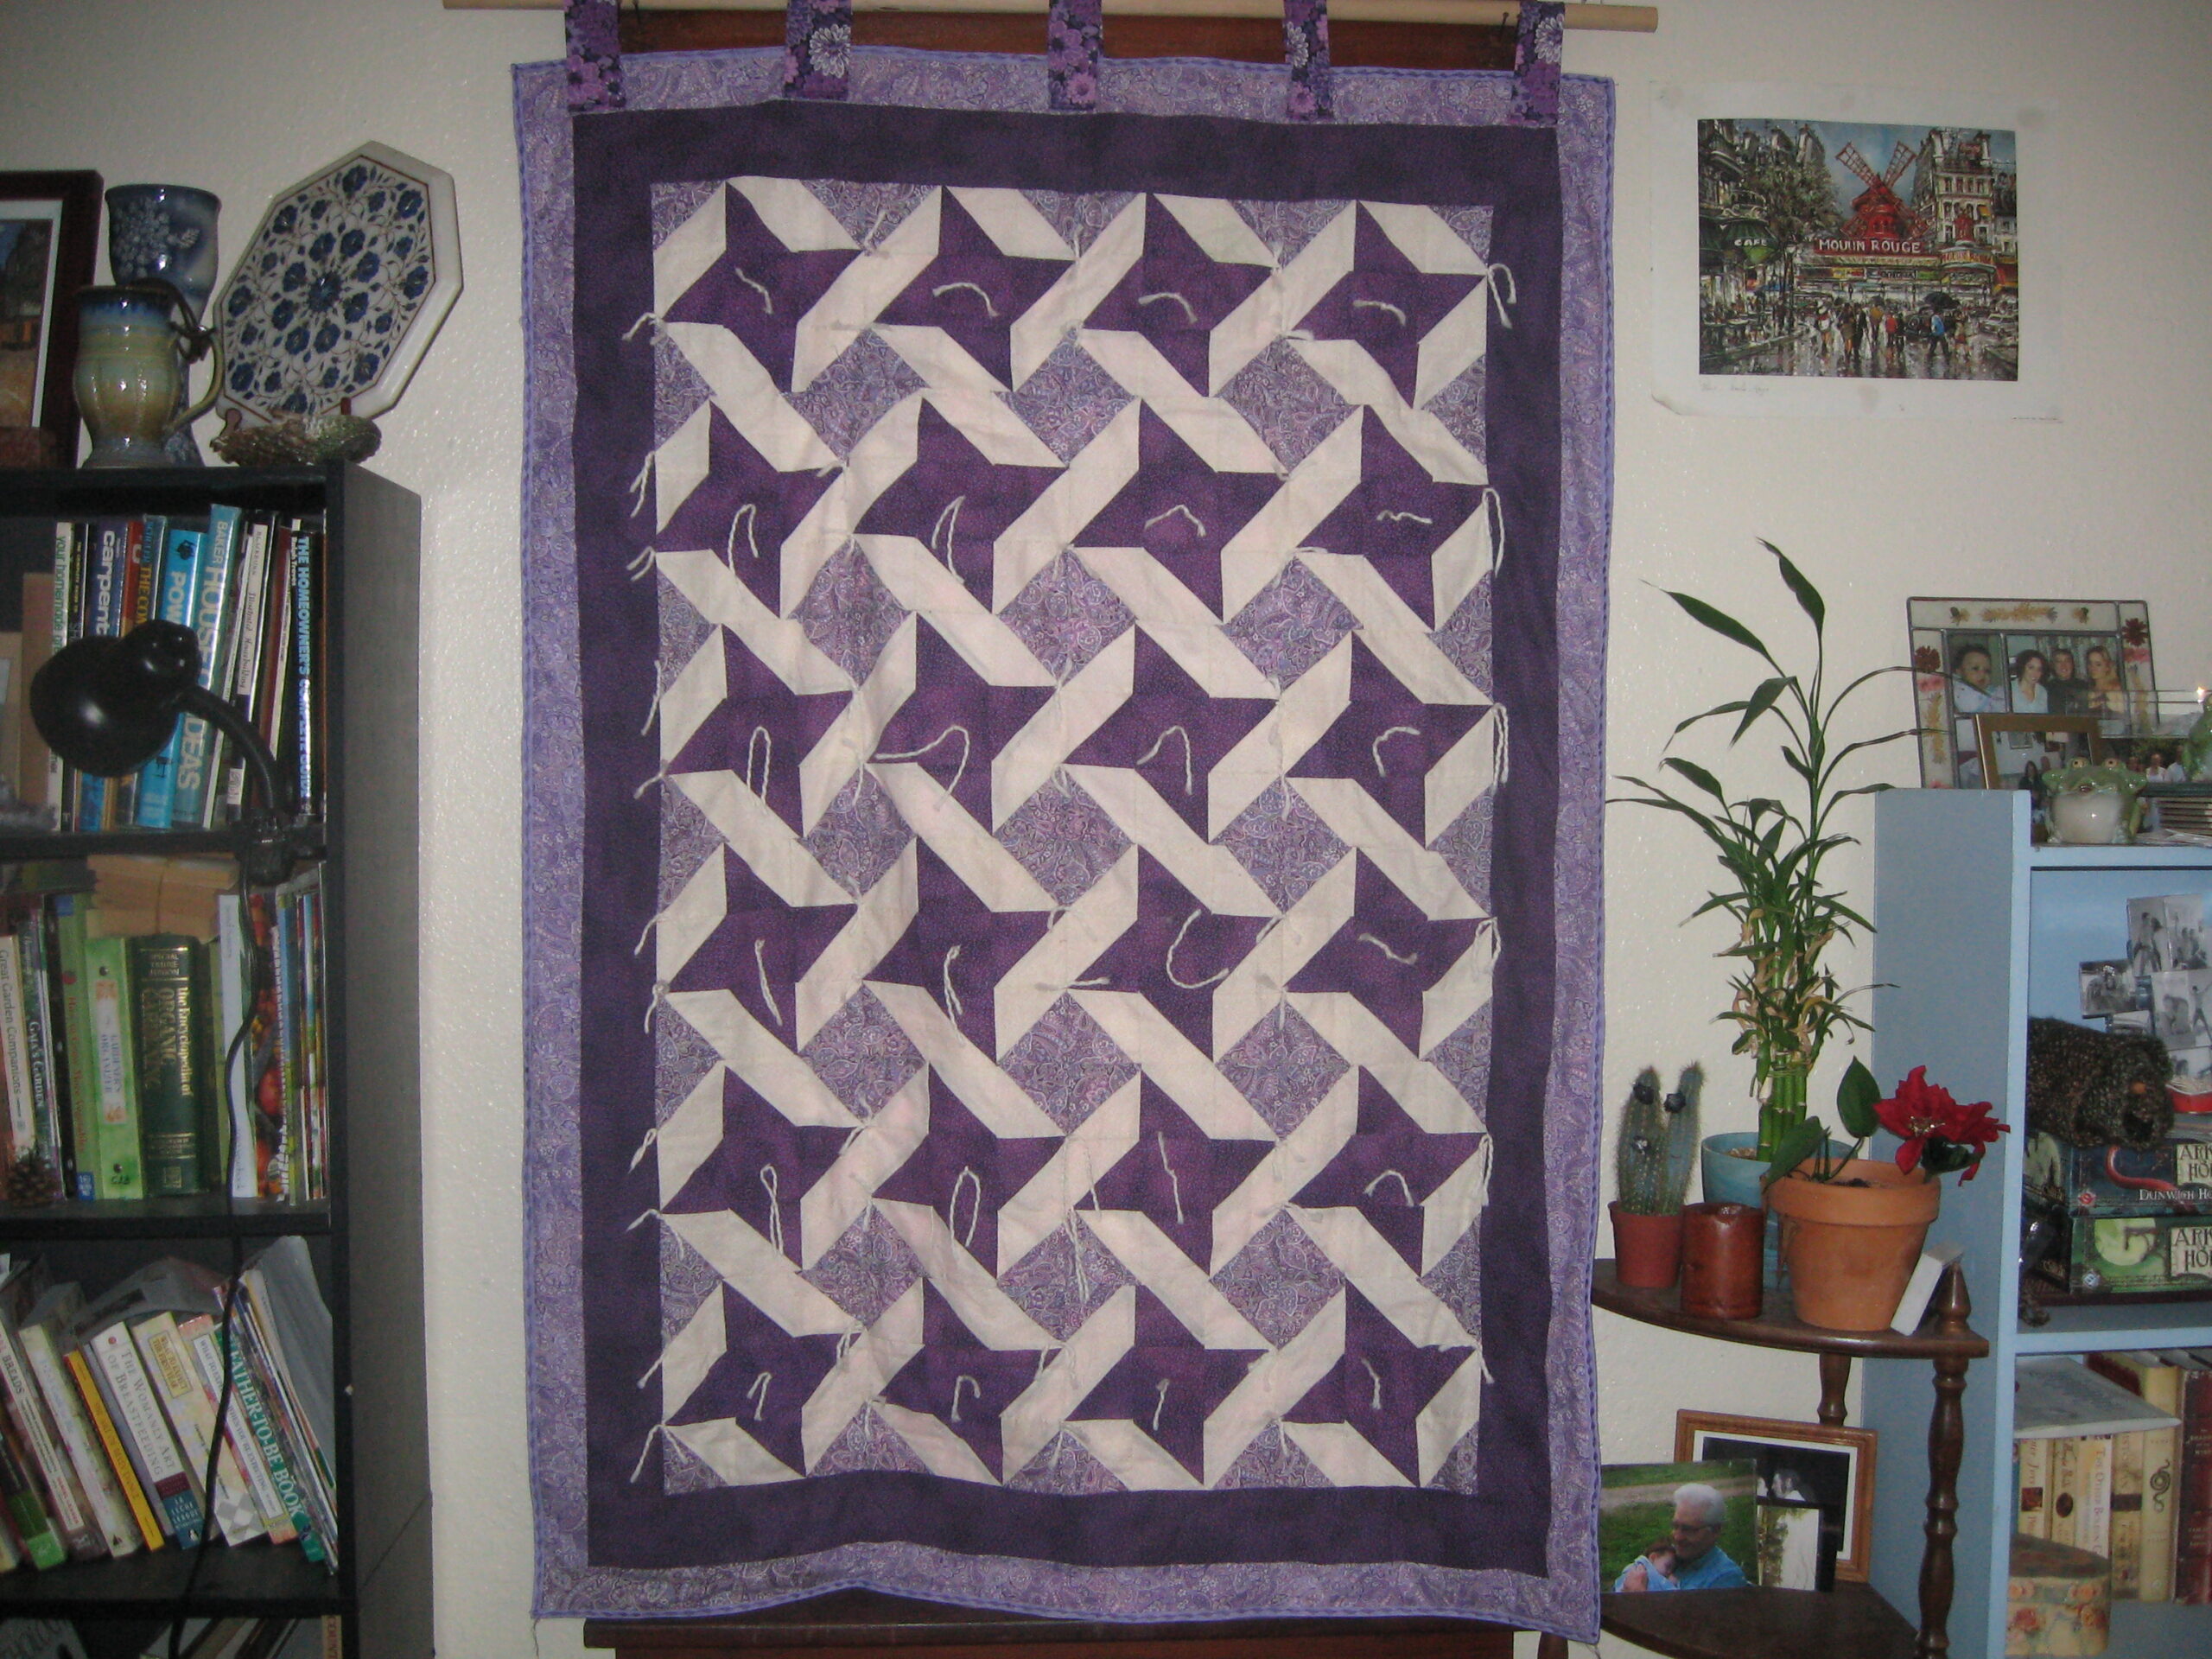
Finally, you need to sew on something to hang the window quilt with. I went with tabs/loops across the top. You could also do small tabs around multiple sides to tack more of the quilt to the window trim. Again, gaps are bad, so some care should be taken to keep the hanging points even.
I went the dowel route with this quilt for our living room window. I looked for hangers at garage sales and such, but I haven’t found anything yet. Four nails, angled up a little bit seem to do the trick for now. Two at each end of the dowel. It did seem easier to get the quilt onto the dowel and then up on the wall with two people.And that’s it! One window quilt, saving you pennies a day. Good for blocking light, heat and some sound. If you want to get fancy with them, you can add ties to the bottom of them to draw them up, or ties to draw them to one side. I’ve never needed such things, but they wouldn’t be hard to add.
Any questions? Do share if you’ve made one before. I know my grandma remembers them.
15 comments
Beautiful work, Calamity!
My oldest daughter is currently learning some of the lost arts and skills in a homeschool group. She’s getting a good introduction to knitting, embroidering, quilting, crocheting, soap making, candle making, etc.. She’s having a lot of fun learning the skills of old.
Joe
Great idea, especially for all the home’s north-facing windows (where there would be no “greenhouse effect” benefit from the winter sun’s rays).
I can barely sew a button, though, so that kind of wipes me out on this.
Just a thought: in terms of increaing the quilt’s “R Value”, I wonder what would happen if you sewed a mylar “space blanket” inside as the middle layer? Would that be workable?
I don’t like the idea of blocking out the sun, I think that is why the plastic dealies are more popular. I think it would get depressing never seeing the sun, especially in the winter.
~Primal
Yea it would be, that’s why I don’t cover every window with them, I focus on several factors: Age of window, Direction of window, Room type.
If it’s an old window and leaking like a sieve, I can sacrifice the view for the heat retention. North facing windows see a LOT less sun up here than South facing ones, plus they get hit with more of the bitter winds from Canada, so most of my North facing windows get this treatment. Room type, we want more natural light in the family room where we congregate every evening, and less light in the bedrooms where it’s dark when we wake up and dark when we go to bed.
When l make a quilt for warmth, l put a sheet for the back, and a thermal blanket instead of batting for the middle. l wonder how that would work for a window?
Love the idea of quilted curtains. We’re do for frost here in about 4 days. Yee Ha.
Just had to share. A storm is due to move in in a couple of hours and God love my hubby-he’s an in the closet prepper, just won’t admit it. He actually started setting stuff up for just in case it gets bad this evening. I just smiled cause the things that I have been doing are finally starting to rub off on him and it does my heart good.
I’ve always wanted to try quilting but I do not have a sewing machine. Used to work with a lady who was skilled with quilting and she recommended one of those fancy machines that do all kinds of stitching with I don’t have the budget or space for. Do you or machine or hand stitch them? Thanks!
I do a mix of both, I machine stitch the piecing (to make the pretty tops) but I usually handsew any quilting that gets done. Tying is definitely my preference though, I rarely have the time or room to sit around with my quilt frame put together while I spend weeks doing nothing but handquilt. Maybe some day when I’m not competing for space against an extensive wooden train set and a 2 year old who likes to stay close. 😀
That said, my machine isn’t “fancy” and all you really need is straight stitch to do a lot of nice work.
I cheated – I just bought $5 kingsized bedspreads from Goodwill and cut them to size, hemming the cut edge. Put up 3 of them along the double-wide garage door in the garage we turned into an office. Those doubled as a nice background for business videos we made!
That’s not cheating, we call that resourceful reallocation of available materials and skills. ;-D
I don’t have quilts made for all the windows I want yet, we use blankets for those windows. Wool blankets are what I tend to use, but only because it’s what we have and I find them less offensive to the decor than what’s on offer at the Goodwill.
Don’t know if mylar’s washable in any case, but I had already decided to put Reflectix (mylar+airbubble) insulation over some windows, between a layer of fabric to make it nicer. Thanks for more ideas!
For the window quilts, Reflectix might be efficient also (if you were more into piecing than actually quilting, and didn’t wash it… ?) Also maybe add polarfleece into the mix – or any other “high-performance” fabric? I’m also thinking about the air pockets created by fake or real fur (Or maybe even old shag carpet!-Maybe).
Anyway I’m doing my coverings with elastic loops at corners, to remove for sunshine and then hook up the covering at night, since that is when room heat just gets sucked out by the glass.
I do this every winter but I use heave moving blankets
For many years we have used window quilts in our mobile home. Ours is a bit different, we made a window size pillowcase then inserted a 2 in foam,one piece rectangle, from a sewing store. To keep in place, I use an inexpensive spring curtain rod, if needed. It looks pretty from both sides and stops the drafts. The only problem is the windows in our mobile home sweat but removing to clean and store is super easy and very guick.
I too ,want to use my moving blankets against the windows like rusty, but how can I attach them? The window is wide and the quilt, heavy.
Carol, I use simple nails as hanging points for the blankets. Works well.