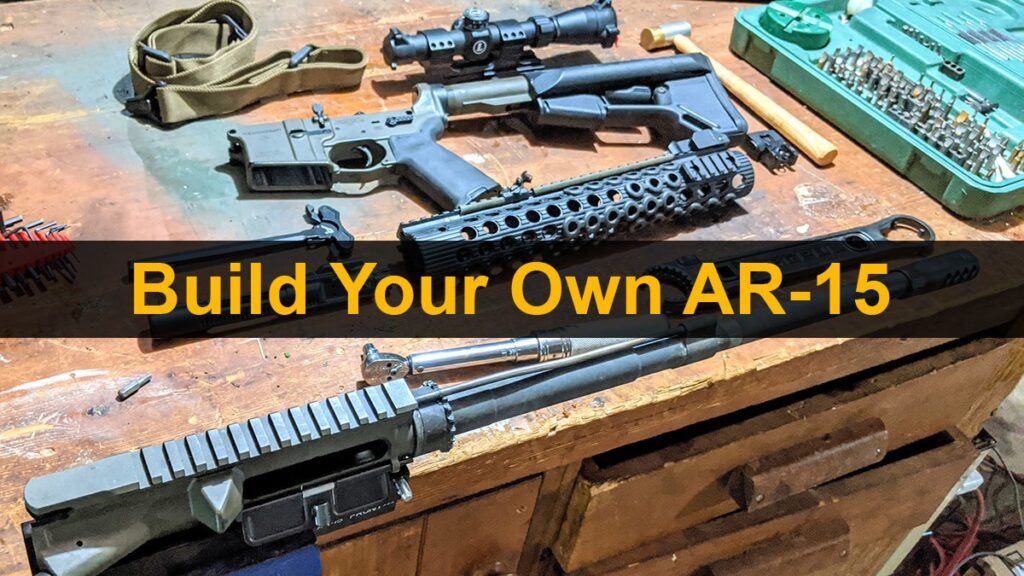
Once you decide to join the black rifle club, you’ve got two choices: Build your new AR-15 or simply buy one. We’ll save you the headache by telling you that you should build your first rifle. Why? There are a few reasons we will explore below.
Note: If you care looking for complete (minus the stripped lower) build kits – shop here.
This article covers the various AR-15 parts needed to build an AR-15 and some recommendations to get you started. Remember, the objective here is not to build “the best” AR-15, but to build a functional, reliable, low-cost model.
4 Reasons to Build Your Own Low-Cost AR-15
There are 4 main reasons why you should build your own AR-15: lower cost, personal customization, enhanced performance, and better familiarity with the rifle you may have to rely upon.
#1 – Lower Cost. When you build an AR-15 instead of buying a pre-assembled rifle, you save money by avoiding the premium prices that brand-name rifle makers charge. You also avoid covering the gun dealers’ mark-up and shelling out cash for unnecessary parts or accessories. You could use all that money saved for ammo or a nice optic.
There are many ways to do it, but for the purposes of this article, we’re focusing on using Palmetto State Armory’s (PSA) parts. PSA manufactures everything in the U.S., they make a wide variety of AR parts for dozens of calibers and brands, and they maintain a consistent reputation for quality and reliability.
#2 – Personal Customization. The AR-15 is the LEGO kit of the gun world. It can be infinitely customized thanks to a plethora of available aftermarket parts. From muzzle to buttstock, building your AR means you get to customize it from the ground up the way you want the rifle to fit your needs and objectives.
#3 – Enhanced Performance. Most retail rifles come with the same mediocre configuration: A lower with some gaudy roll mark, an M4 buttstock, a basic handguard that’s not installed perfectly flush, and a run-of-the-mill flash hider or compensator. None of this bodes well for performance. Building your rifle means picking out – and more importantly, correctly installing – all the parts that make your AR perform well.
#4 – Better Familiarity. What better way to become acquainted with your rifle than building it from the ground up? Going through the process of a build you will be better situated to make your own repairs or improvements. As stated, the AR-15 can be easily customized to meet different purposes, from survival hunting to home defense. What better way to understand the ways and how to do them yourself than by starting from the ground up?
If you’re new to the world of building a gun, you may feel overwhelmed or uncertain. Don’t worry. This is something you can do. Let’s clear up the most common questions and misconceptions about this project first.
FAQs on Building an AR-15
Q: Is it legal to build a gun?
A: Yes. The ATF and the Gun Control Act of 1968 both allow any private individual to build a firearm for personal use. No special license is required to assemble a firearm as long as it isn’t an NFA (National Firearms Act, basically any regulated arms, i.e. fully auto weapons) item.
Q: What kind of gun can I legally build?
A: You can configure your new AR-15 as a rifle or pistol. You cannot build an NFA item, like a short-barreled rifle or machinegun, without possessing a Class 3 FFL license. We’ll cover both AR rifles and pistols in this guide, as each configuration provides the shooter with unique advantages.
Q: What is an AR pistol?
A: An AR pistol is like any other AR-15, except for its barrel length and buffer tube attachment. An AR pistol uses a barrel shorter than 16”, which is below the minimum legal barrel length for any rifle. This means the pistol cannot have a vertical forward grip or buttstock attached. A weapon with a barrel shorter than 16” and either of these two items installed is considered an short-barreled rifle (SBR), a Title II firearm that requires special permitting for ownership.
Q: Do I need an FFL or background check?
A: That depends. You can buy most of the parts for your AR build without paperwork or a background check. The firearm (serial numbered) component of the AR-15, the stripped lower receiver, requires an FFL transfer and background check if you buy it from an online FFL or local dealer. If you fabricate a stripped lower from scratch using an 80% lower receiver (more on that in a minute), you do not need a license, FFL transfer, or background check under federal law.
Q: How much will an low-cost AR-15 cost?
A: You can build a mil-spec rifle (that is, a rifle which holds the same barrel, specifications and nearly all the same parts as a military-issued M4) for less than $650. We’re piecing together a rifle that meets these criteria and falls around this price point. AR-15s have become incredibly cheap to build. The market became hyper-competitive with the rise of the AR’s popularity.
The AR-15 Parts List
Below lists all the parts you need to build an affordable AR. The AR-15’s broken into two halves: the upper and lower receiver assemblies. When it comes to the upper receiver, you can put it together yourself or you can buy an assembled unit that’s ready to fire out of the box. One option may be less expensive than the other and we’ll cover building with both, including their pros and cons.
Lower Receiver Parts
- Lower parts kit
- Hammer
- Trigger
- Disconnector
- Safety
- Pins, springs, and detents
- Pistol grip
- Buffer tube
- Buffer and recoil spring
- Buttstock or pistol brace
- Latch plate / sling mount
Upper Receiver Parts
- Barrel
- Barrel nut
- Gas block
- Gas tube
- Muzzle device
- Front and rear sights
- Stripped upper receiver
- Bolt carrier group
- Charging handle
- Ejection port cover (on most models)
Building the Lower Receiver Assembly
Now that we’ve got our list of parts, we can start picking them out. Since the AR is so customizable, it would be exhaustive if we try to cover every possible caliber and configuration in detail. We’re focusing on building a 16”-barreled rifle chambered in 5.56 NATO or .223 Remington. This is considered by most to be the gold standard of black rifles, and it provides a great foundation for achieving even higher accuracy later. We’ll briefly cover the configuration and legality of building an AR pistol, too. We’re starting with the stripped lower since it’s the only part that may require paperwork.
Stripped Lower Receiver
We’ve talked about preparing for civil unrest and government collapse. And it’s no secret that many people are concerned about their gun rights. It’s a little-known fact that any American who can legally own a gun is also legally entitled to build a firearm that is unregistered. Yes, federal law prohibits a firearm registry from ever being created, but gun dealers keep your paperwork for twenty years and law enforcement can tell what guns you own. This information has been used to require individuals to temporarily relinquish their firearms under certain states’ Red Flag laws and protection orders, without due process.
That’s if you opt for a regular stripped lower receiver for your AR-15. Buy one of these for your build, and it’s just like buying any other firearm. You need to have the lower shipped to an FFL in your area, fill out a Form 4473 and have the weapon transferred to you through that dealer. PSA offers its roll-marked lower for $75.
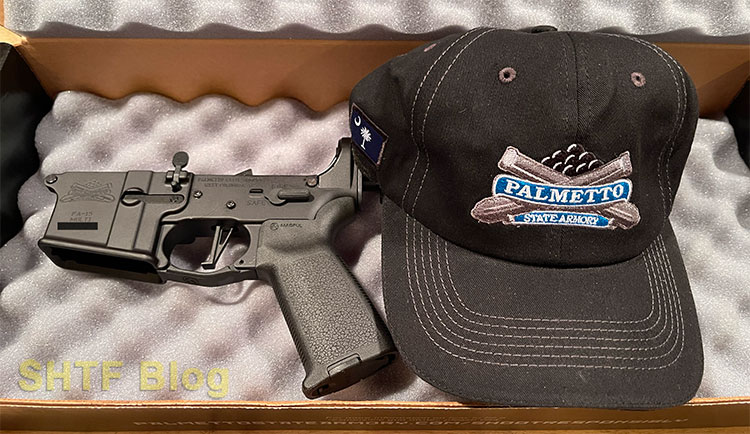
Specifications
- Material: 7075-T6 forged aluminum
- Coating: Type III hardcoat anodized
- Roll-mark: “PA-15 MULTI”
- Engravings: “FIRE”, “SAFE”
- Fitment: Mil-spec, forged buffer tube
- Price: $74.99
The alternatives, which may appeal to the prepper or SHTF-minded folks, are called 80% lowers. This is a collection of forged or billet stripped lower that aren’t entirely fabricated. They don’t have the pin holes drilled for the parts kit and the cavity where the trigger, hammer, and safety reside is not machined for the parts to be installed.
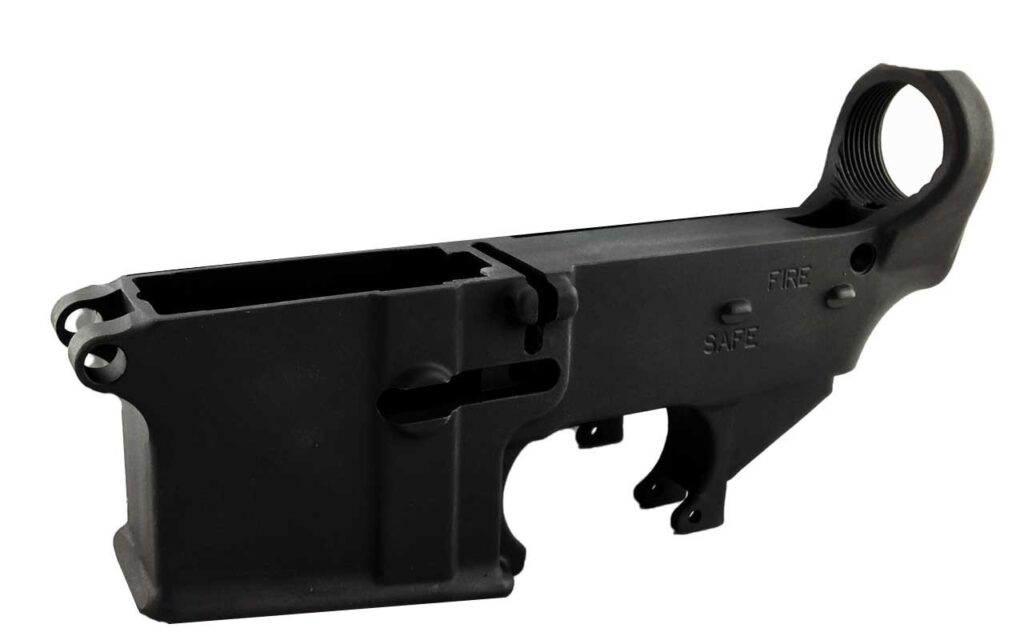
Specifications
- Material: 7075-T6 forged aluminum
- Coating: Type III hardcoat anodized
- Roll-mark: None
- Engravings: “FIRE”, “SAFE”
- Fitment: Mil-spec, forged buffer tube
- Price: $60 – $100
Why bother? Because the GCA of 1968 says that a firearm a private individual builds for personal use doesn’t need to be serialized. No background check or FFL is required to fabricate the lower into a firearm, making your new AR-15, in effect, “off the books.” If you own the right tools (namely a drill press) you have what you need to fabricate this receiver. Some states have banned these lowers. and others (like California) require serialization, rendering the advantage moot. Check your local and state laws before pursuing this option.
Lower Parts Kit
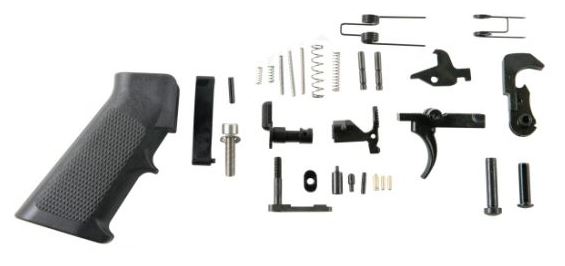
Thankfully, the lower parts kit (LPK) – which comprises arguably the most important parts of the lower assembly – is almost entirely universal and standardized for every AR-15 build. PSA’s Classic Parts Kit provides a mil-spec, single-stage trigger tuned to provide a 4.5-lb trigger pull. It’s a reliable performer with a crisp feel, little creep or take-up, and no over-travel. This parts kit runs $74.99, which puts it below many other kits’ price points. Not all kits include a grip, so that’s a bonus.
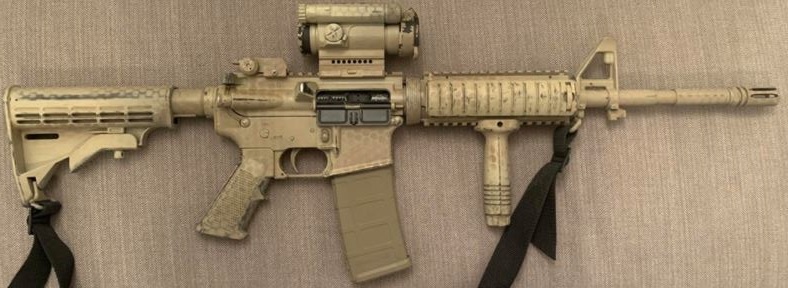
This writer installed the PSA Classic Kit into this M4 clone. The LPK has thus far provided around 1,200 rounds downrange with no failures or trigger reset issues. The complete kit includes:
- Trigger
- Trigger Spring
- Hammer
- Hammer Spring
- A2 Grip
- Buffer Retainer Pin
- Buffer Retainer Spring
- Trigger Guard
- Safety Selector
- Bolt Catch Spring
- Detent Spring
- Bolt Catch Plunger
- Bolt Catch
- Disconnector
- Disconnector Spring
- Magazine Catch Spring
- Bolt Catch Roll Pin
- Magazine Release Button
- Magazine Catch
- Pivot Pin
- Selector Spring
- Safety Selector Detent
- Rear Take Down Pin
- Takedown Pin Detent
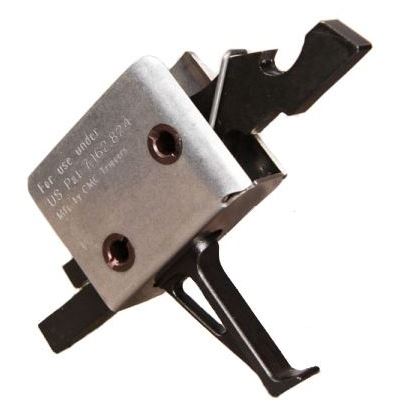
With a PSA-forged lower receiver (or a forged 80% lower) and standard LPK chosen, we’re into the build budget with around $150. One of the biggest investments any AR owner can make rests in the trigger assembly itself. You may find the single-stage OEM trigger more than adequate, but a drop-in enhanced trigger provides a relatively affordable upgrade, too. If you’re a left-handed shooter, we recommend considering an ambidextrous safety selector, too.
Enhanced triggers, like the CMC 3.5-lb. Drop-In unit shown to the right, provide a lighter trigger pull. A flat-bow trigger setup like this unit also provides a perfectly linear trigger pull regardless of finger position. These units are usually CNC-machined with very tight tolerances approaching +/- 0.001”. For our budget build, this is likely out of our league. It is nonetheless a critical first upgrade to consider once you’ve broken in that barrel and receiver set.
Buffer, Tube & Recoil Spring
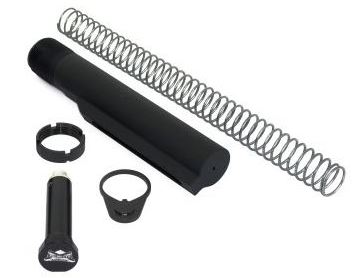
The buffer assembly, which includes the buffer tube, recoil spring, weighted buffer, castle nut, and latch plate, is standardized based on the type of lower receiver you purchase. Forged tubes and lowers are considered mil-spec and their threaded fittings match accordingly. More expensive billet receivers (made from 6061-T6 aluminum) require a different buffer tube, which is also made from billet.
Buffers, latch plates, and recoil springs are interchangeable between forged and billet tubes. PSA’s mil-spec buffer tube assembly comes in at around the $30 price point, making it an affordable catch-all kit that completes the forged lower receiver. If you’re building a pistol, this carbine tube kit will work all the same. Keep reading below for the most affordable pistol setup.
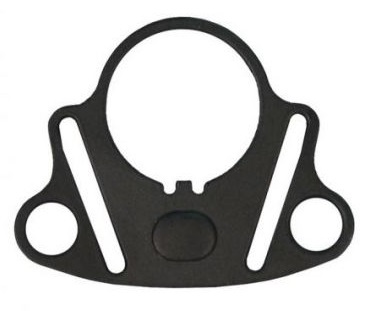
Optional Sling Adapter Plate
Rocking your new AR with a single-point sling affixed just behind the pistol grip provides one of the most comfortable and easy-to-manage setups when carrying your rifle. Most latch plates don’t provide a sling adapter, so you may want to consider springing for this extra feature before assembling your rifle.
Yankee Hill Machine’s ambidextrous plate comes with attachment points for sling straps and or carabiners and runs around $25. Another consideration: Magpul makes the ASAP sliding loop single-point sling attachment that can be a bit noisy, but allows the sling attachment point to slide to either side for true versatility.
Buffers and Weights Explained
There’s a misconception in the AR community about buffers and their use in the modern semiautomatic 5.56 NATO rifle. Before we explain, let’s summarize buffer weights. There are five weights made for various AR-15 builds:
- Carbine: 3.0 ounces
- H buffer: 3.8 ounces
- H2 buffer: 4.7 ounces
- H3 buffer: 5.4 ounces
- Pistol buffer: 5.0 to 8.5 ounces
- Rifle buffer: 5.0 ounces
The last two – pistol and rifle buffers – are used for 9mm and blowback cartridge builds, and M16 builds that utilize the M16’s fixed stock. Many believe the purpose of the AR-15 buffers in the “Carbine” to “H3” category is to, based on weight, account for the length of the rifle’s different gas system lengths and the resulting force of the bolt carrier group’s cycling. This is incorrect. Rifles or pistols using a rifle-length, mid-, carbine-, or pistol-length gas system should stick with the standard carbine buffer by default.
The H, H2, and H3 buffers were specifically designed for the U.S military’s full-auto rifles, like the SOCOM M4A1 and Colt Infantry Automatic Rifle. When building an AR-15 chambered in 5.56 NATO, use a Carbine buffer to guarantee reliability with all loads. Only if your rifle feels over-gassed or “punchy” should you consider an H buffer.
Picking a Reliable, Affordable Stock
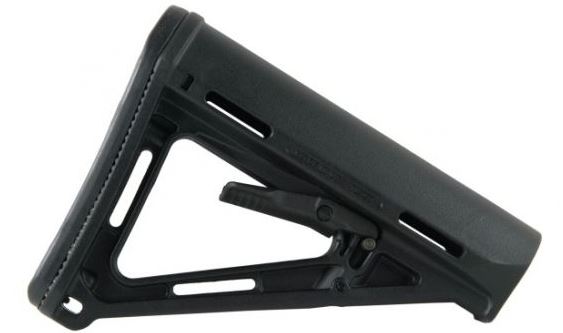
The AR world is now utterly filled with sexy stocks and operator hardware – but we’re not interested in that. If you want cheap, reliable, and lightweight in one, then Magpul’s MOE Carbine Stock is the stock to beat. It’s reasonably-priced and provides a comfortable cheek rest, adjustable length of pull, and it’s made in the USA to boot. It’s tough enough to be used as a reliable club when you’re black on ammo. It sports a rubber pad out back to mitigate recoil and has a few sling attachment points if you want to pinch pennies and avoid the sling adapter latch plate’s extra cost. For a few dollars more, bump up to the Magpul CTR stock which takes the MOE design and adds a position-locking feature and integral QD sling mounts.
- Weight: 8.0 oz.
- Weight, w/receiver extension: 12.0 oz.
- Length, max: 6.9”
- LOP Adjustment Range: 3.3”
- LOP, M4 Collapsed: 10.7”
- LOP, M4 Extended: 14.0”
Most Affordable Pistol Setup
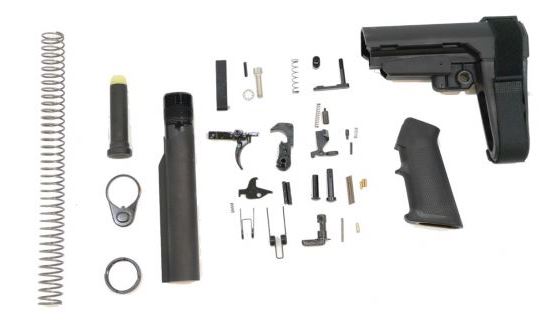
Pistol braces are more expensive than buttstocks. If you’re opting for a pistol build, the PSA Pistol Lower Build Kit, which includes a parts kit, buffer assembly, and SB Tactical pistol brace, runs around the $190 price point. The kit is a standard PSA buffer and parts kit, and the brace is shaped to fit this rifle tube. Stand-alone braces usually run $120 or more, so this represents a cost-savings by bundling all parts together.
Selecting a lower receiver, buffer assembly, parts kit, and choice of buttstock or brace completes all components for the lower half of your AR build. With our suggested rifle configuration, this build comes out to around $220. With an upgraded latch plate, we’re close to $250.
If you’re happy with the configuration provided above, PSA sells the entire lower rifle assembly installed and ready to fire for around $210. It swaps out Magpul’s MOE buttstock for an M4-type stock, saving around $10. Sticking to a $650 budget, that leaves us with almost $400 for the upper receiver.
Building the Upper Receiver Assembly
With your lower receiver now complete, you can opt to buy an upper receiver fully assembled and ready to snap on to your lower, or you can continue your build to the next level.
Option #1: Buying an Upper Receiver

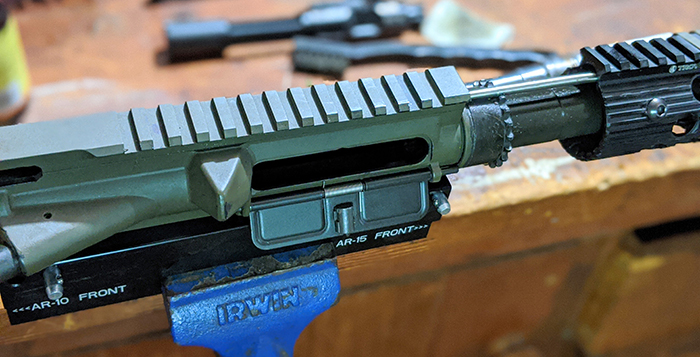
When it comes to building a standard rifle, you needn’t spend much time deciding on an upper receiver configuration if you don’t want to. The 5.56 NATO cartridge enjoys optimal velocity and stability with one type of barrel setup, and this is the most common barrel you’ll find on any AR-15. It’s also the most important part of the upper assembly. All other factors affecting the price and configuration of the upper (handguard, front sight, muzzle device, bolt carrier, and the stripped receiver) are simple matters of preference and comparing price tags against options and extra features.
Keeping things incredibly simple, this PSA M4 Upper with a nitride-treated 16” barrel, carbine gas system, and 1:7 twist rate effectively clones the current setup found on military-issue M4 rifles. It provides consistent performance with any 5.56 NATO or .223 Remington load, and sports a classic two-piece M4-type handguard and M4 railed upper. The A2 muzzle device is removable if you want to upgrade, and the FSB provides a simple and effective front iron sight and gas block in one unit. Its price can’t be beat, coming in at just $270.
That caps your budget PSA AR build at just over $500, for a rifle that is entirely mil-spec and on par with an M4 (minus the full-auto). If you first want to get a better understanding of the different parts and optimal specs you want in an upper, keep reading.
Option #2: Building an Upper Receiver
Let’s cover each part of the upper assembly in detail. We’ll suggest which components to purchase, too.
Picking the Perfect Barrel

The barrel is the heart of the AR build. It determines how accurate your rifle is, how hard the recoil hits back, and what type of loads you’ll shoot most often. The important specs to consider are overall length, gas system length, twist rate, type of steel, profile, and coating or treatment.
VERY IMPORTANT: When selecting a barrel, be sure the barrel incorporates the improved M4 feed ramps. This feature replaces one feed ramp in the center bottom of the barrel extension with a pair of side-by-side feed ramps, a setup that performs far more reliably with the AR’s staggered magazine feeding system.
Length (Best: 16”)
Length is easy: All 5.56 NATO guns should stick with a 16” length barrel for rifle builds. Anything longer provides negligible velocity gains, and anything shorter requires a pistol configuration.
Gas System Length (Best: Carbine or Mid-Length)
Gas systems required for the standard rifle configuration are carbine and mid-length. If you’re in favor of lighter felt recoil and don’t ever intend to shoot subsonic ammunition suppressed, the mid-length system is the best choice. Carbine gas systems are required if you’re ever shooting low-power loads or subsonic ammo. Many AR owners still favor the carbine gas system for its guaranteed reliability when running a dirty or dry gun, and the increase in felt recoil is negligible.
Twist Rate (Best: 1 in 8)
Twist rate determines what bullet weight your loads will use. The 5.56 NATO cartridges available at most stores or online retailers comprise 55-grain and 62-grain cartridges. If you’re opting for precision shooting, 77-grain Sierra MatchKings dominate the market. It is these popular loads that influence your AR’s twist rate the most. If you want to shoot regular ole’ ammo, you’ll be sticking with XM193 55-grain loads, and these work best with a 1:9 twist. This twist rate also manages heavier 62-grain M855 loads.
If you want to shoot 62-grain steel penetrators and occasionally shoot match loads, a 1:8 twist rate is best. This rate also provides the best compromise. It stabilizes most 5.56 NATO loads on the market, including both 77-grain and 55-grain loads. If you’re shooting exclusively match loads and specialty rounds that weight 87 grains or more, you’ll need to stick with a 1:7 twist rate. This twist rate is still used by the military and manages lighter loads with acceptable accuracy. Older barrels or varmint hunting oriented barrels will frequently be seen with 1:9 twist barrels, which is a solid performer if you shoot 55-grain or lighter bullets.
Barrel Steel (Best: 4150 CMV)
The barrel steel used for most AR-15s is 4150, also called CMV, or Chromoly Vanadium. This steel most closely matches the alloy used in service-issued M4 and M16 rifles. It provides excellent resistance to heat and weather, can sustain rapid and fully automatic fire, and it provides a long barrel life. Softer 4140 steel was once used to save cost, but it is a softer steel that may not produce a barrel as accurate as 4150.
For shooters who love stainless steel, Crucible 416R stainless is the only steel you should consider. Standard 416 and 410 stainless can suffer from material imperfections and are at risk of suffering damage when used in extreme cold.
Profile (Best: Varies by use)
The profile of your AR’s barrel determines its exterior shape. The “Government” profile you see on the barrel above is the same cut as a military-issue M4. It provides rigidity, reduces weight, and helps to dissipate heat near the muzzle and gas block. (it also provides a mount location for an M203 grenade launcher, if that happens to be your thing.) “Bull” barrels are favored for bench shooting and accuracy, and lightweight or “pencil” profiles are favored for ultra-light builds.
Coating or Treatment (Best: Nitride)
Nitride is the favored barrel treatment for most ARs today. This chemical treatment is applied to the entire barrel, including its rifling, to improve barrel life and protect against rust, corrosion, and carbon and copper fouling. Chrome-lined barrels with a Phosphate exterior coating were once popular, but the introduction of Nitride – which is more effective and less expensive – has reduced the market size for chromed barrels. Unless you’re the rare shooter shooting rapid or full-auto frequently, a nitride barrel will outperform chrome lining. Stainless barrels are not coated nor treated.
For another idea, check out Converting .223 Rifle to .300 Blackout in a Few Steps.
Picking a Stripped Upper
The stripped upper for the AR-15 is, like the lower parts kit, almost entirely standardized and universal for every rifle and pistol, regardless of make, caliber, or cost. That means you get to enjoy picking the most affordable unit you can find. More expensive stripped uppers come with optional features or their higher cost is baked into aesthetic touches like custom engraving. The primary spec to look for here is whether the upper includes M4 feed ramps.
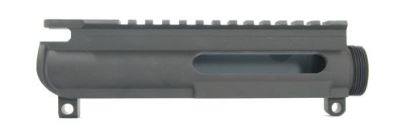
Want super cheap? The “Slick Side” upper is the cheapest stripped upper you’ll find. It’s also the simplest, lightest, and strongest, and is favored not for its low cost but its low weight and aesthetic. The slick side is forged and has no ejection port dust cover, no brass deflector, and no forward assist. At $60, it’s the least expensive upper available just about anywhere.

Want something properly mil-spec, but still cheap? The PSA Complete Upper again clones the M4 in its form and function. For around $80, it comes with all the M4’s standard features (dust cover, deflector, and forward assist) and is also made from forged 7075-T6 aluminum. Both uppers have M4 ramps, sport a mil-spec anodized finish, and provide the same fitment and compatibility with your bolt carrier, lower receiver assembly, handguard, and barrel.
Speaking of bolts…
Picking the Right Bolt Carrier Group (BCG)

Lucky for us again, the AR’s bolt carrier group is standardized, and more expensive units don’t provide any measurable performance benefit. “Commercial” or AR-15 bolt carrier groups are lighter. Heavier M16 or Full-Auto BCGs provide a small reduction in felt recoil and are generally more reliable. There is no reason to pick a commercial carrier over an M16 carrier; they often cost the same.
Nickel boron-coated (NiB) BCGs run more smoothly, so to speak, but they cost up to twice as much as a mil-spec BCG like the PSA Full-Auto shown above. At just around the $100 price point this mil-spec bolt carrier is one of the most affordable units on the market. It is a reliable, heavy-duty M16 unit that’ll take plenty of abuse – probably more than you can throw at it. Like newer barrels, this BCG ditches the older phosphate coating for a nitride treatment to protect against fouling, debris, and rust.
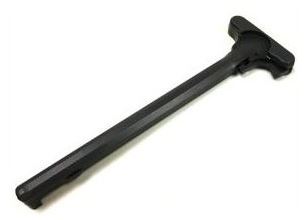
Charging Handle
The K.I.S.S. principle applies here, too. The PSA billet charging handle is only a couple bucks and fits any BCG and upper receiver. If you want to spring for some extra bells and whistles, PSA’s ambidextrous charging handle makes reloads a tad easier for lefties.
Gas Block & Tube
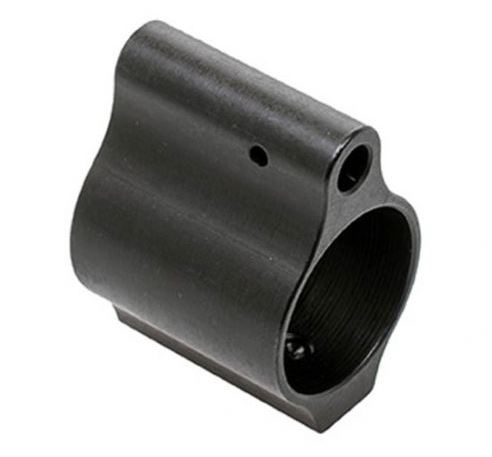
The gas block and gas tube perform a relatively simple job: Get gas from the barrel to the bolt. Modern gas blocks, unlike the FSB shown on that assembled upper in option #1, are low-profile and lightweight. They tuck under your handguard to provide additional rail space and length. The modern gas tube is universal and is almost exclusively made from stainless steel. The only major decision to make is whether you’ll purchase a fixed or adjustable block. An adjustable block allows you to tune your gas system for higher or lower energy (and thus, more or less felt recoil).
This CMMG Low-Profile Block is around $35 and fits any standard 5.56 or .223 barrel. It maintains a 0.750 port, which is also the typical port diameter on AR barrels. It’s fixed, so you miss out on adjusting for recoil.
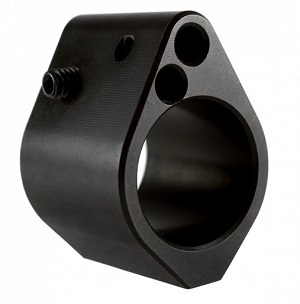
Alternatively, you can opt for PSA’s Adjustable 0.750” Block. We strongly recommend it. The extra cost is minimal and you’re getting the ability to tune for felt recoil. You can accommodate low-power cartridges if the need ever comes. It reduces gas pressure and wear-and-tear on your bolt and receiver and allows you to improve shot placement and groupings accordingly. Adjusting the gas system is completed with an Allen key. The block features an exhaust port that diverts gas away from the gas tube and bolt when a set screw is turned. It makes for easy on-the-fly adjustments.

The gas tube needs little discussion. Grab a mid-length tube or a carbine-length tube depending on what choice you opt for when picking your barrel’s specifications. Either tube costs around $12 to $15, which is on average for most gas tubes. PSA’s tubes are nitride-treated, which is a nice touch.
Choosing a Handguard
Picking a handguard depends primarily on the type of rail and accessory attachment system you prefer to use. We’ll keep it simple here, too: You should avoid Keymod rails. They were tested repeatedly by SOCOM and other communities. Both M-Lok and Picatinny were found to be superior. Picatinny rails provide the most “rail estate” and provide the strongest connection between rail and attachment. M-Lok rails are incredibly lightweight, tough, and comfortable. This writer recommends M-Lok above all else.

PSA’s branded free-float M-Lok rails provide a great option for around the $100 price point. For most builders sticking to a 16” barrel, the 13.5” rail (which includes a Picatinny mount for a front sight) is perfect. It’s also their most affordable rail, making it a great choice for this budget build.
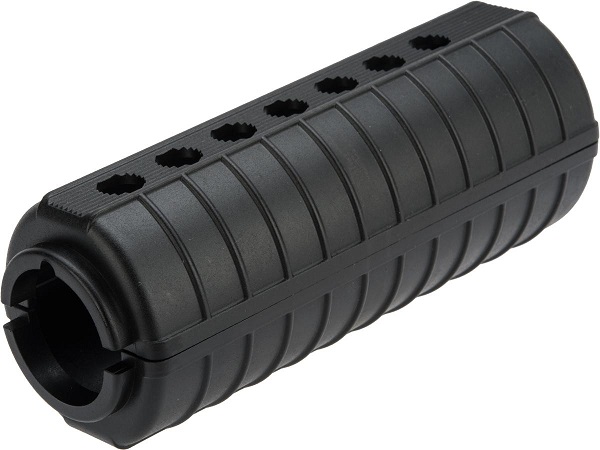
Of course, we have to give you the cheapest choice. If you’re going for full simplicity and low cost, PSA does offer the M4’s original handguard for a whopping $6.00. The mid-length version is available here. These handguards only work if you opt for a government-profile barrel and stick with the military-type FSB for your gas block and front sight.
Don’t forget Magpul here, either: the stellar $30-ish MOE handguards slip in the Delta ring locking system just like a standard ribbed mil-spec handguard, but offer M-lok mounting locations at 2 o’clock, 6 o’clock, and 10 o’clock positions. The mildly triangular shape is superior ergonomically as well.
Building a Low-Cost AR-15 with PSA Summary
With the parts we suggested in this guide, you can easily configure an AR-15 chambered in 5.56 NATO that’s reliable, lightweight, accurate, and most of all, affordable. If you want to venture out and browse different parts, then simply click the links below to locate components:
To quickly recap, these are the top specs to consider for a reliable, mil-spec rifle:
- Barrel: 4150 carbon or 416R stainless; 1:8 twist; 16” length
- Gas: Carbine or Mid-length
- Rail: M-Lok or Picatinny (drop-in or free-float)
- Upper: Forged, “Slick Side” or M4-type
- Lower: Forged or “mil-spec”
- Parts kit: Mil-spec
- Buffer: Carbine or “H”
- Tube: Forged or “mil-spec”
Optional upgrades that are small, affordable, yet add real value to a budget build include:
- Sling adapter/latch plate combo
- Drop-in enhanced trigger assembly
- Adjustable low-profile gas block
Building an AR Pistol
We wanted to take a moment to discuss pistol builds because they’ve grown wildly in popularity as a legal alternative to an SBR. If you want to build an AR pistol, you’ll need to make sure it DOES NOT:
- Have a buttstock installed
- Have a vertical forward grip
Installing either of these two items on an AR pistol constitutes making an SBR, which is illegal without some very involved paperwork and the ATF. To configure an AR pistol for optimal performance you will need to pursue the following specs:
- Barrel: 4150 carbon or 416R stainless; 1:7 twist, 11.5” length
- Gas: Pistol-length
- Rail: M-Lok or Picatinny (drop-in or free-float)
- Upper: Forged, “Slick Side” or M4-type
- Lower: Forged or “mil-spec”
- Parts kit: Mil-spec
- Buffer: Carbine only
- Tube: Forged or “mil-spec”
Pistol builds require a pistol-length gas system. A Carbine or longer gas system will cause the bolt to experience short strokes and failures to feed and eject. The minimum barrel length required for 5.56 NATO to enjoy meaningful accuracy and power is approximately 11.5”. You can pursue a build with a barrel as short as 7.5”, but you will experience noticeable drops in muzzle velocity and maximum distance. Most AR pistols with an 11.5” barrel can still ring steel at 200 to 300 meters. A barrel length of 7.5” will afford accuracy within 100 meters. PSA’s assembled pistol uppers can be found here.
What’s next?
If you’ve begun ordering parts or are finishing a build, it’s time to get your rifle sighted in and ready for the range. Check out our bore sighting guide for 5.56 rifles and check out some of our recommended components for improving AR-15 accuracy.
You should find this post very helpful. If you want more detailed specifics about your AR-15, see the AR-15 Rifle Builder’s Manual: An Illustrated, Step-by-Step Guide to Assembling the AR-15 Rifle and Steve Markwith’s Centerfire Rifles: A Buyer’s and Shooter’s Guide (Special AR-15 Section Included).
Have you built an AR-15? What worked or didn’t work for you?

5 comments
Do you have these in a kit that I can buy it all at one time
Yes, but you will still need to buy the stripped lower. Look at the kits here: https://bit.ly/3mtStYt
Great article. Question I have is, if one buys the 80% lower receiver does it come with detailed instructions on how to finish it? Your article said all is needed is a drill press. Is that accurate? Thank you
Thanks for your question, Russell. Different manufacturers might have different components or guidelines. I’d suggest reaching out to the folks at https://www.80-lower.com/ and asking them directly. I don’t want to give you the wrong advice. Please tell them SHTF Blog sent you and thanks for visiting.
So if you buy a kit , it’s automatically an nfa item? On PSA all their kits I looked at say they are nfa items. I was under the impression that an AR pistol wasn’t normally an NFA gun. It’s confusing