I don’t know about you, but I always get a laugh out of those dystopian stories where survivors are dirty and ragged just a month after whatever cataclysmic event occurred. I can understand being a bit worse for wear if water for bathing and clothing washing is scarce but ragged? Really, does no one know how to use a needle and thread anymore?
by Jolina Flowers, SHTFblog’s Expat Prepper
And that’s what we are going to discuss in this post, how to use a needle and thread to do basic repairs to your clothing. Not only is this a skill that will come in handy after an SHTF situation, but hand stitching can make your clothes last longer in normal instances, creating a greater sense of self-reliance and saving you money. And in today’s COVID-19 world, you might even find yourself looking at cloth mask effectiveness for a pandemic.
You don’t need to set out to learn all of these skills today for a potential post-SHTF situation, but at least being aware of the necessary supplies and types of stitches should get you set up for extending the life of your clothes. In fact, I would advise you print this post off and stash it with an emergency sewing kit in your stockpile of preps!
What to Keep in Your Sewing Kit
First, let’s talk about what very basic supplies you should have on hand. There’s no need to rush out and buy everything to become a professional seamstress, but buying a very basic sewing kit will go a long way and pay for itself many times over if used for repairs. They don’t take up much space and can fit within even a compact survival kit.
If you choose to make your own kit, you’ll need the following items.
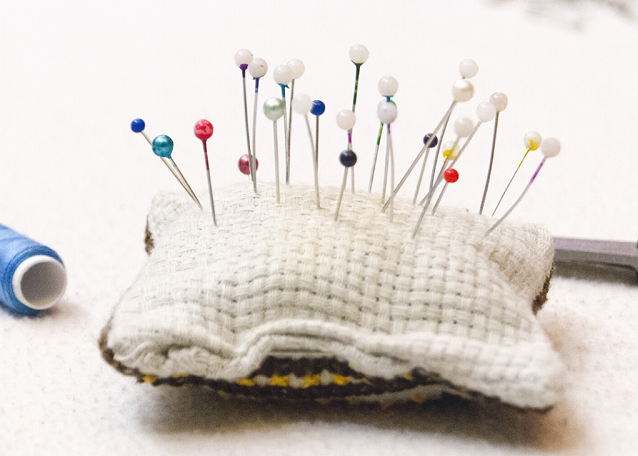
Needles and Pins
In order to sew, you’ll need needles. They come in a variety of lengths and sharpnesses. You’ll want what are known as “sharps” needles. Sizes 2,3, and 4 are best for medium to heavy fabrics while sizes 5-10 are fine for light to medium fabrics.
If you have leather, heavy canvas, or suede items in need of repair, it’s best to invest in a leather stitching needle. Other types won’t be up to the task, and you’ll want that leather jacket functioning if you’re to become the next Mad Max of the post-apocalyptic world!
Although not essential, a needle threader will save you time and effort. Threading a needle isn’t as easy as it looks, and this nifty little device will substantially cut down on the frustration level.
You’ll also need a set of straight pins to hold the pieces of fabric together while you stitch. I prefer pins with a larger round head so I can keep track of the pins better, but it’s not really necessary. Again, these sewing notions come in a variety of lengths. Longer pins are usually thicker and work better for heavier fabrics. Seamstress or dressmaker pins are fine for light to medium fabrics.
You should also have a pincushion of some sort to keep all your pins and needles in one place. You can find simple instructions on the internet on how to make your own. You could also use a small box with a magnetic in it for storage as well.
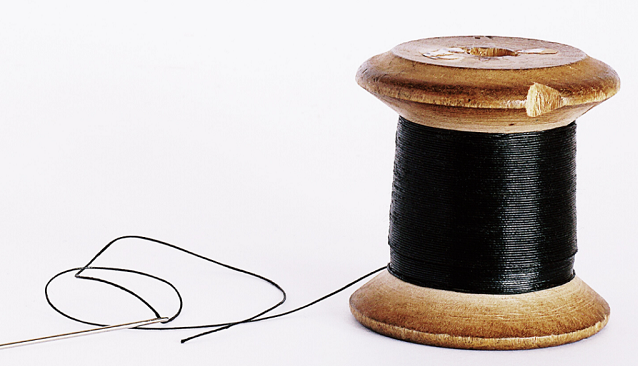
Thread
You don’t need 60 spools of thread to do simple repairs. A spool of polyester or all-purpose thread in black and another in white might be all you require. If you prefer that the repair isn’t as noticeable, by all means, get a spool of thread that matches the garment.
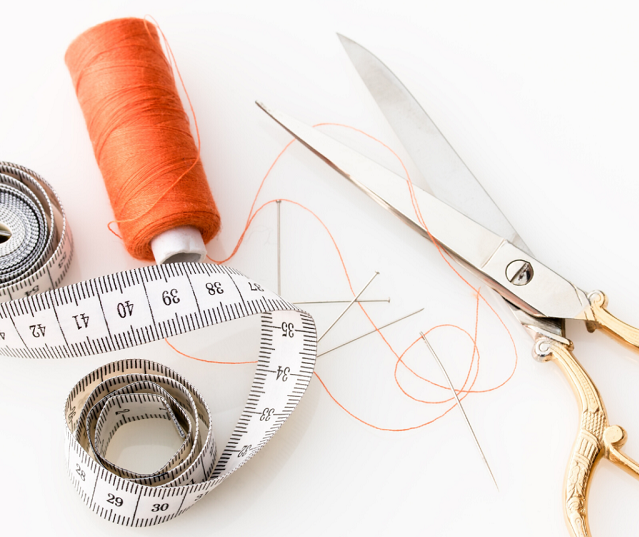
Scissors and Seam Ripper
You might be able to get by with a pair of kitchen scissors, but having certain types of shears for sewing can make things easier. Dressmaker shears are great if you are cutting large swathes of fabric. A pair of small but sharp scissors like embroidery scissors are best for snipping threads. Pinking shears cut in the fabric in a zigzag which keeps the ends from fraying.
A seam ripper is also a helpful mending tool. Sometimes you’ll need to take the old stitches out to replace them with a new line. Using a seam ripper will reduce the tension on the fabric and help keep it from tearing as you remove the thread.
Sewing Tape Measure
A sewing tape measure is useful not only in making sure a hem is straight, but measuring for inseams and other body parts because it is made of flexible plastic. You can use a fixed ruler or construction tape measure in a pinch, but your results won’t be as accurate.
Basic Sewing
Now that you have the basic materials, let’s talk about how to do some basic repairs.
How to Thread a Needle
- Before you even attempt to thread a needle, take a look at the end of the thread. If it is frayed or uneven, snip it clean.
- Hold the thread between your thumb and index finger near the very end.
- Push the eye of the needle onto the thread rather than trying to get the thread through the needle’s eye.
- Once it’s through, pull it so that it’s the amount of thread you think you’ll need for the repair.
How to Thread a Needle with a Needle Threader
- Snip the end of the thread so that there is no fraying or unraveling.
- Slide the needle threader into the needle’s eye. Now you’ll have a large area to aim for.
- Next, pinch the thread between your thumb and index finger. Bring the needle threader towards the thread and push it through.
- Now, pull the needle threader back through the eye of the needle and the thread will follow.
How to Knot the Thread
You need to knot the end of your thread length, otherwise, you’ll pull the thread all the way through the fabric and no mending will be done. An unknotted finished stitch will also come undone.
Before Mending
- First, cut off the length of thread you think you’ll need, making a double strand of thread after the needle has been threaded.
- Next, wrap the ends around your finger several times.
- Finally, roll your finger out of the circle of thread and pull the knot tight.
After Mending
- Leave enough thread after the repairs are made to tie off, between two and three inches.
- Loop the thread with the needle to make the knot, keeping your finger on the thread where you want the knot to be.
- Pull the knot tighter, using your finger to position the knot as you pull.
- Snip the excess thread.
Basic Stitches
The following are simple stitches that are useful for basic clothing repair.
Running Stitch
- Start from the underside of your fabric, so that the knot is not noticeable.
- If you are making a seam, you can fold the material like a fan so that the stitches and gaps between the stitches are roughly the same size. Larger stitches are looser and may catch on things and rip, so try to keep the stitches somewhat small.
- Run your needle through the folds and pull it through.
- To finish off the stitch, make a small backward stitch and run the needle through the loop before tightening. For a stronger knot, repeat this several times.
Backstitch
- The backstitch can be used when the mending is visible. It’s neat and simple.
- Start from underneath and make a stitch.
- Now come up again the same length as your first stitch.
- Stitch back, inserting the needle in the same hole that you came up in.
Whip Stitch
- Whip stitches are great for holes or seams.
- Start by making sure the knot of your thread is between the two layers you are sewing together so it won’t be seen.
- Go over the top of the seam with your stitch.
- Continue the over-and-under-stitching with the stitches running parallel to each other.
- Knot off between the two sides of the fabric.
How to Sew on a Button
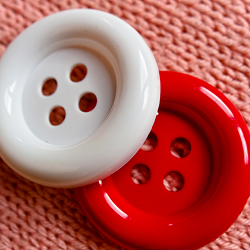
- Begin with a double threaded needle with about 12 inches of thread (24 inches in total).
- Knot the thread.
- Starting from the back, make an X with the thread where the button will go. If you look carefully, you can typically see small holes where the button threads were before. Aim to get the X in the same place so that the button will line up with its buttonhole when you are done.
- Position the button.
- Coming up from the back, push the needle through one of the holes. Pull the thread through all the way, keeping your finger on the button.
- Turn the needle around and push it through the opposite hole.
- Come up through another hole and repeat the process at least 6 times.
- When you are ready to tie off, come up from the back as if you are going to go through the hole again, but instead come up underneath the button.
- Wrap the thread several times around the threads at the base of the button, underneath it.
- Push the needle back through the fabric and tie off the thread.
How to Hem
Hemming is a useful skill. Not only can you alter your own clothes so that they fit better, but you can repair ragged hems so that your garments last longer.
- Begin by taking your pinking shears to even up the hem. The pinking process also reduces fabric fraying.
- Next, fold up the hem and fold it up a second time so that the bottom edge is neat and even, hiding the raw edge.
- Use straight pins to hold the folds in place.
- Use your tape measure to make sure the hem is even, adjust as necessary.
- Start your needle between the two layers of fabric so the knot isn’t as noticeable. You can use the whip stitch or a running stitch for hemming.
- Knot off the thread and remove the straight pins.
General Tips
- Remember to turn your garment inside out and do the mending from the inside for less stitch visibility.
- If you want to hide the repair even more, use color matching thread or invisible thread. Invisible thread is more difficult to work with, but the stitches are not noticeable.
- Remember to cut off any loose threads to keep them from getting caught and ripping.
- When you have a jagged edge, use pinking shears to make an edge that won’t fray as much.
- Fold under the jagged edges of the material before stitching to make a neater repair.
- “A stitch in time saves nine.” Immediate repair keeps the hole from becoming massive, meaning more stitches.
In summary, if nothing else, buy a basic repair kit and print this post off. Store the paper printout with the kit. It’s not expensive and it could pay off in a big way WTSHTF.