This is of special importance to me since I live in fire country. Every year the threat rears its paranoia inducing head and forces me to look at my wooden dwelling as a potential hazard. No matter where you live, there is always a natural disaster threat. Although this one pertains to all who live in a wooden house, no matter where it is. Just because you live in a swamp doesn’t mean you are excluded. Since humans keep building wood homes, fire is always a problem.
If you use wood to heat, chimney fire. That can take all your belongings as quick as a wildfire. As we discuss the ways to help keep your home safe from forest fires, all of them can be applied to protecting it from riotous mobs too. It is not much of a stretch to imagine a group who would be willing to burn you out if you didn’t let them have what they want. History is full of such tales (click for details).
Step 1

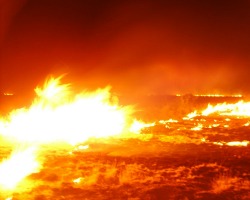
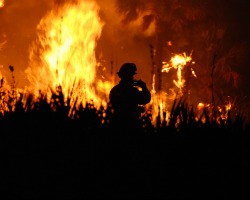
You need to understand how houses catch fire from the outside. We have all seen pictures or video of a charred hole in the ground that used to be someone’s home and the trees next to it still green and standing. How can that be? It takes a lot of energy to cause a green healthy tree to burst into flames, not so much for a dry wooden home. I cut down trees all summer long, thin them out, create a healthier forest, promote diversity, it is good to do, but the home still needs work. When a forest fire is raging through an area, it creates a lot of embers that spread their wings. An ember can travel over a mile and start up wherever it lands if it has fuel and air.
You can have the nicest plot around your home, but you are still subject to the whims of the forest beyond that is overgrown, dry and ready to explode. When those embers fly to your home, will they find wooden decks? Firewood piled up next to the house? That pile of priceless artifacts that you hope to do something with, someday, that are heaped next to a propane grill? Those embers will hit a vertical surface and drop, looking for fuel to stay alive. They are alive and don’t care if you are nice person or not. Stephen King couldn’t write a better terror novel.
Step 2
Now that I have your attention, what can you do? Clear all flammable materials away from your perimeter. Some groups, municipalities, insurance companies will say having a 6’ ‘skirt’ is a good starting point, and I agree. Further is better. If you can keep all unnecessary items 20’ or more away from the outside wall of your home, you get a brownie point. When deciding how far is far enough, imagine that pile of wood catching fire, how hot could it get? Would it get hot enough, with the right winds, to break that window due to heat? That window shatters and embers enter the home, bye-bye house.
Step 3
There are safety films on the market that can be applied to your glass. These films won’t keep your window from shattering, but they can keep the glass in place. That would be a great benefit if the heat gets close to your house, one less entry point for the devil. The bonus is that films can be tinted, for privacy or UV protection. And, those same films make it hard for thieves to gain entry. Your windows are the easiest way to gain entry into the house and one of the easiest problems to fix.
Step 4

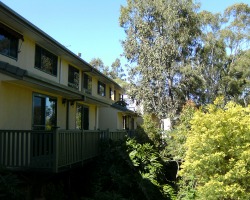
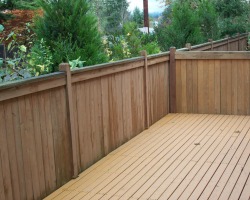
Back to your decks and porches. Stand on your deck and look at your home. If you were a spark and flew at the house, where would you land? Is that area made of dried deck boards? One or two sparks does not a fire make, but how about a few hundred. This step might be the most expensive or frustrating of them all. I have no silver bullet to solve this one. You could get rid of the deck, ground based ones can be replaced with a stone patio, problem solved. It’s those second story ones that can give your heartache. I have replaced my cedar based decks with fresh treated joists and synthetic boards, it was pricey and not even fire-proof, but it is fire-resistant. It would take a lot of embers to start it up. The best woods out there to build a fire resistant deck with are expensive and are probably being illegally harvested to death.
Here are a few:
1) IPE (Brazilian Walnut), Lapacho. My friend gave some pieces to play with and it is very dense. You would need a blowtorch to set it ablaze.
2) Cumaru (Brazilian Teak) and Southern Chestnut
3) Orange Tree, yep an Orange Tree. If Florida continues to lose orchards then maybe there will be a surplus supply.
When replacing those decks remember to use galvanized flashing vs. aluminum, it is much more effective in reducing heat transfer if those pesky embers make it down that far.
Step 5
Clean your gutters. If you have wood shingles, well that’s another big job. Metal is king, but there are some architectural grade asphalt shingles out there, that are 50 year rated and are damn near fire proof.
Step 6
If you have an older home with an attic, does it have vents? Those vents that promote air flow in the summer to vent heat out, also give embers an avenue into the top of your dwelling. Cover them with steel or aluminum screening, the finer the better. Check out Vulcan Vents (click here)
Let’s Wrap It Up

Now that I have found a way to spend your retirement money, look at it this way, if you lose your home and all it contains, can you recover? Emotionally, financially, and spiritually. There is more to a home than stuff, there are memories, a place to gather, and a legacy for your beneficiaries. Next to your mortal life and family, there are fewer things more worth protecting.
Lastly comes your trees and vegetation around the house. Trim up lower branches that can let ground fires spread into the trees, ladder fuels. 2’ to 3’ tall dried grasses can create a wall of flames 8-10’ high, keep them cut down. Some people say that
“limbing” your trees up to 12’ is the way to go. I think that is excessive, but your terrain, type of vegetation and tolerance for a State Park look determine the height. I like to start with 6-7’. That makes it easy to walk through the trees without bashing your head. Remember, you can always take more, but once they are removed you can’t put them back. That goes for your trees too. If you open up the forest too quick you are more susceptible to blow down. Let the trees get used to the wind and spacing slowly. Crown spacing is what your end game is. If the trees are touching each other, fire can spread more easily. The forest didn’t get crowded over night and you can’t fix it in one season. Do a little every year and the result will be better and you won’t be shocked by the new look.
The Proof
Back to the problem of angry desperate mobs. Having a line of sight through the trees is crucial. What you give up in privacy is the price you pay for safety. This is a tough one for me and I continue to look for a balance. If you look at your property like a crook, a fire, think like the enemy, you will find things to fix.
Photos By:
US Fish & Wildlife Services
Santoshvbhosale
Gert Stobbe
Colin Shackelford

15 comments
Thanks of the informative post Pineslayer.
Around here, your words are a fact of life. In fact we have already had our first fires, and ironically one even threatened a 7100 foot high ski resort in March!
https://www.washingtonpost.com/news/post-nation/wp/2015/03/29/montana-wildfire-continues-but-evacuation-lifted-for-ski-resort/
Weird.
Unless you’ve been around a forest fire, you cannot really appreciate its hell-bent intensity. There is simply nothing you can do about it once its in your face. So as you noted the only chance of success is to prepare for the inevitable by doing what you said.
Carry on.
The deck is the most difficult part. It may be possible (if the deck is small enough) to cover it in decorative patio stone. Get the thin stuff not the walking path behemoths. This way you have removed the giant landing zone for embers.
The deck is the most difficult part. It may be possible (if the deck is small enough) to cover it in decorative patio stone. Get the thin stuff not the walking path behemoths. This way you have removed the giant landing zone for embers.
Stupid question: How about a cheap sprinkler system? When you hear or see a fire turn it on. Might just be enough to buy you time.
Well JohnAmmo, I do have a sprinkler system and back-up gennie. We can soak the area out to 30′ beyond the house. The chink in this armor is that we can’t soak the sides of the house, in other words, the places where embers will hit the house and fall down. All those little crevices are hard to get to. I have thought about more sprinklers aimed at the house or sprinklers under the eaves all around. The other system out there is a foaming system, very cool, very effective.
I’m not an arborist, nor do I play one on TV. And I didn’t stay in a motel last night. That said, while cleaning up the lower part of our trees is strongly recommended by our local fire department, your readers should remember to be careful limbing trees for fire safety or for any reason…it can be done without harming the tree, but there are caveats to respect.
Removing any limb can unbalance a tree’s nutritional system, and it can take a while for the organism to re-balance and recover. Cutting too many limbs at once, especially the large lower limbs of significant girth, can stress the tree to the point of sending it into shock, and possibly killing it.
Any limb cut will expose the tree to invasion from insects. I can offer no proof of efficacy, but when I have to cut limbs on my now 20′-30′ juniper trees, I use Rustoleum “Anodized Bronze” spray paint (because it’s a good color match…other colors may work better on different species of trees) to coat the wound on the trunk. That does 2 things: it immediately adds a layer of protection from invasion by bugs while the wound can dry out out naturally, and it blends in the colors so the raw cut isn’t obvious. Seems to have worked well here for the past 24 years…haven’t lost a single tree to bugs. (Yes, I know this sounds like “elephant powder”, and maybe it is. But the aesthetic effect alone has made it worthwhile for us to keep painting the cuts and wounds all these years.) FWIW.
This article failed to address an enemy wanting to burn you out, hopefully, your next article will do so! Please! On the subject of wooden patios/porches, is there any DIY coatings/products to basically make the wood fireproof? There are few trees where I live, it is usually quite dry and windy, though the weeds always seem to do quite well! So a grass/weed fire is a very real possibility. Short of a scorched-earth area around the abode are there any other inexpensive methods of reducing fire danger from a fast-moving grass/weed fire? Short of a home made entirely of brick or other fireproof material (I wish), there seems to be little one can do to stop deliberate arson, except maybe keep the would-be arsonist at a good distance, long-range firearm, anyone!
Good article, esp. relevant since Southern California has already (April 2015) had several wildfires to contend with.
One area on houses that can also be prone to fire that we’ve seen in the last few years is under the eaves of the house; fire or embers get blown up against the wooden eaves and eventually ignite it (as well as through the vents already mentioned).
Exposed wood can be protected from fire with Intumescent paint
FireFree 88 is the benchmark product in this market segment.
https://www.firefree.com/
Please note it often takes two coats to achieve 1 hour rated protection. We have heard that this product should be top coated with an exterior grade paint. In my experience I have had best results with Behr Ultra premium as a final coating.
There are may other means of hardening your home.
Please feel free to contact us at http://www.hardenedstructures.com
re:DIY wood fireproofing
Durabak epoxy coating, you can get a “char” additive that will put out a fire if the paint lights up. I have used the reg. durabak to do a Willys Jeep.
https://durabakstore.com/collections/coatings/products/durabak-18-m26?variant=924232559
Fire is a huge threat out west. This year we have gotten a lot of rain but it is always on everyone’s minds and it only takes one dry season for the whole forest to become a tinder box.
As the SN induicates we are fairly deep in the bush. Climax PJ mostly.
As stated the best defense is naked ground out to 30′. I’m a little anal about it having been raised in the chapparal of SoCal.
I am out 60 to 80′ in places, have a metal roof, bowed evers and water aplenty.
But, one a big burner gets a leg under it, everthing becomes a crap shoot. So, this year I am installing some “chicken house technology” I don’t think it will be too expensiveor complicated and not overly ugly.
In California chicken ranches use roof sprinkler systems to lower the lay house temperature in summer. They use recirculating pumps to save water, but for my needs I want to spread that aound. I will use a spare storage tank, a pump and a line of sprinklers on 12″ risers down the ridge line of the roof. Then, when the fire gets close enough for embers to be flyin’ I will activate it.
Fire moves fast in this country so if I can get a good drenching effet for 30 minutes or so, I should be past the worst of it.
It ain’t “if” it’s “when”.
SORRY! A case of ‘first cup spelling”
Not bowe evers BOXED EVES
We have been on level 1 evac notice for three weeks and some of our neighbors have been at level 3 and had to evac. We’ve been watching the fire off our deck from the very first plume to now 60,000 acres. We keep barrels and buckets on and around our deck and porches and run sprinklers off our deck and all around our close in property. The fires are being fought and luckily we have had rain for three days, not hard rain but anything right now has helped out. You need to maintain a steady vigil about keeping things wet and staying close. We hope to add three 6600 gallon tanks on our hill this next year and a system to cover everything that can’t grow back. A sad note: we lost three firefighters this year just down the road. It has been a rough, hard few weeks and we thank our Lord for the men and women who put themselves in harm’s way to protect people and property. Just like our military folks, when you see a firefighter, thank them for what they do. Stay prepared my friends.
awesome pos,t like it !! please read the article about epoxy too https://www.ahlibeton.co.id/2015/09/epoxy-lantai.html
Epoxy Paint SL (Self Levelling) be an option if you want to show the effect of gloss on the floor. Especially for the top coat, paint the floor produces two kinds of effects: glossy and semi-gloss or matte https://www.ahlibeton.co.id/2015/09/cat-lantai-epoxy.html