Knowing how to shoot clay pigeons is not as complicated as it might first seem. A little bit of instruction will go a long way (and save a lot of wasted money). Proper instruction from the outset will also help prevent bad habits that are difficult to correct later on.
Backstory
Dawn had barely broken when a mallard streaked into view – a low quartering incomer, headed toward the decoys. I swung through and fired, splashing the drake in the marsh. As the dog paddled out for a smart retrieve, for some unexplained reason, the front sight of my shotgun caught my eye.
Turned out the red fiber-optic element had departed, leaving just its steel retaining ring. At that point, my hunting partner broke the news: It had been gone for at least a week. So much for powers of observation.
The bad news was I needed a new plastic element. The good news was, we’d chalked up three productive hunts and, if anything, my shooting had improved. The reason? When it comes to flying targets, deliberate aiming is the formula for a miss.
Consistent hits require sharp focus on the object in flight! But I’m a better aimer than a pointer. With that bright red bead no longer visible, the ducks, rather than my barrel, received attention. And then, sorta like throwing a football or a dart, wing-shooting became much more intuitive.
4 Key Steps in How to Shoot Clay Pigeons
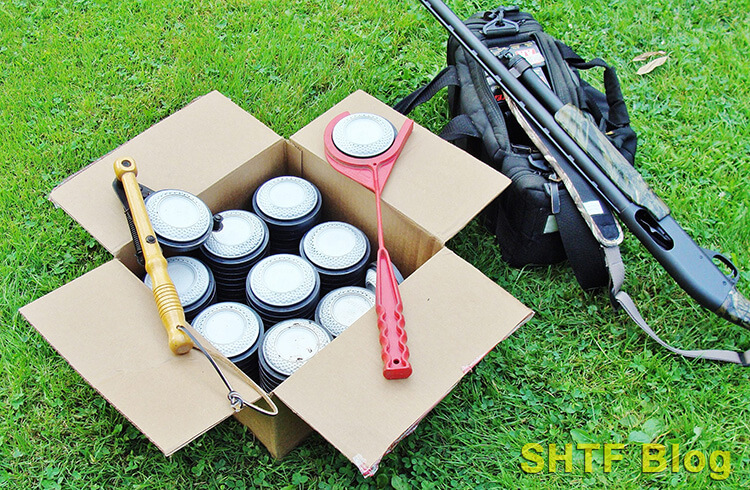
Successful clay pigeon shooting is going to require some supplies, there’s no way around that. In addition to plenty of clay pigeons and ammo, you’re going to need a thrower. There are a few different throwers mentioned in this article. We have a listing of bulk ammo sites that you can check for ammo. Shoot often enough and you may find reloading shotgun shells is worth it.
Other stores we like for shooting supplies include:
Even if you’re not a hunter, blasting clay birds out of the sky can be a hoot. Of course, this assumes you can hit ‘em. On the flip side, there’s nothing quite as aggravating as burning through an entire box of shells with little more to show than 25 empties – especially with an audience.
Well-intentioned spectators may offer suggestions related to the necessary lead, which could be valid – or not. You could have the perfect allowance for a 30-yard crossing target, but still shoot under it due to a flinch – or for other reasons related to gun fit, form, and vision.
1 – Point the Gun
By their own admission, many experienced handgun and rifle shooters tend to struggle on airborne targets – something I can relate to. We’re programmed to carefully align a set of sights on a target – at which point we’re aiming. Thus, the inclination is to watch the muzzle of the shotgun, again, the recipe for a miss.
Back to that aggravating 30-yard crossing target, a 4.3” claybird streaking by at, say, 45 mph. There’s some psychology here: For whatever reason, deliberate muzzle alignment with the target unleashes an inner demon with a measuring tape. While obsessing over the necessary forward allowance (lead), the gun tends to stop while the target keeps going.

Odds are the shot will miss – but here’s a strange phenomenon: A hasty follow-up shot could produce a hit.
Why? No time left to think. You simply “kept your eye on the ball.”
That’s what it takes to dust a clay pigeon with a shotgun. If you’re concentrating on the target, you’re pointing. Most of us have been pointing at objects of interest since before we could ever describe what they were. Take that practice and apply it to shooting clay targets.
Even today, as you point at an object, your finger tip will be little more than a peripheral blur – a good way to visualize the shotgun barrel. You’re aware of it, but your full attention is riveted to the target.
2 – Prep the Shot
Experienced clay target shooters engage their targets with a plan, usually based on three distinct stages: pickup point, insertion point, and break point.
| Pickup Point: | The spot where the target can first be readily seen and evaluated. |
| Insertion Point: | The spot where the muzzle is inserted for tracking to the break point. |
| Break Point: | The optimal spot for the shot, with some allowance for follow through. |
As a rule of thumb, the insertion-point is usually somewhere in-between; and, as the stock contacts the shooter’s face, full concentration shifts to the target – especially at the break-point. Done correctly, it’s called “hard focus.”
3 – Focus Hard
The goal should be a razor-sharp clay bird – so clear every minute detail can be seen while concentrating on the leading edge. If you can achieve this, congratulations! You’ve nailed “hard focus.”
Believe it or not, that elusive 30-yard clay target will appear larger, and it may even seem to slow down. It’s also why I’m not a fan of high-visibility sights (which work for some wingshooters).
4 – Account for Lead
Consider what it takes to toss a football to a running receiver. The details are almost impossible to articulate, but somehow, most of us can intuitively calculate the lead with a surprising degree of accuracy. For this reason, when starting a new shooter, I try to avoid the demons associated with specific methods – just to see what happens.
No crossers though; instead, a shallow-angled incoming target with time to make the shot. For safety’s sake, this presentation requires a remote-controlled trap.

- Wireless remote and foot pedal for custom shooting arrangements
- Quicker motor allows for ultra-fast 1.75-second cycle time
- Solid tires for easy transportation
- Built-in cord wrap securely stores cord
The alternative is an outgoing target thrown to minimize worries over lead. But eventually, allowances will become necessary. And here’s where things get interesting – most shotgunners, whether they realize it or not, use one (or more) of the following techniques, best visualized through the tiresome 30-yard crosser.

| Swing Through: | The gun is inserted behind the target. The trigger is pressed as the muzzle sweeps through its leading edge, generating built-in lead – and follow-through. |
| Pull Away: | The gun is inserted to track with the target to its break point. Then, as the muzzle is accelerated ahead, the trigger is pressed – another version that generates built-in lead and follow-through. |
| Sustained Lead: | The muzzle is inserted ahead of the target as the stock contacts the shoulder and face. While maintaining the necessary lead, the trigger is pressed – and the swing continues. |
Follow-through is essential. Stop the gun and you’ll miss. Also, many experienced shotgunners use different techniques for varying presentations. Actually, once the basics are understood, a large part of the game becomes mental – the confidence to trust our shooting.
If you can afford it, a professional lesson is well worth its cost. For a window into the art of wingshooting, Optimal Shotgun Performance maintains an excellent site with a huge amount of valuable information.
Wingshooting: The Finer Points
Because a target/wingshooting shotgun is designed to be pointed, the sighting system is rudimentary; some type of front bead (possibly with an additional tiny mid-bead more for mounting practice).
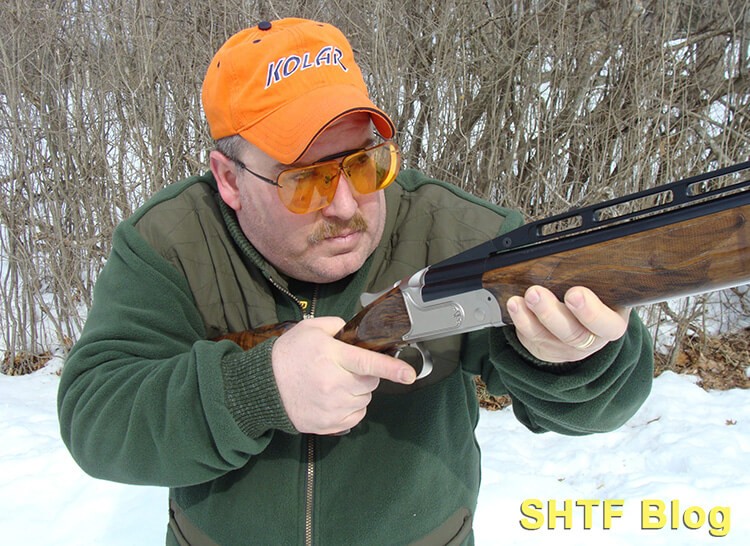
But it still needs a rear sight to deliver centered shot patterns – namely, the shooter’s eye! And, just like the rear sight of a handgun or rifle, an adjustment will introduce a zero change. Thus, the first concern is eye dominance.
Determine Eye Dominance
The dominant eye must be centered behind the barrel to avoid a drastic windage error. It’s a true issue for a right-handed shooter with a dominant left eye (or vice versa), but one that is surmountable. If unsure which eye is in charge, go visit the Dominant Eye Test.
Ensure Proper Gun Fit
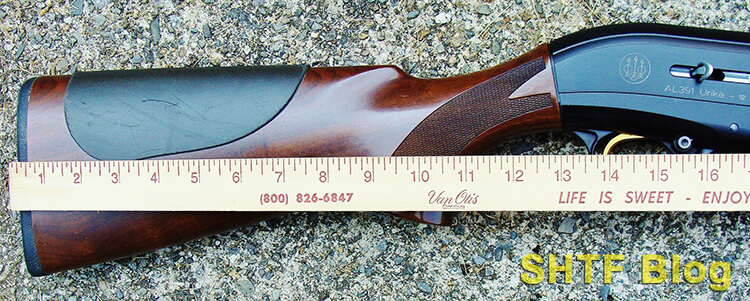
The gun needs to shoot where you’re looking. The comb (top edge) of the stock serves to regulate the shooter’s head for pattern placement. Length is another critical dimension.
Proper gun fit is one of the best ways to reduce shotgun recoil. As a rule of thumb, shoot the longest stock you can comfortably mount without contortions. However, shorter-stocked ladies & youth guns are sold because adult-sized stocks are often too long.
Proper Stance
Believe it or not, plenty of targets are missed with our feet. An example: As a right-hander, you assume the same bladed left-foot forward stance used by many rifle shooters. The dreaded 30-yard crosser appears on a right-to left path but, just as you’re ready to break the shot, you run out of swing.
The gun stops and the bird keeps going. Perhaps the greatest wingshooter who ever lived was Earl de Grey, Lord Ripon, a driven gamebird master. To better address targets, he preferred a more frontal stance similar to the latest squared-up tactical positions – something Lord Ripon had figured out before the 20th century. Or, try pointing your leading foot to the expected break point.
Gun Mount
During the gun mount, bring the gun smoothly to your head – not your head to the gun. The good news: You can practice this at home. While you’re at it try tracking wall/ceiling line junctures while swinging the gun in both directions. Done correctly, the swing and break are just a fluid continuation of the gun mount.
Use Good Targets
Erratic throws make it hard to figure out the basics. Remote-controlled traps solve this issue, and can also cover all angles, but a manually-cocked $100 version will work, too.

- Oil-impregnated bushings
- Throws regulation singles, tandem doubles and piggy-back doubles
- Fully adjustable without tools
- Sun-and oil-resistant rub strip
Choose the Right Guns & Loads
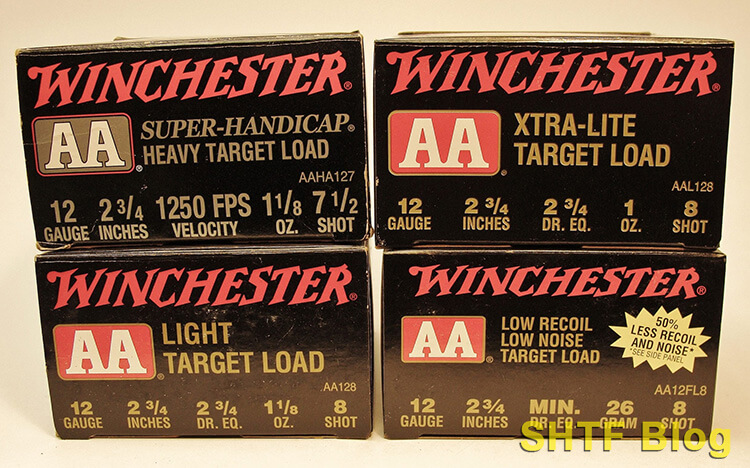
The highly versatile 12 gauge will cover nearly all clay bird venues with a 2 ¾-inch, 1 1/8-ounce, target load. But a softer-shooting 1-oz. load of # 7 ½s or #8s will cover most inside 40 yards with much less chance of developing a flinch.
Better yet, start with a 20 gauge and 7/8-oz. target loads. Use a gas-operated autoloader and recoil will be even softer. Also, within reason, longer barrels of 26 -28” will provide smoother swings.
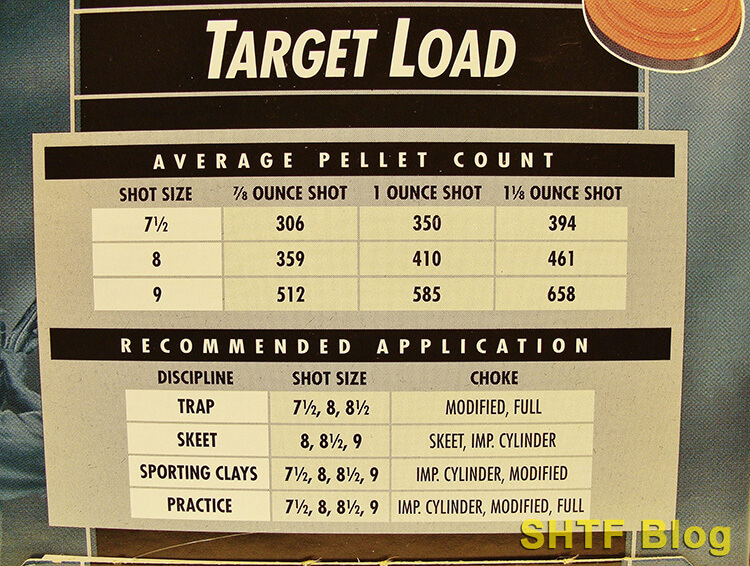
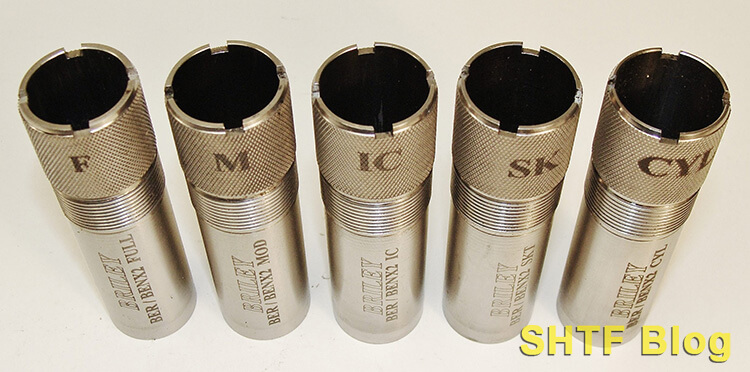
Choke It
Skeet was founded to simulate upland bird hunting. The targets range from shallow-angle outgoers and incomers to 90-degree crossers. Since most are engaged inside 21 yards, minimal-constriction chokes (skeet – I/C) are preferred.
Trap targets are outgoers shot at longer distances, so more choke is needed (usually modified – full). Still, that infernal 30-yard crosser could be broken with an improved-cylinder (I/C) choke and a 1-ounce load of #8s.
Waterfowl and Upland Birds
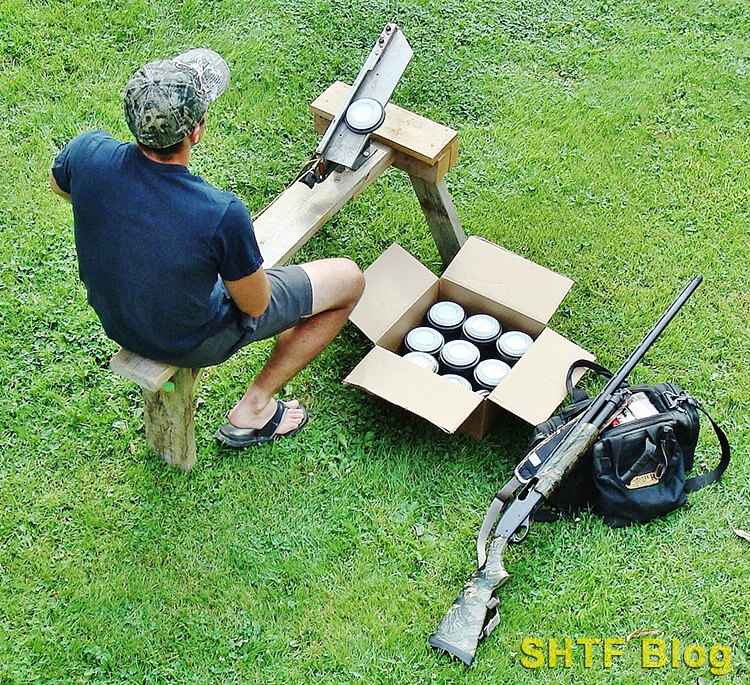
Clay targets are a great way to improve wingshooting skills – especially if you shoot from a dismounted ready position. Because the same skills apply, there are opportunities for tailored practice. We’ve enjoyed great pre-season tune-ups during claybird flurries, starting while flat on our backs in layout blinds.
Two stacked milk crates can simulate a blind or boat seat. A couple friends with an inexpensive hand trap are all you need. Get creative, keep at it, and the result will be a heavier game bag.
Defensive Training
With the able assistance of an experienced cadre, we weaved some clay birds into our agency’s busy shotgun program. The goal was to increase the tempo of effective shots while building confidence on moving targets – an ideal venue for clay pigeons providing instant feedback. Of the couple hundred participants, only a small percentage had any clay bird experience.
Nevertheless, the non-regulation claybird fest turned out to be a big hit – in more ways than one. By the following year, our battery-powered Auto-Chucker launcher had evolved to a pair of machines, capable of throwing single or double targets via one remote control.
By the third-year confidence had soared to the point where the whole thing became a full-blown competition. But the bigger win for all was shotgun competency, which had noticeably improved across the board.

A primary concern was the pointing vs aiming conundrum. Our troops were already shotgun trained so their Model 870 Police pumps weren’t strangers, but these guns were equipped with rifle sights. We dealt with it during a pre-fire class, summarized as follows:
- Focus on the target!
- Keep your cheek on the stock.
- Press the trigger.
With a set of sights in the picture (literally), the inclination is to use ‘em. The fix? Just stare through the sights and keep your eye on the target!
When It’s Okay to Aim a Shotgun
Because shotgun slugs are single projectiles, accuracy improves through aimed shots. Turkey hunters are in the same boat due to tight chokes that produce dense patterns. Red dot sights and even scopes are an effective solution to a frustrating miss caused by a tight pattern and an elevated-head lapse.
For defensive purposes the above “stare through the sights” technique is fast and effective with buckshot loads. The same technique works well with a ghost-ring system, too.
Parting Shot
Wingshooting is part science, but it’s also part art. Truthfully, it’s often not nearly as hard as we make it – if we can just get out of our own way. If you can work through the basics, you’ll gain the technology to harvest upland birds and waterfowl, all perfectly edible protein sources, as are turkeys and small game.
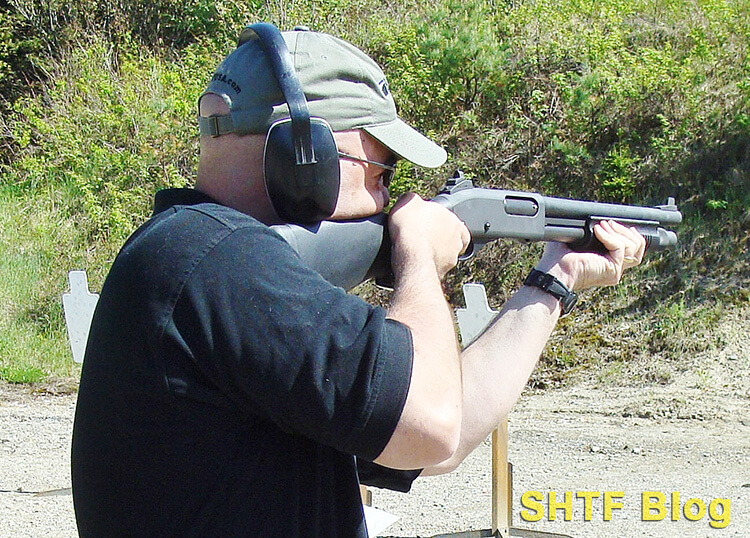
Start with a basic shotgun (like the Remington Model 870 12 gauge pump in the photo), add an extra rifle-sighted slug barrel, and you’ll also own a deer gun and formidable defensive firearm – perhaps the ultimate Prepper package.
Bottom line: When it comes to true versatility, a shotgun is hard to beat. For more information about its capabilities, here’s the link to Shotguns: A Comprehensive Guide.

- Markwith, Steve (Author)
- English (Publication Language)
- 190 Pages - 11/27/2014 (Publication Date) - PrepperPress.com (Publisher)