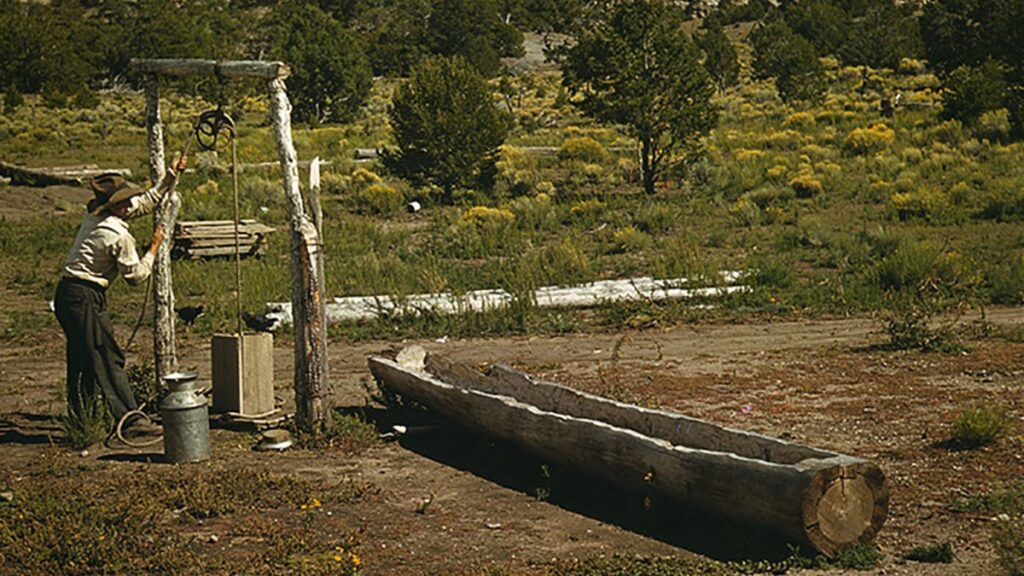
The crap has finally hit the fan, and you’re now living in a TEOTWAWKI-esque scenario. There is no help. There doesn’t seem to be any hope. It’s just you, and your own ability to survive. You’re gradually running out of water, and you know that it’s only a matter of time until you finally run out. You’re in a great location defensively-speaking, and so you have no desire to move on. But you need water, so what do you do?
Digging a Well by Hand
Digging a well is most certainly not a skillset that comes easily to most people, and I would argue it’s a task that should only be begun after being given deep thought. This is because well-doing is not only incredibly labor intensive but can be incredibly dangerous as well (no pun intended). And to further complicate matters, you never can be quite sure just how pure the water is that you’re raising up out of the earth post-disaster. Before collapse, you can easily test your water for impurities, bacteria, and the like. Such a convenience is not possible post-collapse.
So, what can we do? To begin with, it would help to know a bit about groundwater wells and well construction. There are three main types of wells: dug, driven, and drilled.
Different Types of Wells
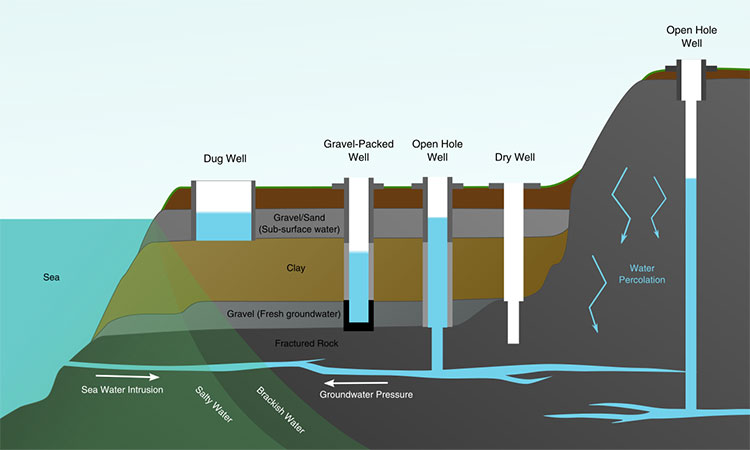
Drilled Well
A drilled well is the most common that you’ll encounter on a daily basis throughout the United States. Odds are that your well, and all of the wells around you were drilled into place by a specialized well drilling company. It’s one of the simplest ways (but by no means the cheapest) to get access to lots of pure water in a hurry, particularly in areas where the water table is located very deep in the ground.
Can you Drill Your Own Water Well?
You can drill your own well by hand, but the soil conditions have to be right and you will be limited in how deep you can go. If the soil is rocky or the water table is too deep, you will be unable to successfully drill your well by hand.
Driven Well
Driven wells involve hammering a specialized pipe deep into the ground until water is hit. This method only works on non-rocky soil, and though it can be done by one man, it requires specialized equipment, and a lot of sweat equity.
Dug Well
A dug well is exactly what it sounds like. It’s a gigantic hole that is dug down into the ground until it reaches the water table. These are often the shallowest wells (as the sheer amount of physical labor it takes to dig a well prevents it from being dug as deep) and are also the type of well most likely to be contaminated.
This is due to two reasons:
First, shallower wells are more likely to be affected by contaminants that leach their way through the soil. It’s much easier for a five gallons of spilled gasoline to make its way 25 feet down into the ground than it is for it to make its way 200 feet down (a common depth for drilled wells) into the ground.
Second, due to the larger size of the hole that is required for a dug well, there’s an increased probability that stuff can get into the well. Read about the construction features of dug wells and other types of water technology.
Where to Place Your Well
One of the first decisions that you’re going to have to make about your well, is where are you going to dig it? The right location HAS to be determined BEFORE you begin to dig your well, or else you risk wasting a lot of time, energy, and manpower for nothing (you may hit a dry spot), or you potentially risk endangering your family with unsafe drinking water.
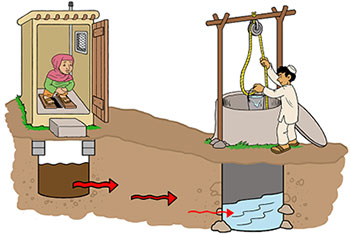
To begin, you need to make sure that your well is AT LEAST 50 feet away from any septic system or buried fuel tank. The farther you can get it away from these things the better. Nobody wants to drink feces-filled water or a diesel concoction. So, if you’re going to dig, make sure you’re nowhere near either of these obstacles. Likewise, make sure you’re digging at least 100 feet away from any pasture used for livestock. Manure runoff from animals can be a serious problem when it comes to potable groundwater.
You also are going to want to avoid digging your well in any marshy area, or at locations where gravity may bring rainwater with impurities/contaminants toward your well. You want your well to be in as safe of a location as possible.
Next, consider if the location you have chosen is likely to have available water within a reasonable depth from the surface. If you dig deep enough, you’re going to hit water, but digging a well that’s 300+ feet deep post-apocalypse is going to be virtually impossible, so we need to make sure that our efforts are efficient. It may be worth your time to research water witching/water dousing to learn how some of the old-timers were able to locate close-to-the-surface water.
Locations where green grass can still be found growing during the driest parts of the year may be indicative of an aquifer that’s near to the surface, or… a leach field.
How to Hand Drill a Well
In best case scenarios, hand drilling a well is best suited for landscaping and livestock purposes, but prepping isn’t always about best case scenarios. Honestly, if you’re in a post-disaster scenario, the only option you really have of being successful drawing water from a well would be to drill your own in an area where you can expect to find water relatively shallow to the surface (<50 feet). Why do I say this?
To begin with, the odds that you’re going to have what you need to drive your own well is slim to none. You have to have specialized pipe with perforations on-hand, you need the appropriate driving equipment, and so on. Digging a well with a shovel would take you DAYS, and is not without risks. Poisonous gas build up, lack of oxygen, and cave-ins are all real possibilities when digging your own well. Let alone that you need to figure out a way to get out of the well that you’ve just dug.
As a result of all this, I think your best bet is to focus on drilling by hand. It’s going to take an incredible amount of manual labor, but if water is within range of your extensions (and you’re strong enough to pull the tool out of the hole – numerous segments of extensions get heavy real quick), you have a very good chance of hitting water.
Equipment Needed to Drill a Well by Hand
Speaking of extensions, you’re going to have to make sure that you have plenty of those stockpiled ahead of time as well – I would suggest at least 25 feet worth of extensions.
To do this, you’re going to need a Seymour fence post auger. Other equipment you need to make sure that you have include a foot valve, PVC for casing, PVC for the foot valve, pea gravel and a hand pump.
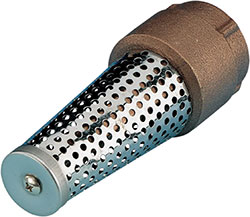
The foot valve is basically a one-way valve that will reside close to the bottom of the well. It allows water to go into the pump’s PVC without allowing it to exit from the bottom of the well again.
This helps the pump to maintain suction the entire length of the well. Without that foot valve it would take a phenomenal amount of nonstop pumping to even begin to bring water to the surface.
Next, you need to make sure that you have a sizeable amount of PVC pipe (and potentially joints for the size that you choose) to attach from the foot valve to the hand pump. This length of piping is going to be safely nestled inside of the casing – a much larger diameter length of PVC pipe.
How Deep Can You Drill a Well By Hand?
Expect a hand drilled well to be about 15-20 feet deep. You’ll have done all of your work for nothing if the water table is deeper than 25 feet where you’ve dug, so the more that you can get the better. That being said, it’s just about impossible to hand drill a well past 50 feet.
Drilling a Well by Hand Process
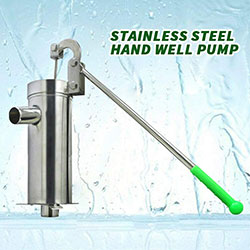
After you have drilled down to the point where you have hit water, it’s time to begin installing your well. Your casing is going to be what enters the well first. You want the bottom six feet of your casing pipe (the part that’s going to be deepest in the well) to have slits cut into it every ½ inch or so for the last six feet of the pipe.
You want to cut these slits around the pipe. Cutting three slits around the diameter of the pipe (without cutting the pipe in half) will allow the bottom part of your casing to fill up with water, allowing the foot valve to have access to water for pumping up to the surface.
Once your casing has been inserted into the well, do your best to make it as vertical as possible. Fill in the empty space around the casing with pea gravel (enough to surround the area where you cut slits into the casing, and a little above it as well). This will help to filter out the dirt and mud that would otherwise fill in your casing and potentially clog your foot valve.
After that job is done, insert the PVC pipe that has your foot valve attached to it with the hand pump attached to the top. If all goes as planned, you should then be able to pump up water from below the ground.
Finishing Touches
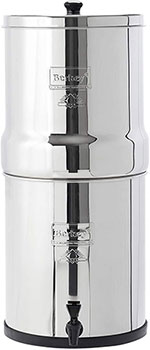
It’s going to take quite a bit of pumping to clear up the water that’s coming out of your well. Since you’ve greatly disturbed the ground around it, the water is going to be very muddy. You also need to understand that even after the water goes clear, it still may not be safe to drink.
In ideal situations (pre-disaster) you would take a sample of your water to have it tested (not a bad idea for everyday water use if you haven’t done it before). You would then know if there were any dangerous bacteria, viruses, chemicals, or other pollutants in your well that needed to be addressed.
Post-collapse, you’re most likely not going to have that luxury. As a result, you’re going to want to have some form of water purification system in place before you drink any of what you pump up from below. All is not lost in this scenario, however – you still have water, you just need to make sure it is potable. You can boil it, of course, but that then uses fuel.
A better options is to buy a Berkey Water Filter or some other method from reputable companies such as Katadyn or Epic Water Filters.
A Few Caveats
If you intend to drill a well in such a way pre-collapse, you may want to first check with your local building ordinances. Certain locales require a building permit before digging a well, and there’s the chance that you could get into trouble for doing so without one.
Also, you have to be careful that you don’t drill through the bottom of the aquifer as well. If you do this, you very likely will destroy the aquifer (you just created a drain), and all of your work will have been for nothing. If your aquifer is the same one that your neighbors use, this could create problems.
You also need to know that since hand drilling creates a shallow well, there is a good chance that your aquifer could very well dry up during the drier parts of the year. That’s not to say that it’s a guarantee such will happen – you very well could have a high-quality aquifer with a lot of volume to it. But I am saying that it is a very real possibility. Proper water storage and rainwater collection would be a wise investment of both time and resources as a result.
Well Done
Really, it’s best not to ever be placed in a situation where you have to dig a well yourself post-disaster. Though it’s most certainly doable, I doubt that the level of effort required or parts needed would make such a job truly feasible. Consider these questions:
- Just how many people do you know that have foot valves laying around?
- Where would you barter for a hand pump in your region?
- What if they’re all gone when you get there?
- Is well drilling equipment a reasonable prep for you to stockpile?
I would argue that it’s best to avoid ever having to face such a problem to begin with.
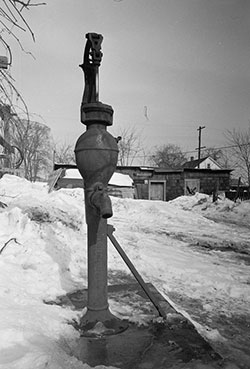
Get your wells drilled NOW. Make sure that the water that you have is safe to drink.
Work on your water storage NOW. Do you have a reasonable amount of water stored in your home already? Do you have rain barrels installed already? Do you have methods to purify water prepped already? Do you have ready access to some form of stream, spring, creek, or other body of fresh water?
I would argue that THESE are the steps that you should be taking right now. That’s not to say that knowing how to hand drill a well is a pointless process. Not by any means. What I AM saying is that it’s best to place yourself in a situation beforehand where digging your own well by hand is truly a last resort – something that you don’t really have to worry about. Exhaust your other options first, and THEN look at drilling your own well.
If you want to learn more about digging your own well, I highly recommend checking out this video here.
Do you have thoughts on the subject? It’s a pretty deep subject (pun intended!) Let us know in the comments below!

2 comments
Please check your date and info on the high resolution color photo (1942).
Thanks, but it looks accurate – https://www.loc.gov/resource/fsac.1a34103/