A bunch of years ago I lost the sheath to my USMC Ka-Bar and went online looking to see where I could get a cheap replacement. I came across a web site with instructions on how to make a sheath without having to sew anything. Killer! So I looked at the pattern and fooled around with it until I made a passable sheath.
What you see in these photos is merely a demonstration, so don’t think this is the sheath I wear around with my proud Ka-Bar! My dad gave me some old leather for another project and I used the remains to pass on to ya’ll the way that I made a sheath for it.
What you’ll need.
You’ll need a few things to get started:
- A knife – obviously. Did I mention KA-BARs are great?
- Rule or tape measure.
- Scissors.
- Rawhide material, heavy-duty canvas, or some similar material.
- Strips of rawhide or some other cordage.
It can be a little confusing, but I’ll to be as clear as I can. A picture is worth a thousand words, so don’t be afraid to study the pictures. Also, read all the way through first to get a better idea of how it all fits together. Let’s get started…
Note – I marked up the leather with a permanent marker as a demonstration. Don’t do this or your sheath will have ink marks all over it.
Step 1. Measurements.
Measure the length of the blade plus one inch and the length of the handle.
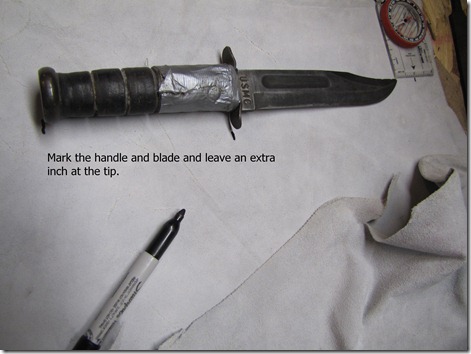
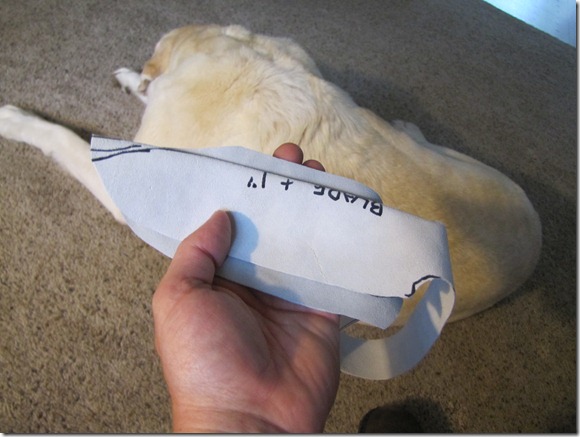
Below is the blade plus one inch.
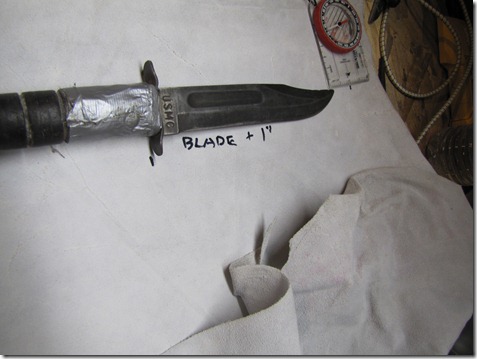
Step 2. Drawing.
Draw a line around the blade giving yourself a little extra material. Flip the blade to it’s other side and do it again. The reason for this will become clear in a minute (see below).
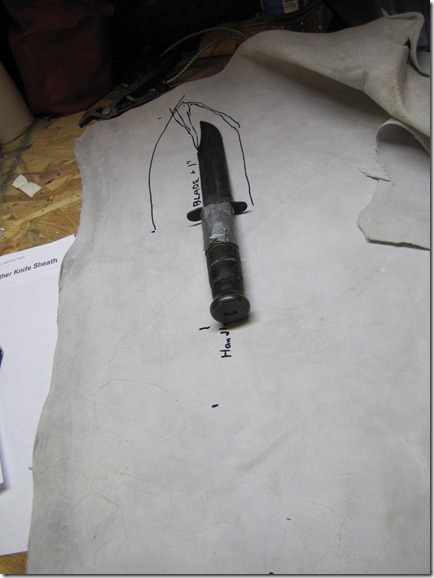
Step 3. Measuring.
Measure the handle and then add a 1/2 length to it. This will be the belt loop (below). Then flip the knife to the other end and draw out the blade. Make this one a little wider. I’ll explain why in a bit.
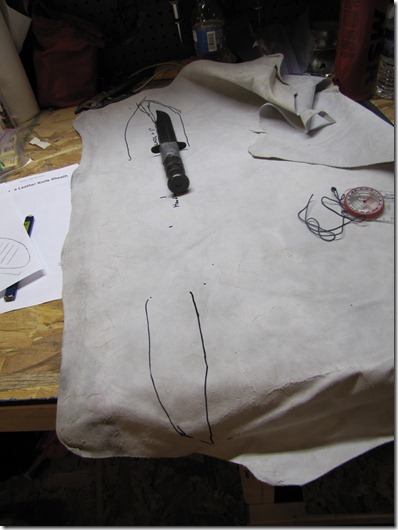
Step 4. Connecting the dots.
Time to connect the dots and draw the outline of the sheath. Look at the example below.
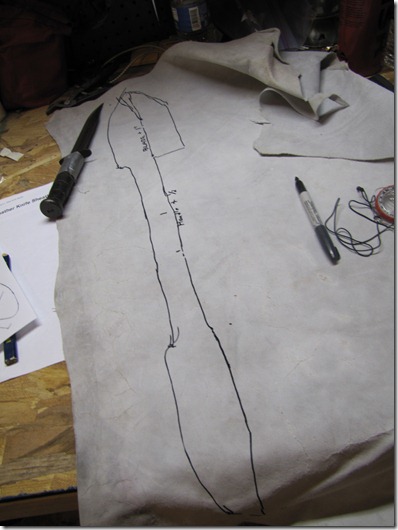
Step 5. Cut it out.
This leather was thin enough that I was able to use a pair of scissors. In the picture I left more material on the left for reasons that will become clear shortly.
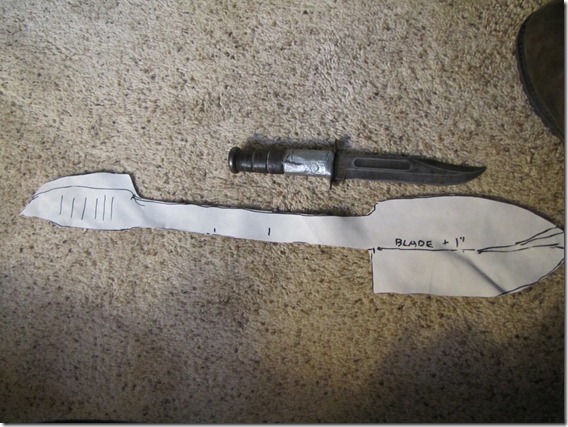
Step 6. Fold and trim.
Fold the big (folded) section in half and measure your knife against it. Trim off some of the excess.
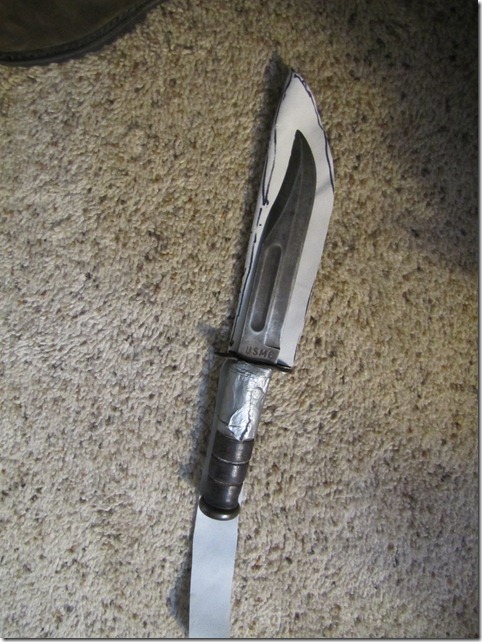
Below you can see how I trimmed it.
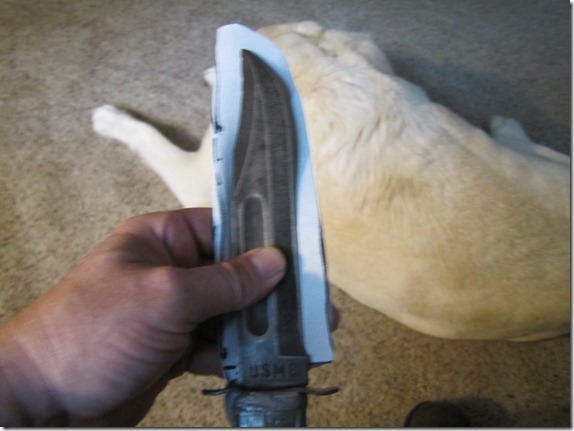
Step 7. Lay out next piece.
Now you’ve got the folded half you just trimmed. Lay that over the other piece just to get a feel for how many slits you’ll need to cut.
Step 8. Making slits.
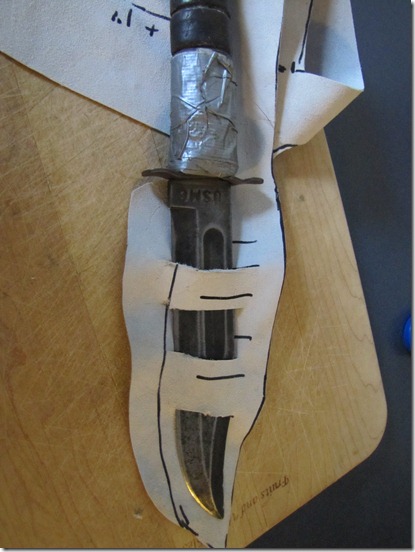
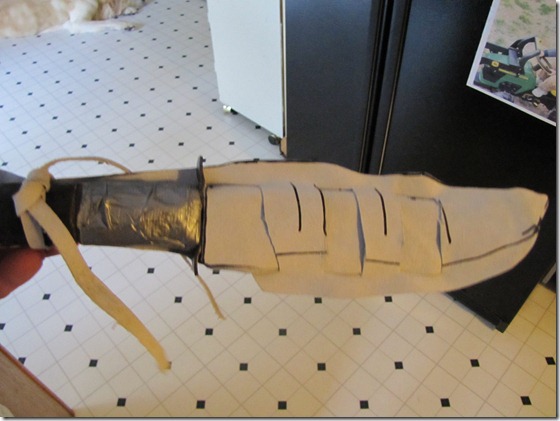
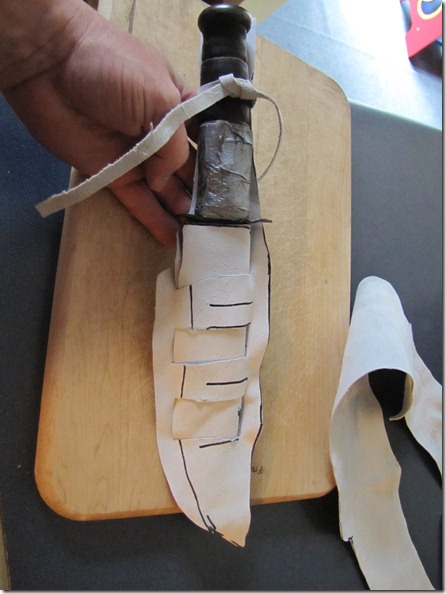
This is the tricky part. On the end that has the big piece you haven’t trimmed yet start making some slits like in the picture below. This is where the part that holds the knife will slip into. (This is the secret of not having to sew anything.) You’ll have to experiment to figure out how many slits you’ll need for your particular blade. I have my knife stuck through there, but you’ll need to make the slits a little bigger to fit the other piece through.
Step 9. Weaving.
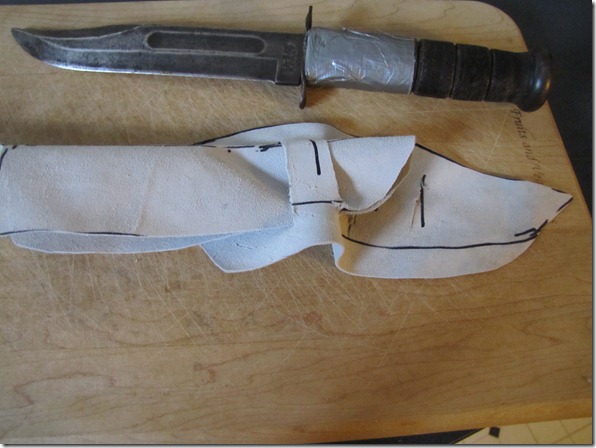
Once you have the slits cut take the folded half, which I think of as the “sheath proper,” and weave it through the slits in the bigger piece. Again, you’ll have to play with this to get it just right.
Step 10. Cutting rawhide.
Cut a piece of rawhide to tie around the handle of the knife to keep it in place. In the other sheath I made I cut a slit for the handle-tie rawhide so I wouldn’t lose it when I was using the knife. (That’s not pictured here.) Below is a picture of the back of the sheath – the part that will ride against your leg.
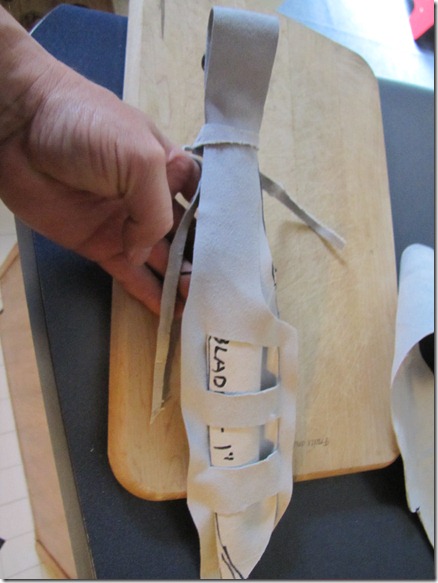
Obviously this is just a sample sheath I whipped together for the purpose of this post. If you take your time and do it right you can really create a very nice sheath for next to nothing.
As cool as this is I’d love to claim all the credit for it, but you can see the original sheath and a pattern here. I found this when I was going through my debt reduction days and didn’t want to spend the money on a sheath. I also like it because you can tailor it to any knife at all.
The fit is very important. Too much space in the slits and the knife will fit loosely. Too tight and it won’t fit at all or you’ll cut the leather. I didn’t get it right until about the third time I tried it.
-Jarhead Survivor
BTW: I know the knife in the picture is a little beat up, but that’s because I actually use my knives.


8 comments
Cool. I just acquired an Uncle Henry UH 153 Golden Spike knife which has a damaged sheath that needs replacing. Maybe I’ll give this one a go with these instructions – Thanks!
Thats not bad for what it is and proves a very valid point, however I ma more in favor of the lacing method especially on rustic style knives like bowies and such. Any sharp knife or a swiss army knife with an awl in it will work and you poke evenly spaced holes down the side and lace the thing together with whatever cordage you can find. If you have killed and eaten something, there should be some sinue available or some hide that could be dried and split to make some lacing material. This also affords you the ability to later strip the cordage for emergancy issues. Just my thoughts on the matter. I make knife sheaths, molded holsters, western style holsters etc. almost anything leather and the lacing method is the way to go when you dont want to sew.
Soooooo, whats with that duct tape? Is the leather stack coming apart? ITs hard to get the pommel off without breaking stuff but there some companies that sell stack leather discs to repair your handle. You could probly make them yourself but if you can buy them already cut so all you hv to do is stack them and compress them, I would buy them precut. The next trick is to find a WAy to spin it at high speed and burnish the new leather with a damp pc of leather. This will give it a shine and harden the outside to help protect it. I would use some buthcers wax and spin it about 2500 rpms and applie light preasure. Anyway, I think you can get those from the Smockey Mtn knife works, they sell blanks and pommels and hilts etc to build ur own. Just FYI if you want to fix it and make it last another 50 or 60 yrs.
Yeah, I could order the leather stacks, but it’s just a matter of finding the time to do it. Seems like I’ve got way too much going on these days.
Has anyone here tried the zucchini sheath? All you gots to do is cut a medium sized zucchini in half, then insert the knife length-wise into either half. One bonus is you can actually eat the other half of your sheath as soon as your knife is stowed away.
As it were, I just finished a molded holster for a 38 snub for one of my friends. IT was a bear, had all kinds of problems today but it turned out good anyway. Nothing like good thick saddle leather!
…………………………………………………………….Statistics……………………….Members 13322.News 646.WebLinks 26…………………………………………You are not authorized to view this resource.You need to login….
I like the look of this sheath Jarhead! I have made similar, but as Spook mentioned, I like to thread cordage through holes I make with the awl on my Gerber Multi-tool. I do prefer the sewn sheaths, but this would work in a pinch for sure!
When I make a sheath, I start with the heaviest leather I can find, that usually come for the local “tack” shop for repairing saddles. I cut the pattern I want, usually 2 separate pieces, but I have done the folded-sandwich method similar to that you showed in the pictures. Then I mark with a fabric pencil where I want the holes for my “stitching”. Once I have the holes made, I use a heavy “leather” needle, just to make pulling the thread easier (it can be done without it, it’s just harder and takes a lot longer to do). Just “stitch” the thread through the holes, and the sheath is ready for staining! I use 2 different types of thread for my sheaths, one is a beeswax coated heavy hemp twine, and the other is a Kevlar thread. The beeswax-hemp twine is strong/durable enough to hold the sheath together by itself, but it can get cut-up by the blade of the knife. The Kevlar thread helps to prevent the blade from destroying the stitching. I usually run the Kevlar thread along the inside of the twine, which further protects the twine from getting cut. I like to use a dark stain on my sheaths, and I don’t lacquer/oil them, this prevents the sheath from being shiny, but also requires more maintenance to keep it as a functioning piece of kit. I also like to put some stamped embellishments onto my sheaths; every one I have made since my first at Goshen Scout Camp when I was in Boy Scouts has had a bear stamped into the leather just below the opening for the blade. It’s sort-of my trademark!
Jarhead- As for the handle on your K-bar, have you tried carving one out of wood? My dad bought me a pretty sad-lookin’ K-bar at a yard sale years ago, the blade was fine, just need some TLC with a grinder and a diamond stone; but the handle was almost completely worn away, you could actually touch metal in spots and the stacked leather washers were all but disintegrated. I cut away the remaining leather (had to use a grinder-tip on a dremel tool!), then cut a branch from a recently fallen hickory tree. I cut the branch down to almost the same length as the handle needed (about 3/4″ longer), carved it into the general shape that I wanted, including grooves for my fingers (leaving it 1/4″ thicker than what I wanted it finished). I split it down the middle on a band-saw, carved out a channel for the tang with the afore mentioned dremel tool, tapered-down the ends to fit, heated the tang with a propane torch, placed a VERY strong glue on the insides of the handle and then placed the 2 pieces together over the hot tang. I finished the handle with sandpaper of increasingly finer grit, and finished the wood with a stain & lacquer. It has served me well, with no issues for about 15 years now. The best part is that it fits my hands perfectly, nobody else finds my knife comfortable in their hands, they can’t get a comfortable grip no matter how they try! I also have people compliment me on the appearance whenever I have it on my hip, and they inevitably ask me where I bought it… It tends to disappoint them when I tell them they can’t buy one, they would have to make it, or pay me but I would charge to much for most folks! My next knife-project is to make a handle from a nice thick deer antler I found in the woods a few years back.