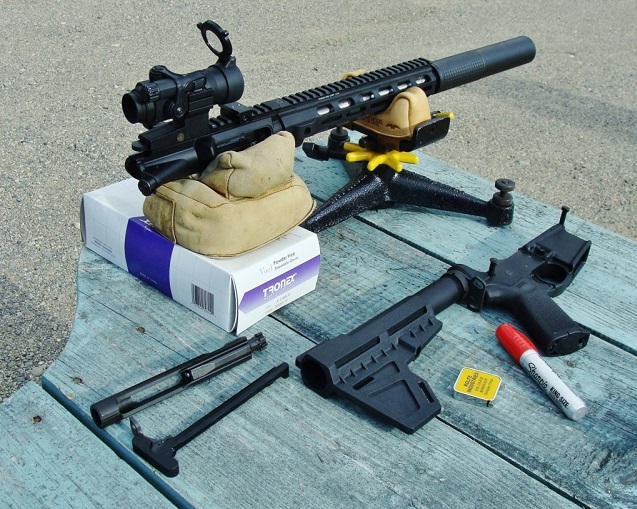
Bore sighting an AR-15 (or other rifle) is the most simple, direct, and fastest way to begin sighting a rifle in. Starting off with bore sighting will save you time and ammo at the range. The process is not complicated.
by Steve Markwith, author of Survival Guns
Recently, I connected with a friend on the range for a bit of low-tech support. He had a new AR-15 that functioned fine – but had an aversion to bullseyes. Supposedly, his dot-sight equipped M-4 type carbine had been zeroed on an indoor range by the gun shop that sold him the rifle. As the story went, several days later, a target was stapled to a cardboard box, set at 100 yards, in a field. Resting over the hood of his truck, shooting commenced; however, a couple boxes of ammo later, the target remained largely unscathed. This, despite lots of dial twisting.
I could relate, having been there before. I’m sure many others have as well. It’s hard to resist cranking scope turrets or sights when a blank target rears its ugly head. With much luck, a bullet hole might even appear. If so, it’ll probably be accompanied by a pile of empty brass.
Long story short, order was soon restored. It just boiled down to some basic knowledge and a few resources – including a solid shooting rest.
Bore Sighting 101 for AR-15s
The fact that he had an AR made life even simpler. After popping two pins, the upper receiver can be detached for removal of the bolt assembly and a look straight through the barrel. By adjusting the aiming system until it and the bore are centered on a target, logic dictates bullets should impact somewhere nearby.
This basic but effective form of “bore sighting” sounds easy and it is – assuming you can peer through the bore. Of course, that’s not possible with all types of firearms, which is why full-service gun shops and many gun aficionados own bore-sighting instruments. Not to worry though; if none of these options are available, there are alternate methods.
Simplified Sighting-In
Let’s start with the above AR-15. Coincidentally, my agency used similarly configured M-4 type 16-inch flat-top carbines. We (my firearms unit staff) were responsible for their initial zeroing. With a large inventory, we needed an efficient system. We’d haul them to our range in batches of ten where the actual sighting-in process required just several minutes and a few rounds per carbine.
The same process will work with scopes or iron sights – again, assuming you can see through the barrel. With new personal systems though, I prefer to bore-sight at home. That way, if a problem is encountered, I’ll have ready access to tools or different mounts.
Setup for Bore Sighting
The following is our AR/dot-sight process. First things first though. The firearm must be properly cleared!
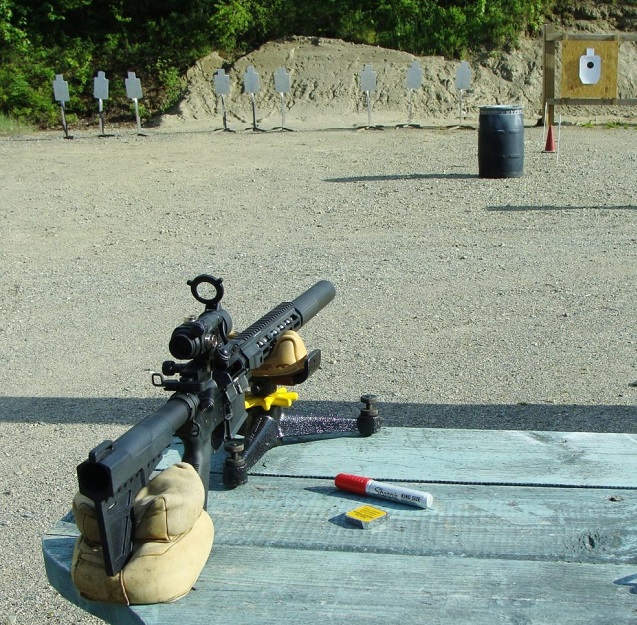
- The AR-15’s upper receiver assembly is detached and the bolt-assembly is removed. The upper is then positioned in a solid rest on a stable shooting bench.
- A chair is placed behind the bench for a comfortable view through the barrel’s rear. A slight lift of the head should permit a clear view through the aiming system.
- For this caliber (.223) and optic, we use a black “Shoot n’ See” 4 ½” bullseye, affixed to a large white IPSC target at 50 yards. It provides good contrast, is easy to center in the bore, and affords plenty of surface to capture bullet strikes. Another option is an actual sighting-in target with a visible center and MOA grid; easier to use with magnification.
Steps to Aligning the Bore and Reticle
Center the sight’s reticle (its dot or crosshairs) in the target and, without moving the upper, carefully peer through the bore. Note its relationship to the target. Let’s say the bore is indexed roughly 8-inches below it. That means your fired shots would’ve hit low (fairly common when mounting new dot-sights on AR-15s).
- We’ll need some elevation, but how much? Turns out we can apply the necessary correction using the sight’s graduated turrets. Many, including my buddy’s dot-sight, are based on minute-of-angle adjustments. By happy coincidence, being an angular measurement, one MOA works out to approximately 1-inch at 100 yards.
- Telescopic sights (scopes) often feature precise ¼ MOA adjustments. However, the turrets of this non-magnifying dot-sight have coarser ½ MOA graduations; the equivalent of a half-inch per click at 100 yards. BUT, since we’re at 50 yards, the inch-values will be 50% – or a quarter-inch!
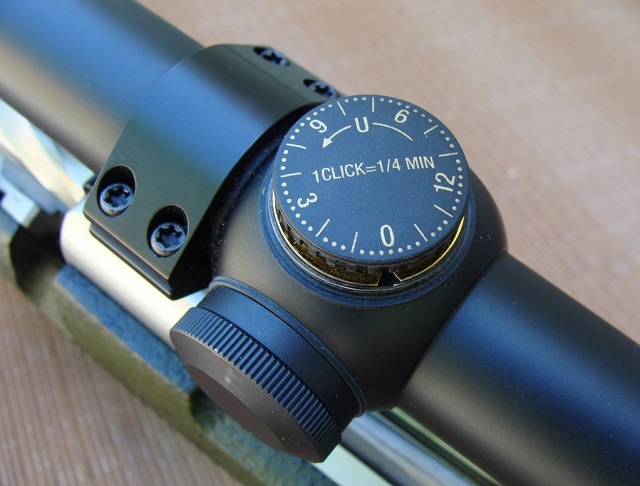
- Assuming the sight is mounted correctly, the elevation turret will be on top (yup, we’ve seen ‘em reversed). Most turrets feature an annular reference scale, tactile clicks, and directional arrows. In this case we’ll need to come “up” four per inch, or 32 clicks total. Windage adjustments (L or R) work the same way.
- If you paid attention while centering the sight and barrel, your first shot should strike surprisingly close to the target. However, bore-sighting is NOT a substitute for actual shooting!
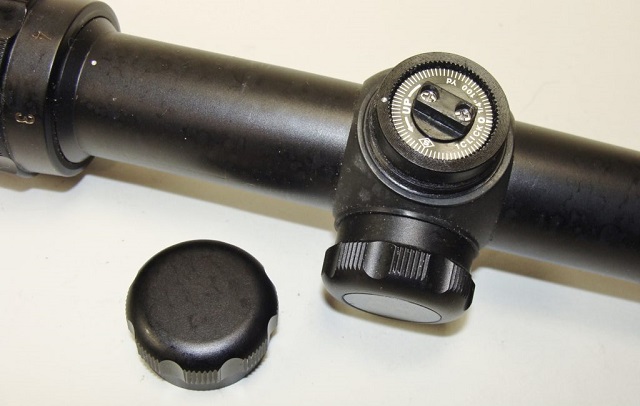
Note: You can reverse the bore-sighting process by starting with the target centered in the bore. Using the above example, the dot (or crosshairs) would be above the bull. The inclination is to adjust downward, but actually, you’ll still need to come up. Confused? If so, stick with the above.
Steps to Live-fire Sighting
It’s time to reassemble the rifle. If you’re already on the range you may need to readjust the rest. Careful and repeatable shooting is essential. There’s no point in squandering ammo…
- From the same distance used for bore-sighting, fire at least two careful shots. Holes should appear near, or even in the bullseye.
- Before applying further adjustments, be certain! Dot-sights like a good Aimpoint typically offer no magnification, so the best bet is a downrange stroll. While you’re at it, bring a marker and a ruler (clear the gun first).
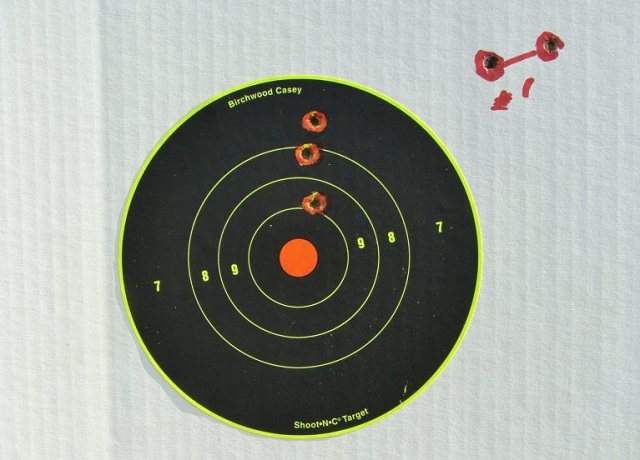
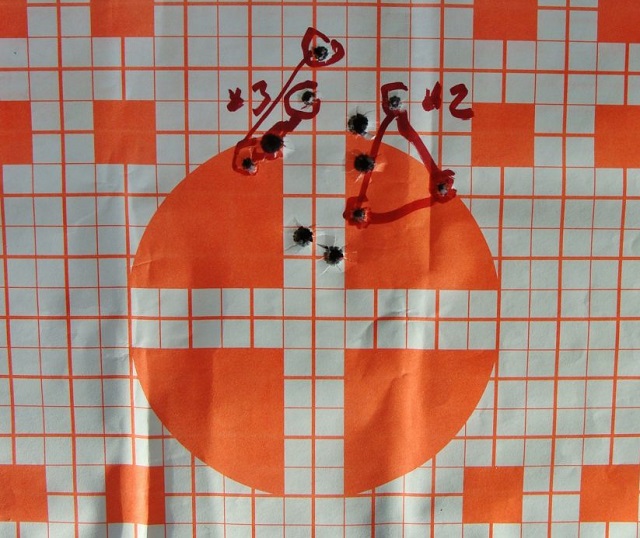
- Instead of guesstimating the necessary adjustments, measure the shot-group’s distance from the center of the bull. Then, mark those hits to avoid future confusion. Let’s say the group is 2-inches low and 4 inches left.
- Adjust the elevation dial up 8 clicks and move the windage dial 16 clicks right.
- Back at 50 yards, fire another group. Good chance you’ll be darn close. If so, fine-tune as necessary by firing more rounds.
- Once the zero is established, shoot at other distances to note the varying impact points (see Zero Ranges, below).
Note: An alternate to step #3 involves realigning the sight on the target and immobilizing the gun. The sight is then adjusted to coincides with the shots. Sounds simple and it is – but only if the gun stays put. Easier said than done.
Tips for Bore Sighting Other Rifles
Bolt-actions are especially easy to bore-sight. Just remove the bolt! Almost all are equipped with scopes, so zeroing often occurs at 100 yards. At that range, by being extremely fussy during bore sighting, I can usually place the first shots within 3-4 inches of the bullseye. But, just to be safe, you might want to fire your initial shots at 25 yards.
I’ve used the same system with iron-sighted shotgun slug barrels after removing them from their receivers. For occasional bore-sighting, a notched cardboard box can serve as a makeshift cradle. The target could be anything easily centered in the bore (like my neighbor’s chimney), but for best results, it should be at around 100 yards. This distance affords greater precision and corresponds with the adjustment-values of many scopes. (We went with 50 yards for specific reasons, explained below.) And round targets work best because our eye will naturally center one in the bore – just like a front sight in a “peep” (or aperture) rear.
Zero Ranges
Back to my buddy; during bore-sighting it came as no surprise that, when his dot was centered in the bull at 50 yards, the bore was the opposite of the above example, in this case well above it. That’s because:
- (a) the indoor range was only fifty feet, and
- (b) an AR requires very high sights; roughly 2 inches above the bore. This difference is called “offset,” and it’s much more pronounced with straight-line AR systems.
A more useful 50-yard zero would’ve put him around 2 inches low on the dealer’s 50-foot indoor range! There are no hard and fast rules regarding zero though. Because numerous factors come into play, the following is merely a guide.
Zero AR-15s
We zero our .223/5.56 carbines at 50 yards because their high sights and parabolic bullet-flight (trajectory) merge again at 200 yards. Shoot some close-range groups (10 – 20 yards) to note the low hits (around 2”) caused by offset. At 100 yards, rounds should strike a tad high. Exact points of impact (POI) will vary, according to loads, barrel-lengths, sight-heights, etc.
Zero Other Scoped Rifles
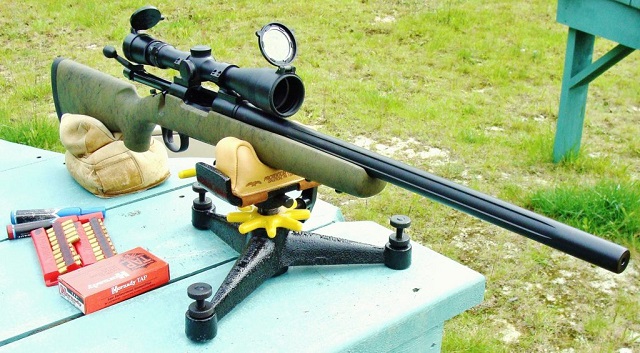
Some sportsmen sight-in their big game rifles at 25 yards which, in theory, should provide a useful zero for most hunting purposes. I go with 200 yards using popular cartridge and rifle combinations. Examples include bolt-action .30/06s (or even a .223s), equipped with 3-9X scopes. A quality scope makes a big difference.
If, for whatever reason, I can’t zero at that range, 100 yards will work by adjusting groups to strike around 2-inches high. Scopes are generally mounted lower on conventional sporting arms (compared to ARs), accounting for the differing zero ranges.
Sighting Precision Long-Range Rifles
This equipment-dependent field is growing by leaps and bounds. Flat-shooting rifles with high-magnification scopes, rangefinders, wind-meters, and interconnected ballistic solutions are the norm. Ranges are pushing the mile-mark and mil-dots have largely replaced MOAs. Bottom line: It’s a subject for another day.
That said, if you want to look at the wide variety of different rifle scopes and optics – see Palmetto Armory’s selection. They also sell different AR-15 offerings.
Rimfire Rifle Sighting
Rimfire rifles are a world onto their own, so much so that I wrote a book on the subject – Rimfire Rifles: A Buyer’s and Shooter’s Guide. Many folks, including me, sight in their scoped .22 LR rimfires at 50 yards. The zippier .17 HMR and .22 WMR (Magnum) loads are often zeroed at 100 yards.
Other Sighting-In Tricks
Some guns can’t be bore-sighted without the previously mentioned special instruments, or laser-cartridges that project a beam through the barrel. Using a more convoluted approach, I have maneuvered a small dental mirror into an action. However, the gun needs to be solidly immobilized, making this process a real nuisance.
Alternate Method
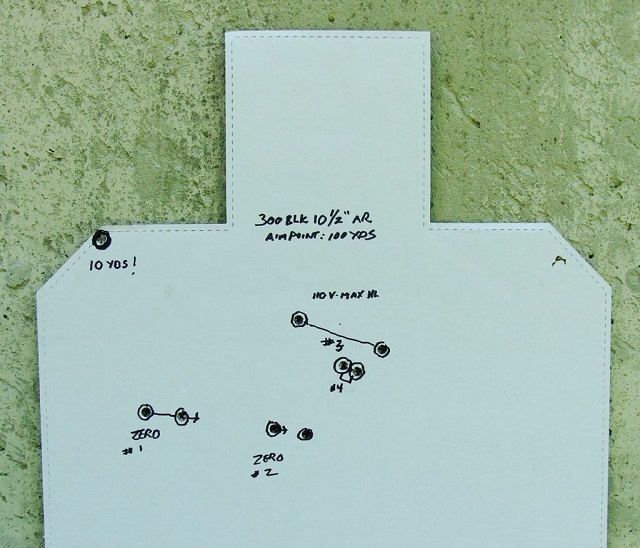
If stymied, try this: Get really close to a big target – like ten yards (or even 5 yards). Then, carefully fire a shot at a central aiming point. The above IPSC target combination should capture your hit, which could be a shocker.
Remember, at 10 yards, the adjustments of your sight will be only 10% of their 100-yard values. Measure the error, apply a correction, and back up somewhat – but not beyond 25 yards. If you’re on the money there, you can expect relatively close hits at 50 or 100 yards for further zeroing.
Encountering Problems
If a bullet hole does appear far off the mark at very close range – unless the adjustments were cranked toward their extreme limits – you probably have a mounting problem. Causes could include loose or mismatched mounts, or off-center screw holes, etc. resulting in a misaligned scope. Gross errors often become evident upon close inspection. Loose stock or scope-mounting screws can cause wandering zeros, the source of many supposedly “bad” scopes. A sharp rap on the scope or action may reveal loose parts through vibration. It’s worth checking a new system before heading to the range. Of course, there’s more involved with scope-mounting, but it’ll need to wait for a future post.
Zero for Conditions
Especially at longer ranges, temperature and altitude can affect trajectory and zero. And, of course, the effects of wind can be significant. When sighting-in, I wait for calm weather and shoot during conditions similar to those expected during actual use. Once on the money, the scope’s turrets will then be “zeroed.”
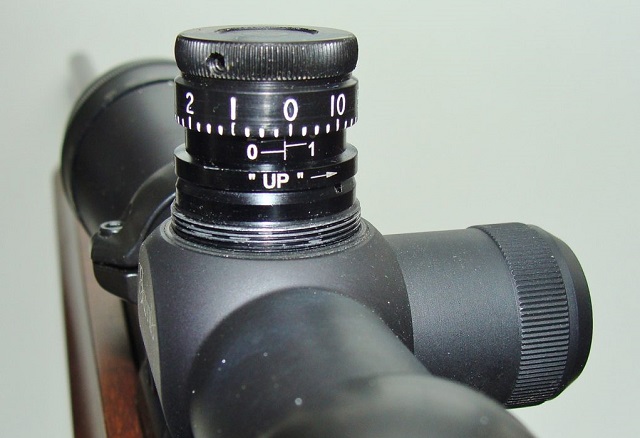
Hunting-type scopes typically have capped turrets, surrounded by some sort of graduated scale, most of which can be reset. Target-turret types are more like micrometers. If you spot a “0,” look for a separate reference mark and a means to bring both into alignment. As long as you don’t move the actual turret, you’ll be “zeroed.” In the event adjustments are later deemed necessary, you’ll have the means to find your way home.
Bore Sighting Summary
Every shooter should learn the basics of “sighting-in.” Personalized zeros are not only more precise, but obligatory for hunting purposes. Once understood, the process is fairly simple, and it’s also good insurance. Many of us have knocked a scope out of zero as the result of a fall or hard bump. If you’re on your own, then what?
