Knowing how to refinish a gun stock is an easy-to-learn skill that can beautify and old gun stock and give new life to the firearm. This is particularly helpful for used guns or family heirlooms that are beginning to show their age. It’s also a great “gift” you can give to a friend or family member.
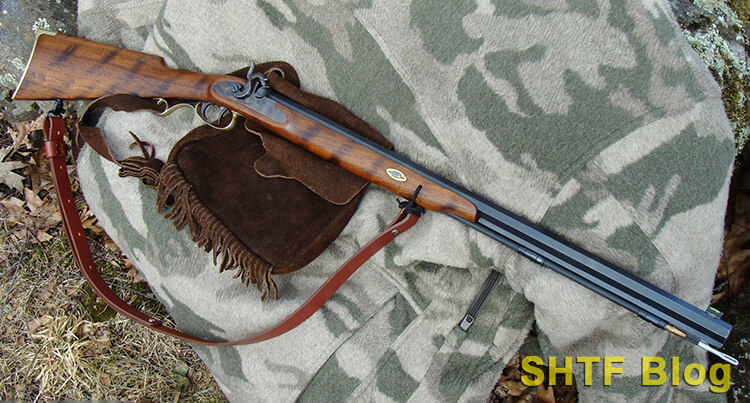
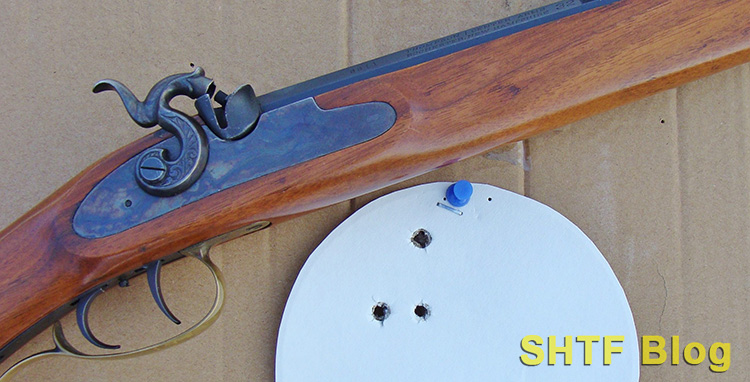
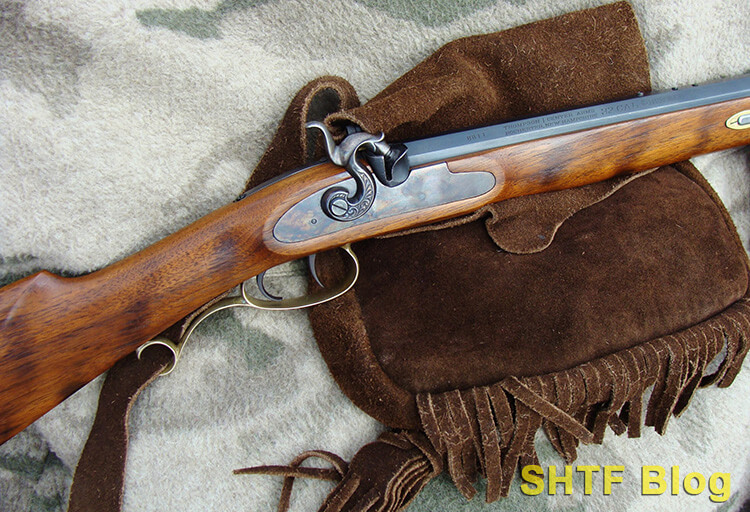
A recent post examined small-caliber muzzleloading rifles, among them a no-longer produced circa 1980s Thompson Center .32-caliber Cherokee percussion gun (commonly referred to as a caplock). I purchased this rifle through an online auction site, and it arrived as advertised, in “used but not abused” condition.
The blued steel surfaces showed minor scratches and thin spots, but the bore was still pristine – an indication of diligent maintenance. The brass furniture (butt-plate, trigger guard, and other small parts) were undamaged but tarnished. Worst overall was the Cherokee’s graceful walnut stock.
Although nowhere near an eyesore, its shiny finish had yellowed, and the surface displayed minor dings and chips. No deep gouges for the most part, just “honest” wear. My son, a purveyor of tactical Tupperware, took one look at the muzzleloader and assessed it as an “old guy gun.”
True enough, but plenty of households (including his) have aged family firearms in similar conditions with sentimental value. Scrapes and dings are sometimes more like battle scars associated with great stories. Either way, they can lead to an oft-posed question: Refinish the stock or not?
Justifying a Refinshing Project
Some guns, such as older Winchester lever-actions, can hold real collector value. Collectible firearms’ worth can actually decrease as a result of refinishing efforts, even if they’ve seen hard use. Depending on factors such as scarcity, an exception could be a restoration from a specialist firm, such as Turnbull Restorations whose work must be seen to be fully appreciated.
Craftsmanship of this quality involves considerable expense, much of it related to labor. Many of us will avail ourselves of local talent but the prudent first step could be research and a cost analysis, or even an appraisal.
On the flip side, plain-Jane guns with no real collector value are often great candidates for restorative efforts. However, the cost for professional work can easily exceed the gun’s worth. The TC Cherokee probably falls somewhere in between.
It isn’t really a beater gun, nor is it highly collectable. But it does hold some value because of its limited production, trim proportions, and intriguing caliber. It’s a good example of a gun that could benefit from some cautious DIY efforts.
A quick inventory check revealed I had the necessary supplies, so I decided to move the project forward. The plan involved some minor touchups with a bottle of commercial cold-blue, and a totally refinished stock with cosmetic flair.
Regarding the actual process, methods tend to vary. The steps I followed came from previous experience as “the gun stock guy” for a professional gunsmith.
Stock Refinishing P.O. Ackley Style
I once had a lively sideline business as a bird carver. This caught the attention of a gunsmith I patronized who offered me work involving gun stocks. It was a great opportunity to pick up a useful skill, but it was also somewhat humbling.
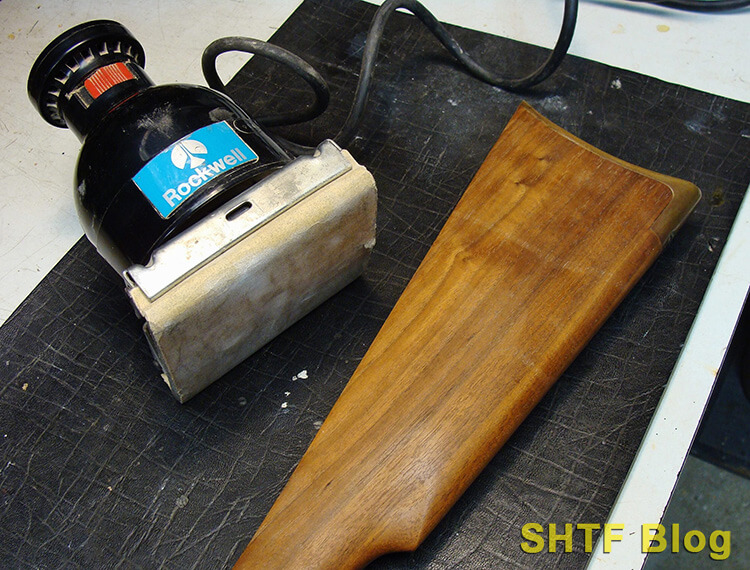
The Gunsmith, Al, had worked for P.O. Ackley, the same name associated with Ackley-Improved cartridges (referred to by Al as “old P.O.”). As I quickly learned, time was money. Hours of patient sanding were out if more effective means were available. The first time Al handed me a Rockwell electric pad sander I was flummoxed. But quite surprisingly, fairly close detail sanding was possible – with practice.
You’ll see a sander in the photos, but it may not be for everyone due to the risk of rounded edges or other irreparable damage. Patient hand-sanding with a couple progressively finer grades is the slower but safer alternative, using a block to preserve sharp lines. Or, depending on the overall condition of the stock, you may not need to do any sanding.
Al’s arsenal of tricks contained an eclectic mix of secret sauces and techniques. Among the former were a non-disclosed recipe of oil-dissolving solvent/finish-stripper that simmered in a volatile tank, and another dip-tank of top-secret stock finish. But some techniques were pretty basic.
The darkened stock heads of old double guns were the result of oil soaked wood. In less severe cases, the cure sometimes consisted of hanging the stock upside down for a week in close proximity to the shop’s woodstove. Despite his exotic blends, Al also liked Tru-Oil, the same stock finish you’ll see below.
And then there was Al’s Sugi Finish, a cosmetic touch applied with a torch to dress up a bland stock. You’ll see that, too.
Stock Assessments
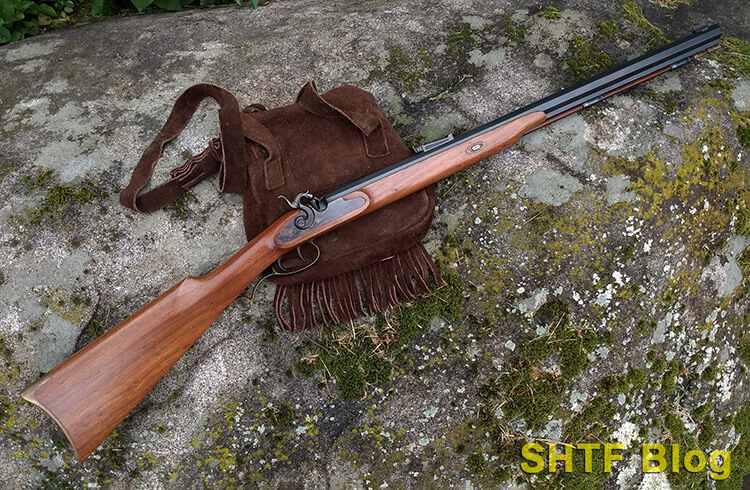
The Cherokee stock was a good candidate for DIY refinishing due to its overall simplicity. Unlike many shotguns or lever-action rifles, it’s a one-piece design. This eliminates concerns about an unsightly receiver fit resulting from a rounded stock. No checkering to worry about either.
However, careful inspection did reveal a couple small cracks near the steel barrel tang. As for the stock itself, although the walnut was properly grained from the perspective of strength, it qualified as “plain.” The walnut was also a lighter shade than I preferred, fixable though the upcoming facelift.
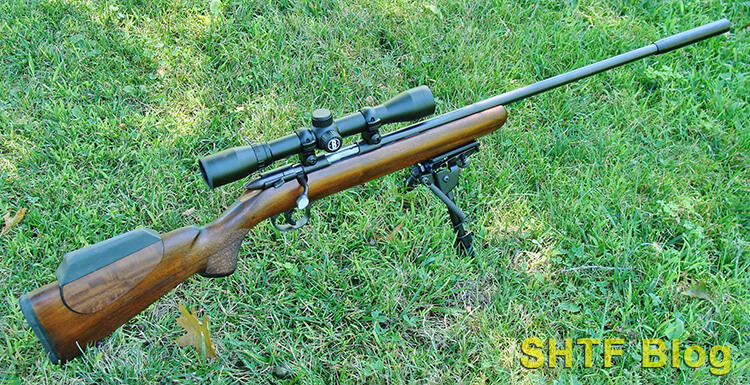
Firearms with similar characteristics include the millions of aging .22 rimfire bolt-actions, many of which hold sentimental value as “first guns” or inherited keepsakes. An example in my possession is a circa 1960s Remington Model 510 single-shot. Although worth a bit more than some others from that era, it’s still far from a big-ticket item.
The plain walnut stock had accumulated a fair share of minor dents, but the bluing was still largely intact, and its bore was mint. Eventually, I decided to make it “project gun” with most effort directed toward the M-510’s stock (see photo). I don’t think the final outcome increased its value much (if at all), but I doubt the efforts hurt it – and it’s certainly worth more to me in its present form. By the way, the whole job cost next to nothing.
Getting Started
The requirements for a job like this muzzleloader project are fairly minimal. The basics include sandpaper, steel wool, finish-stripper (a maybe), and the hand tools required for disassembly. Unless you already own an electric pad-sander, I’d give it a pass.
The few items less likely to found locally will be Birchwood Casey’s Tru-Oil (also available at Brownell’s) and water-based Walnut Stain, however most gun emporiums stock them in affordable quantities.
- Bundle of stock finish and disposable absorbent pads
- Birchwood Casey Tru-Oil Gun Stock Finish 3oz
- Includes 2 Westlake Market disposable absorbent pads for catching messes
- 100% MONEY BACK OR REPLACEMENT WARRANTY- We place value on every customers experience. We provide 100% Money back or replacement warranty if there is any quality issue or any reason that caused you...
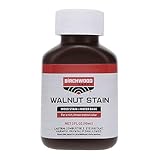
- RICH EVEN COLOR - Birchwood Casey Walnut Wood Stain brings out the richness and beauty of fine woods gives you a tough, long-lasting finish. This walnut stain is a true, brown-walnut color for the...
- WALNUT - Water-soluble stain is sun-fast, true-to-color and non-bleeding. Produces a clear, rich color without grain clouding or smearing. It is very good for staining a maple or alder wood or making...
- WATER-BASED STAIN - Birchwood Casey Walnut Wood Stain is water based so color intensity is easily controlled by adding water to concentrate or using full strength for light colored woods such as birch
- TOP-GRADE PRODUCT - This top-grade product is expertly made in compliance with stringent industry standards to offer a fusion of a well-balanced design and high level of craftsmanship. Manufactured...
Another option is Birchwood Casey’s Tru-Oil Stock Finish Kit (also available at Brownell’s). This kit comes with with instructions, stain, oil, conditioner, and sanding/finishing materials.
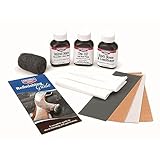
- EVERYTING YOU NEED TO REFINISH GUN STOCK - This gun finish kit includes everything you need to finish a new stock or to refinish an old stock. Each kit contains a generous supply of professional-grade...
- RICH EVEN COLOR - Birchwood Casey Walnut Wood Stain brings out the richness and beauty of fine woods gives you a tough, long-lasting finish. This walnut stain is a true, brown-walnut color for the...
- SATIN FINISH -Birchwood Casey stock sheen & conditioner removes surface imperfections and gives your stock a smooth, hand-rubbed finish. Also protects against weather and handling. Will not fingermark
- STOCK FINISH KIT CONTAINS - 3 oz Walnut Stain, 3 oz Stock Sheen and Conditioner, 3 oz Tru-Oil Stock Finish, fine, medium and coarse sandpaper, 2 rolls of 00 steel wool, 1 piece of nonwoven cloth...
How to Refinish a Gun Stock
Safety first. Clear the deck of any live ammo and ensure the gun is unloaded (since I was working on a muzzleloader I verified this via a reference mark on its ramrod).
Find somewhere to work. A project like this this isn’t kitchen table work – even without caustic stripper. I’m rightfully banished to my basement workshop, by far the better location.
The stock needs a holding device. Advice passed on via Al from old P.O: “even a piss-pot needs a handle.” I used a section of rubber-coated electrical wire, but a piece of a metal coat hanger will do. If you can’t find a suitable opening in the stock, a small eyelet can be temporarily screwed into a spot like the barrel channel or butt.
If the stock is checkered, extra care will be necessary. If sanding is involved, the panels can be covered with tape to protect the diamonds. There’s a good chance cut-checkering won’t have any finish. Most of the pressed versions will, but it can often be dissolved with some furniture stripper and small brush.
Strippers can also dissolve plastic parts like butt-plates and grip-caps, so they’ll need to be removed before proceeding. If you reinstall ‘em afterwards, they’ll remain flush during sanding.
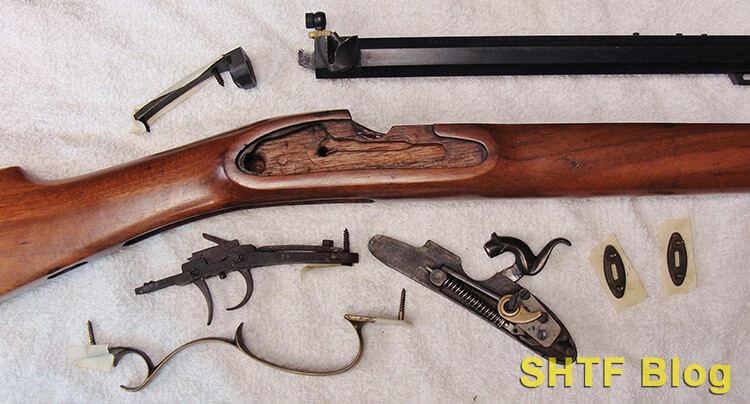
1 – Remove the Components
The lock-work and furniture need to be removed from the stock. Secure the screws to their parts in the order of their removal to simplify reassembly. None were “timed” (for slot alignment) in my job, but others are, so it’s worthwhile insurance. I left the brass butt-plate attached to the stock to eliminate sanding overruns.
2 – Remove the Old Finish
Read the warning label on chemical strippers first!
Then try a cautious test in an out-of-the-way spot (like the bottom of the barrel channel) and remove any plastic parts. The nasty residue can be scraped off with a cardboard edge.
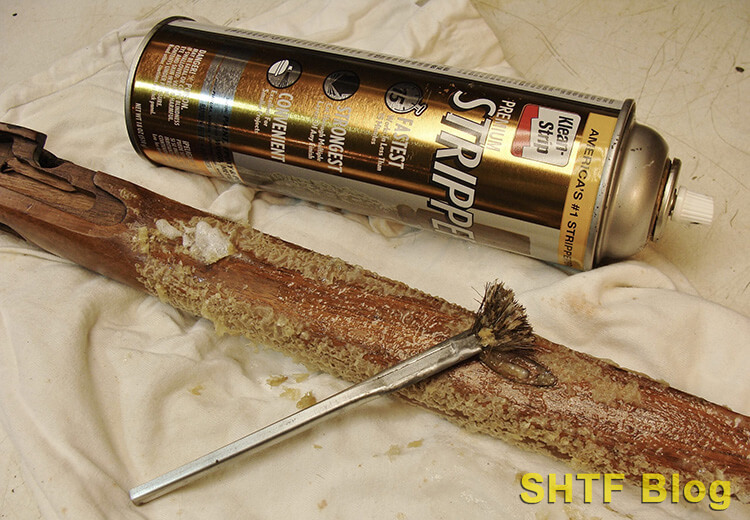

Alternatively, you can remove all of the finish through sanding.
3 – Sand Everything
Sanding typically comes next, starting with a coarse-grade paper (100 – 150). This step will eliminate some dings, and also provide a cleaner slate for future efforts.
Unless you’re comfortable with power tools, the safer bet is hand-sanding (always with the grain).
A welcome but rare surprise here was the good condition of the wood below the original finish. The stripper had even leached some into the pores where it acted as a filler so, in this instance, sanding was omitted. Better plan on some though.
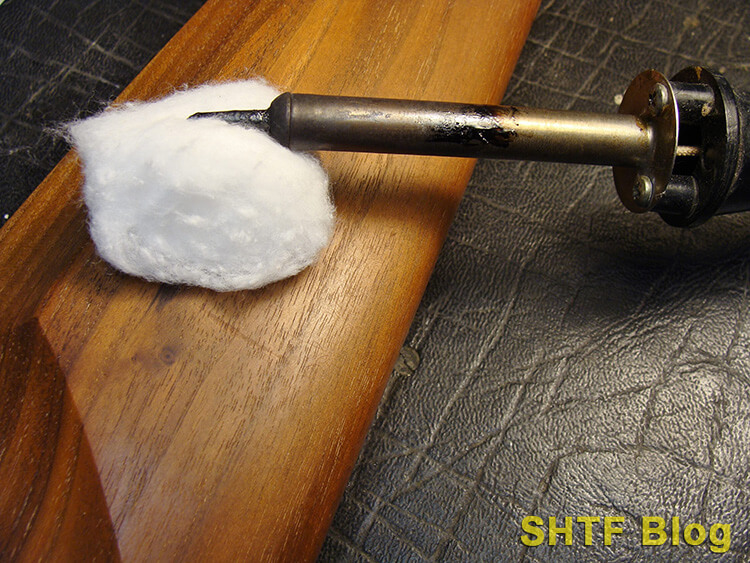
4 – Steam the Dents (if necessary)
Small dents can often be raised through steaming. The process is simple enough. Steaming penetrates the woods, expands the fibers, and raises the dent. For smaller dents, this could resolve the problem entirely. For deeper dents, steaming may only make them less deep.
Wet a cloth, set it over the dents, and press the cloth with the iron. The steaming effect will work its way into the wood fibers. Be sure not to leave the hot iron on the stock too long or you risk burning the wood.
The approach for my project involved a soldering iron and wet cotton ball. The dents were few and small enough that it did the trick. Use an iron and clean wet cloth do bigger jobs.
This technique won’t work with cut wood fibers and it’s seldom 100% effective. Sanding is often more effective but can be risky if carried to the extreme. Either way, one more sanding session will probably be necessary. Give 220-grit a try to see how it looks.
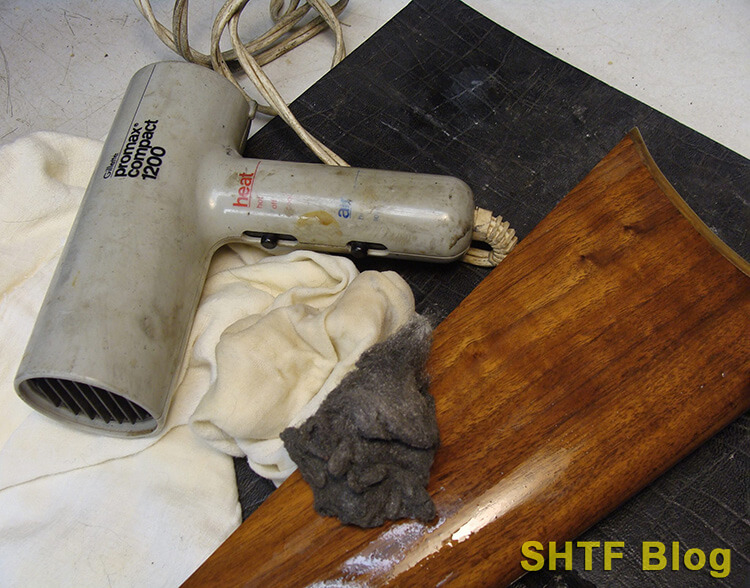
5 – De-Whisker
Now you are ready to remove any wood whiskers. Skip this step and your stock could need a shave the first time it gets wet. Wiped the wood with a mix of vinegar and warm water. This will help raise any whiskers.
Deliver a quick blast of heat afterward from a heat gun, hair dryer, etc. Remove the small cut grain ends for removal with 000 steel wool (again with the grain). Since the latter can rust, blot off the particles with a tack-cloth.
Some people advise against using steel wool. This may be particularly true if you are using an acid treatment for staining as flecks of wool can come off the pad and imbed themselves in the wood. If this happens, acid treatment can stain those flecks black.
Note that this process may require a few passes (or more). Each pass will yield diminishing returns, so it’s your call on when to call it quits.
6 – Apply Your Stain
Ready to give that stock some color? Note the “water base” label in my stain pictured below (oil-based versions can interfere with some stock finishes). Advertised as whisker-free, the stain dries quickly.
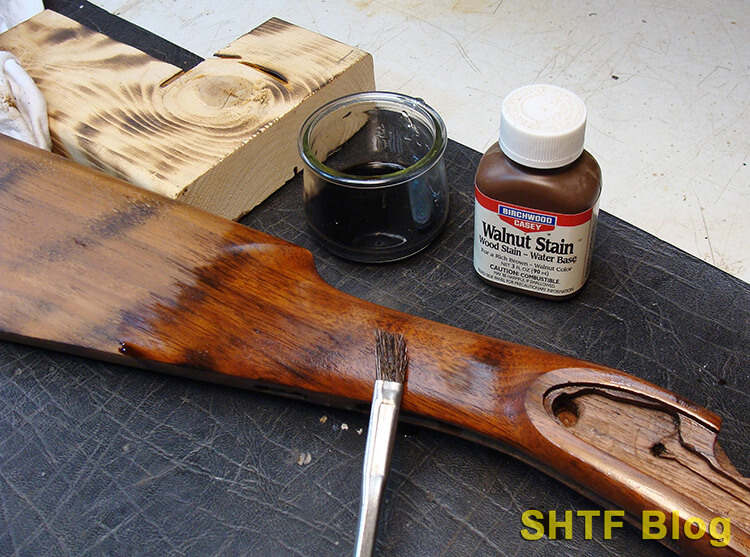
The chunk of scrap lumber in the picture was used as a test bed for a Shou Sugi Ban treatment, applied carefully using a propane torch. The goal was grain enhancement without the appearance of a raccoon’s tail. Before going all out, you might want to practice on an old axe handle or baseball bat.
7 – Apply Tru-Oil and Dry
The goal of your first coat of Tru-Oil is a light drip-free coating. The applicator is a cleaning patch but fingers will work as well.
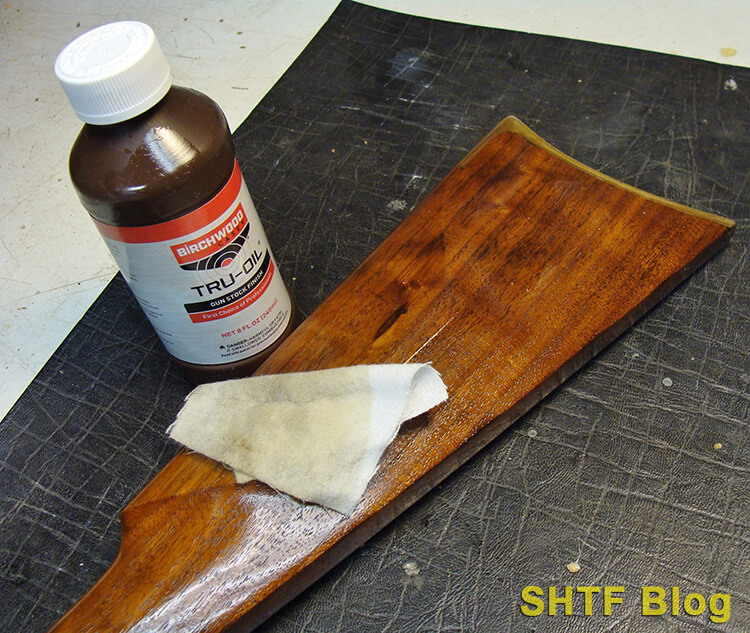
To avoid leaving fingerprints save the handle end for last. Then hang the stock in a warm, dust-free location.
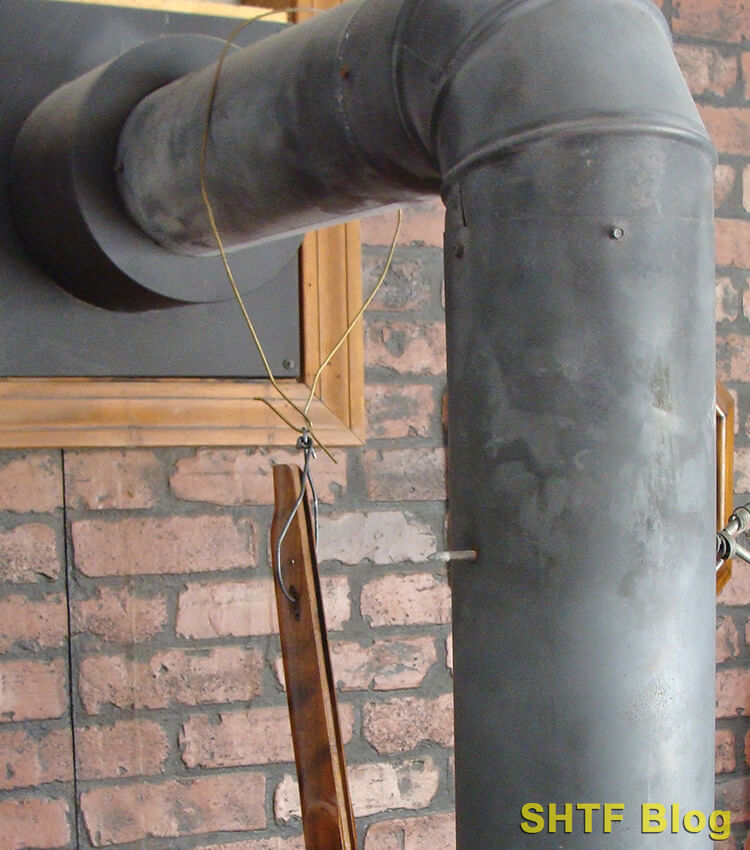
Drying in this manner isn’t necessarily a requirement, but patience is a virtue. So is planning – which accounts for the the electrical wire “handle.”
Two coats of Tru-Oil per day (each morning and afternoon) will ensure tack-free handling in a warm and dry environment.
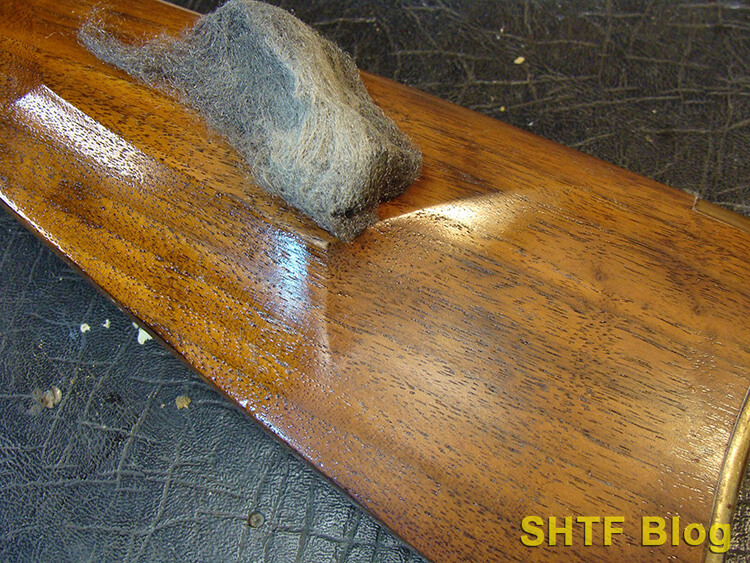
8 – Finish with 000 Steel Wool
After only one coat of Tru-Oil this stock is already coming to life. The butt end has been rubbed with 000 steel wool in preparation for another coat.

- Rhodes American Steel Wool Extra Fine 000 /
- This products adds a great value
- This product is manufactured in China
- Pack of 12 steel wool pads
Keep going with two coats per day and, eventually, the pores will completely fill in, resulting in a high-gloss finish.
A possible time-saving option is a sealer/filler (skipped here).

- SEALER & FILLER - Birchwood Casey gun stock filler and sealer seals out moisture and fills the pores in one easy step. A clear sealer and filler lets you choose your favorite stain or leave the wood...
- EASY TO USE - Use sealer & filler as the first step to a beautiful tru-oil gun stock finish. Birchwood Casey gun stock filler and sealer is easy to use and it dries fast. Must-have addition to your...
- EASY TO APPLY - Birchwood Casey gun stock filler and sealer is perfect product to fill the grain and seal the pores of wood before staining. It comes in 3 oz bottle
- HIGH-QUALITY - This top-grade product is expertly made in compliance with stringent industry standards to offer a fusion of a well-balanced design and high level of craftsmanship. Manufactured from...
9 – Reassembly
Time to wrap it up: Loose ends, final touches, and reassembly (see below).
I wound up applying around seven thin coats of Tru-Oil over a period of around four days. I could’ve kept going until the stock’s pores were filled – but called it good. This little caplock is an old-timey kind of rifle anyway, and it’ll see some time in the woods, so future dings inevitable.
Related Loose Ends
Brownells is a well-established source for gunsmithing supplies. Turned out I already had most of what was needed. If not, the items were only a phone call away.
Before final finishing, I bedded the steel tang with Brownell’s ACRAGLAS, an ultra-strong epoxy used to glass-bed rifle actions (a topic on to itself). While I was at it, I blew a small amount of the two-part mix into one crack with a hair dryer (wiping off the excess with lacquer thinner).
Once finishing was completed, I installed a QD Brownells/ Uncle Mike’s Sling Swivel Stud near the toe of the stock (using an electric drill to pre-drill the hole). Installation of the normal front stud wasn’t possible because of the ramrod. The solution was a lateral hole in the forend, which permitted attachment of a traditional leather sling (using not too traditional para-cord).
I deliberately left a few minor blemishes in the stock so it wouldn’t outclass the gun’s blued steel surfaces. Most of those dings were touched up using Brownells Oxpho-Blue – again, less than perfect, as intended (see my article on bluing for more information).
Final Touches
One loose end was the brass furniture, solved by a quick trip to the local hardware store for a bottle of Brasso (also available at Home Depot or online). After removing the still-attached solid brass butt-plate, I polished all of the brass furniture. All of these pieces were easy to reinstall because the screws had been taped to the parts.
No products found.
In its final coat, Tru-Oil leaves a bright finish. I was after a more subdued version so I lightly dulled the surface with the same 000 steel wool, wiped it clean, and hand-rubbed on a light coating of wax, also applying some to the brass butt-plate and trigger guard.

- HIGH-QUALITY FORMULA - A high-quality formula of Birchwood Casey Gun Stock Wax combines protective and beautifying qualities of the finest carnauba, beeswax and silicone
- PROTECTS WOOD - Produces a lustrous water repellent film that will not rub off like oils. Offers maximum protection against finish cracking from weather and handling. Enhances and protects the beauty...
- EASY TO USE AND APPLY - Birchwood Casey Gun Stock Wax comes in a 3 oz bottle. It is a great alternative to gun oil for concealed carry guns that will help protect finish from cracking caused by...
- TOP-GRADE PRODUCT - This top-grade product is expertly made in compliance with stringent industry standards to offer a fusion of a well-balanced design and high level of craftsmanship. Manufactured...
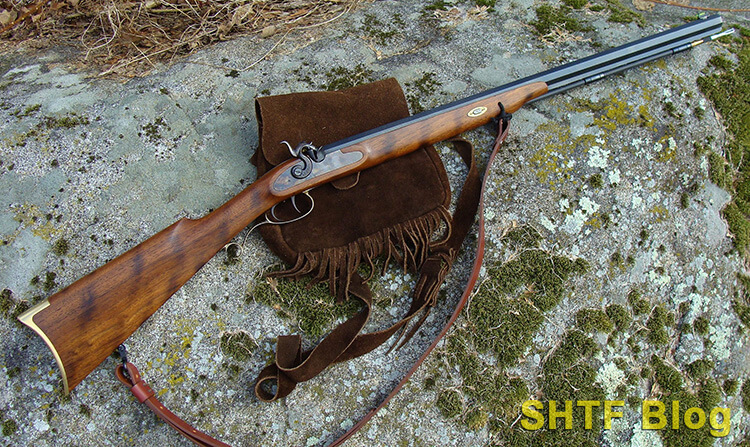
At that point it was time to reinstall the lock assembly and barrel, which brought the whole project to life – except for one last touch…
As much as I appreciate the simplicity of a basic nylon sling, a traditional leather version seems much more fitting for an old-school caplock rifle. Turned out Midway USA had just the ticket for less than $20, complete with two QD swivels in several colors. I went with the 7/8” Chestnut version and replaced the forward swivel with my homegrown para-cord system.
Finale
The whole project was done in less than a week. Most of it involved labor but, once the first coat of Tru-Oil was applied, each twice-daily reapplication required less than an hour.
Is it perfect? Nope, but the stock has a certain antique-ish ambiance that ties in nicely with the bluing and brass furniture.
Many other firearms in circulation will be no harder to work with. The Sugi-torch treatment was an extra that can dress up a plain stock. Whatever the chosen path, you can always practice first, using a piece of scrap lumber. These projects are mostly about time and patience. Out-of-pocket costs are minimal, but the rewards can be substantial.