Despite the advent of high-end optics, many people still use iron sights. Adjusting them may not be as clear as turning the knob on a scope, however. Want to improve your peep sight accuracy? This article might help.
Long-range shooting has caught on in a big way, driven by technical advancements on all fronts from precision heavy-barreled bolt-action rifles to improved ammunition and optics. These systems can really stretch the distance, but not every target is far. More than one deer hunter has been stymied by a grouse blown to smithereens as the result of a low “head shot” attempted from nine yards. The culprit? More than likely “offset,” the height of the scope above the bore.
Likewise, numerous deer have escaped unscathed at close range simply because they could never be located within a scope. That said, optical sighting systems certainly have their place. Many of us are loathe to hunt without a decent scope, not only to gain magnification, but also to eliminate age-related vision difficulties with iron sights.
However, not all targets are far, and fuzzy front sights can often be addressed through bright fiber-optic types – especially when combined with a receiver sight. This could be good news for folks on tight budgets, or for those owning rifles less amenable to scope-mounting.
The Peep Sight Alternative
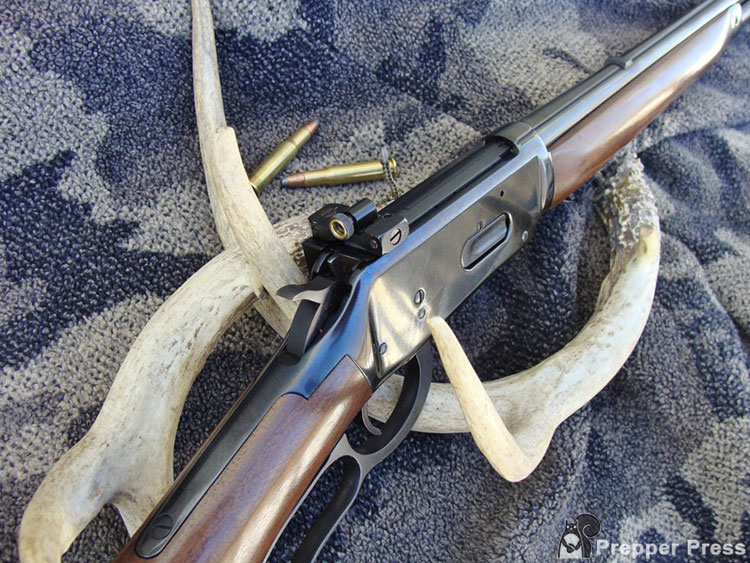
The classic old top-ejecting Winchester Model 94 lever-action .30/30 is one example among many, including military-types, or the legions of older .22 rimfire rifles built for iron sight use. Some have no provision for mounting any kind of a scope, but may accept a receiver sight commonly referred to as a “peep sight.” Although fairly basic, such an aiming system can offer surprisingly good accuracy because our eye will naturally center an object (the front sight) within a circle (the rear aperture).
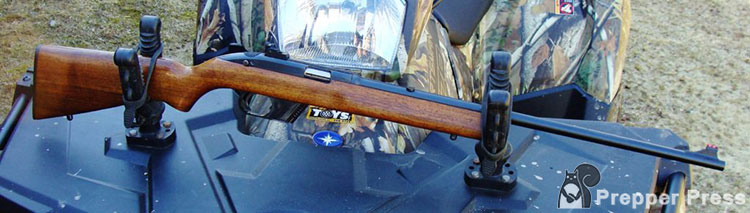
When mounted fairly close to the barrel, the gun will shoot close to its sights. This may seem like a non-issue – until you try weaving a .22 bullet through a latticework of brush toward a 12-yard rabbit. Granted, a scope is the better choice for many hunting situations, but Mother Nature may have other plans. A fogged lens or an objective bell packed with snow won’t work, so even among scope aficionados, simple can sometimes be good. That’s the route I took with an older .22 rifle destined for use around the hacienda, often via an ATV which has an affinity for mud.
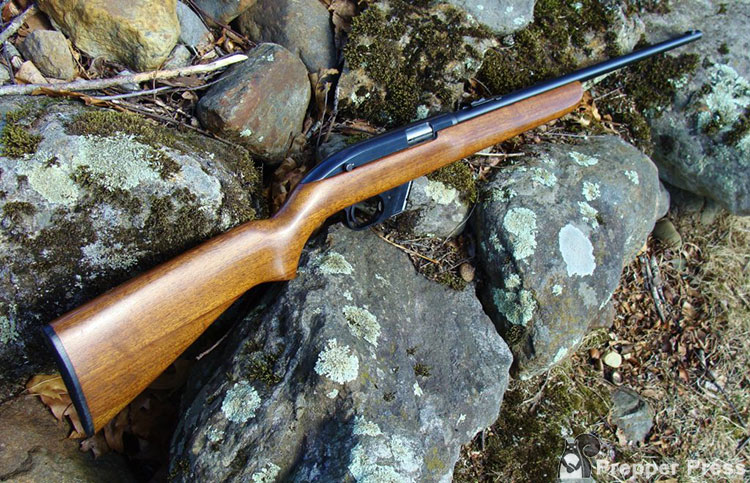
Recently, I wound up buying a nice older Winchester Model 77 “clip-fed” .22 LR semiauto. I’ve had a soft spot for these sleek, lightweight rimfires ever since encountering one as a teenager. This one is a first-year gun built in 1955, made when scopes were less popular. The steel receiver is grooved to accept standard “tip-off” rings, but the stock is better suited for its open sights.
Today, most of us will just buy a Ruger 10/22, or the improvised Ruger 10/22 Takedown. The 10/22 is the rifle that probably killed the Winchester within a few years. We often trick ‘em up with heavy barrels and scopes, but a plinker can still be lots of fun. I’d thought about buying an extra iron-sighted Ruger, but the slim older Winchester carries well and has a lively feel. My old eyes just needed a more visible set of sights.
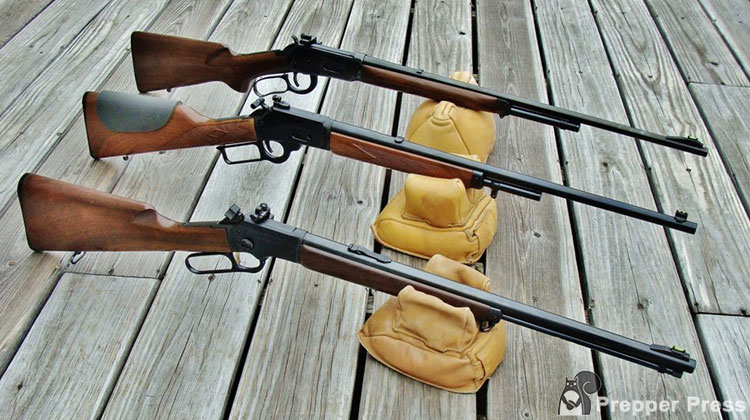
Receiver sights are sold to fit lots of different rifles, and several types are designed for mounting to grooved receivers. Several that come to mind are sold by Lyman, New England Custom Gun, Skinner Sights, Tech Sights, and Williams.
Setting the Correct Height for Peep Sights
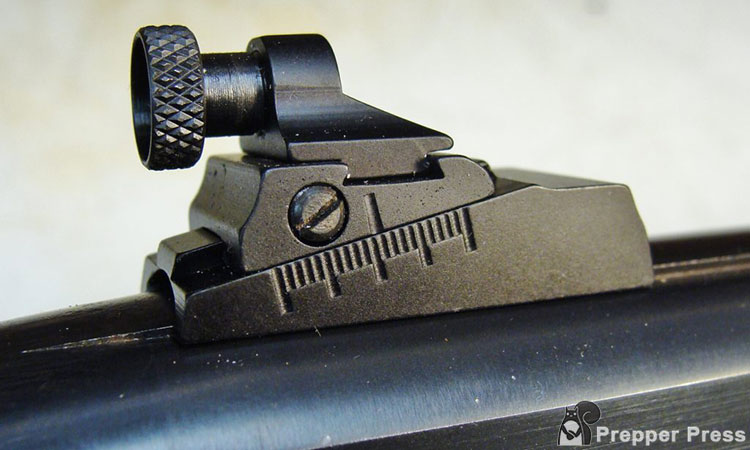
I bought a Williams WGRS-54 for this Winchester, based on previous good results the sight. It’s a minimalist design with a pair of integral jaws that slip into the grooves, where it’s secured with a set-screw. Sounds simple (assuming it fits), however plenty of surprised shooters have encountered extremely high impacts after a peep sight installation.
The reason? Most receiver-mounted sights sit higher than the original open sights. To “sight in” either type, we move the sight in the direction we want our bullets to go. Thus, a receiver sight higher than the original rear will raise our groups – probably enough to require a higher front sight (at the muzzle-end, the sight adjustment rule is reversed). More often, this situation develops when front sights are mounted directly into the barrel via a dovetail cut. Those that incorporate a taller dovetailed ramp locate the front sight higher, with a good chance of eliminating this concern.

BUT, how do we know for sure? Measuring the height of the front and rear sights above their mounting surfaces won’t work unless both are on the same plane, relative to the bore (the case for many AR-15 systems). But most barrels are tapered and many receivers sit higher causing complications.
Front Sight Adjustments
Using this Winchester M-77 as an example, the new receiver sight sits much higher than the factory rear. In such instances, the bore can provide a frame of reference. Its center is sometimes determined via insertion of a cleaning rod. This trick will work with a rifle like a lever-action Marlin because its bolt can be easily removed, allowing the rod to pass through the barrel and receiver. But, the process gets trickier with this old Winchester, a Ruger 10/22, or a number of other rifle types.
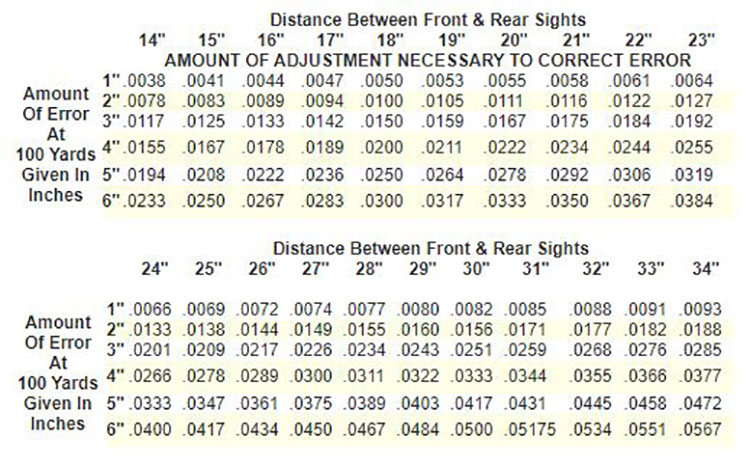
As an alternative, many folks simply adjust the receiver sight to its elevation center and shoot a group using the original front sight. If the rounds strike high, the deviation can be measured and used to calculate the necessary correction through a sight-height chart. You can find a few versions on-line, posted by sight manufacturers. Data based on target distance, shot deviation, and sight height, etc. is gathered to calculate a solution.
Brownells is always a good source for gun parts and information. These charts are from Brownells:
Another possibility, assuming you can peer through the barrel, is to bore-sight; easy with most bolt-actions, or even the above Marlin. If you can jury-rig a temporary front sight (see below), you can tweak its height until your peep sight system aligns with a target that’s centered in the bore. XS Sights includes a simple plastic trial front sight post with their receiver sights just for this purpose. It looks sorta like an inverted golf tee (you slip it in the dovetail).
Other tricks involve laser cartridges and collimators. Or, you might be able to use a board…
Using a Board
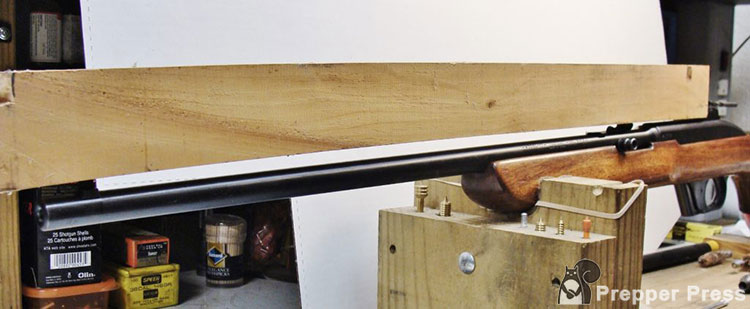
I went low-tech, using a length of pine a bit longer than my rifle’s action. Here’s the procedure:
- Zero the rifle with its factory-original open sights at 25 yards.
- Mount the new sight and center its elevation (using the sight’s adjustment scale).
- Place the rifle in a gun cradle (which could’ve been a notched cardboard box).
- Place a straight 1×3” board carefully atop the iron sights and slipped rearward until it abutted the new peep sight.
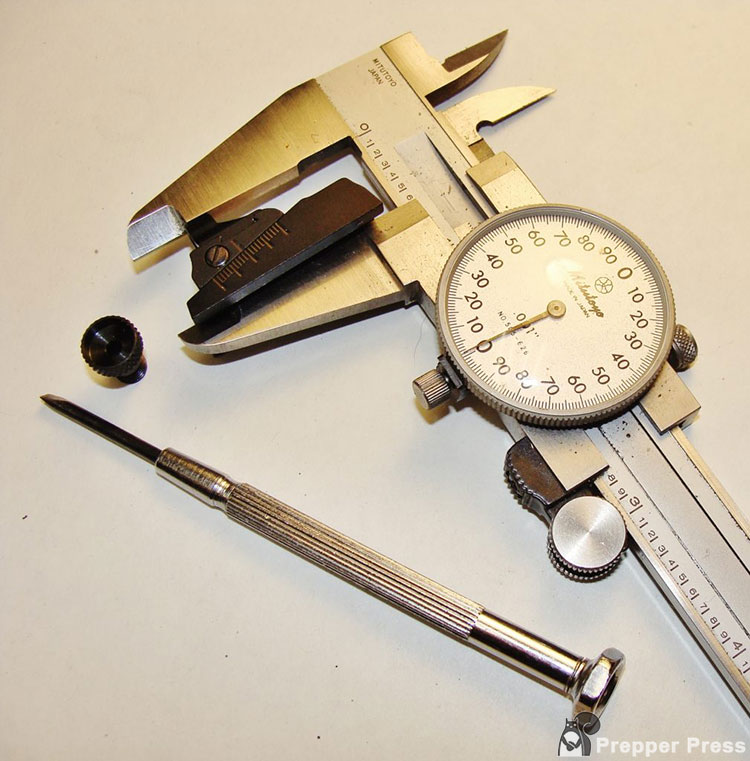
- Slip a tight-fitting drill bit through the aperture to serve as a pointer, and a corresponding mark was inscribed on the end of the board.
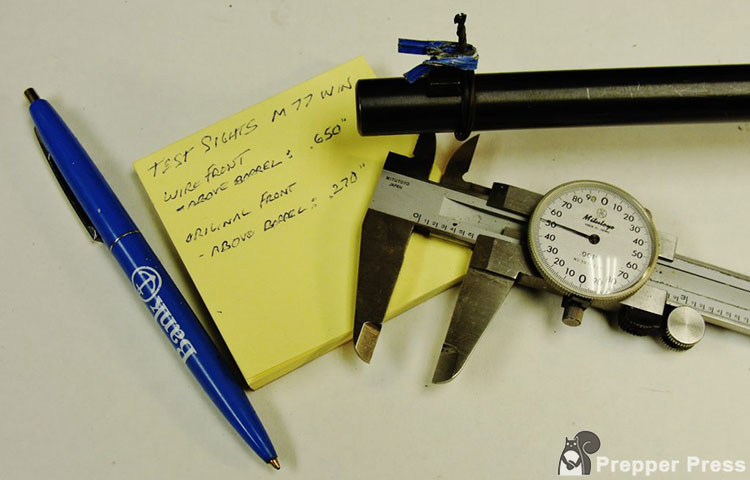
- Use a dial caliper, the height of the mark was measured above the board’s bottom surface.
- That figure (in thousandth of an inch) also constituted the additional front sight height needed to regain a zero (not exact, but fairly close).

The board said I needed an extra 0.390” – but better to be safe than sorry. So, I improvised a temporary sight by wrapping a twist-tie around the barrel just ahead of the front sight. To keep it upright, I wrapped a second one horizontally around it and the front sight blade. The vertical twisted “sight tips” were then snipped off a bit high (determined via the caliper).
At that point I had a workable test-sight for a shooting test. As expected, off a rest, the first three shots struck a tad low on a makeshift target placed at 50 feet. After guesstimating the necessary trim (using wire cutters), two more shots provided the correct height – for a total investment of five rounds. I fired three more shots at a 40-yard steel plate though, mostly for extra reassurance.
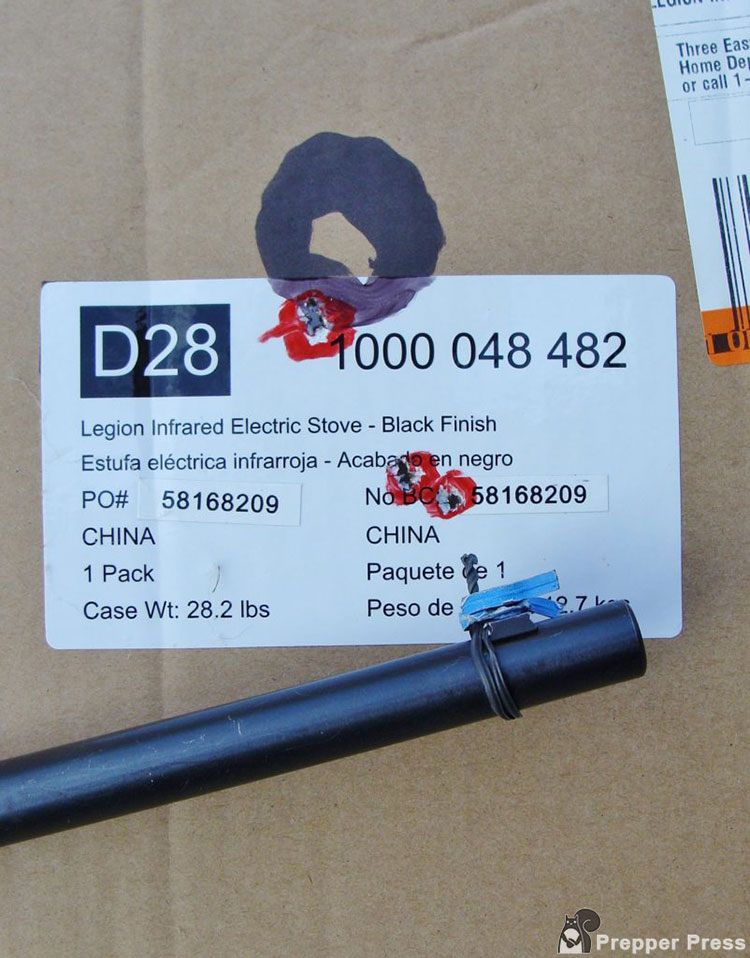
Close! The first 3 shots at 50′ hit a bit low. A small trim placed the next two on the money using a 6:00 hold. 
Three more shots using the .650″ twist-tie front sight at 40 yards. The new receiver sight is set to its mid-point.
Williams Sight Combination
Now, I “just” needed a new matching front sight. Simple, right? Well, maybe – or maybe not. In this case there weren’t any front sight blades tall enough. That meant I’d also need a ramp and a way to attach it to the barrel. Most ramps are attached with screws, but my original sight was mounted directly to the barrel, via the factory 3/8” dovetail.
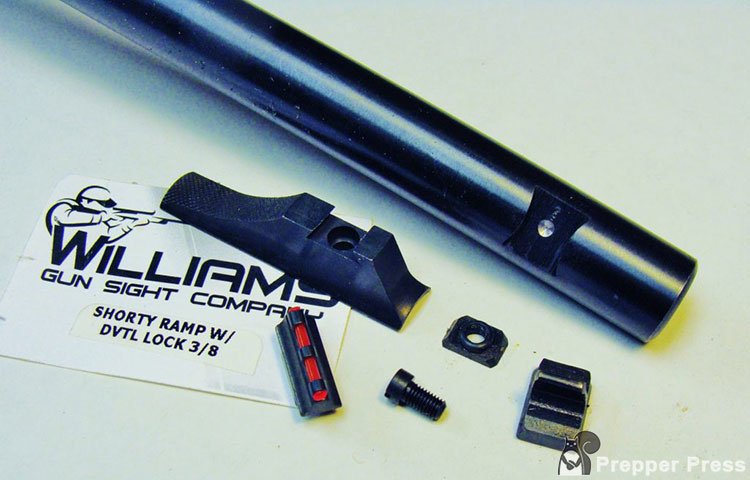
Rather than hunt up a gunsmith, I opted for a Williams Shorty Ramp which comes with a small threaded adapter plate. The plate is drifted into the dovetail until centered. At that point, an integral threaded collar will protrude slightly above the barrel to locate and secure the ramp. A small socket on the ramp’s underside mates with the collar, and both parts are cinched tight using an included screw. I wouldn’t go this route with a hard-working rifle but it’s fine for busting cans or red squirrels.
One challenge involves narrowing down a workable ramp and sight combination. By “workable”, I mean one that’ll provide a bit of elevation leeway via the receiver sight. Like most others, the Williams ramps and front sights are sold in several heights. The latter are also offered in a few thicknesses. Mixing and matching the various options may provide more than one solution, but the best combination for me was a .375” ramp and .375 x ¼” Williams Fire Sight blade – with a caution!
The listed heights of some sight blades (including those from Williams) include the dovetail; about .100”. Thus, its height above the ramp would be around .275”, the amount needed to total .650”. The tolerances can vary so they’re best calculated off the receiver sight’s mid-elevation setting.
Fortunately, despite these trying times, Midway USA had both items in stock. Since I planned on removing the factory rear sight, I also added a sight-filler blank. Meanwhile, I flooded the rifle’s existing sights and dovetails with WD-40 (WD-40 on a gun?), hoping it would ease their removal. The small order arrived within a week.
Installation of Combination
Some sights can be real bears to budge, but the Winchester’s moved without much difficulty. I clamped the barrel in a padded vise and used a brass punch to avoid any dings. Dovetailed sights should be drifted out carefully from left-to-right. I did drill a small indentation in the vacant dovetail, and used a slightly longer screw to engage the indent (probably unnecessary).
The plate was then drifted in (R-L) until centered, and the ramp was screwed to the plate. Both received a dab of blue thread-sealer. The sight was started in the ramp’s dovetail by hand to ensure it would fit, and cautiously pressed home (again, R-L) between the jaws of the vise. Sometimes they need judicious filing. If so, proceed carefully, removing metal only from the blade.
I also added a small indent to the rifle’s receiver to give the receiver sight’s set-screw an extra bite, followed by a dot of thread-sealer.
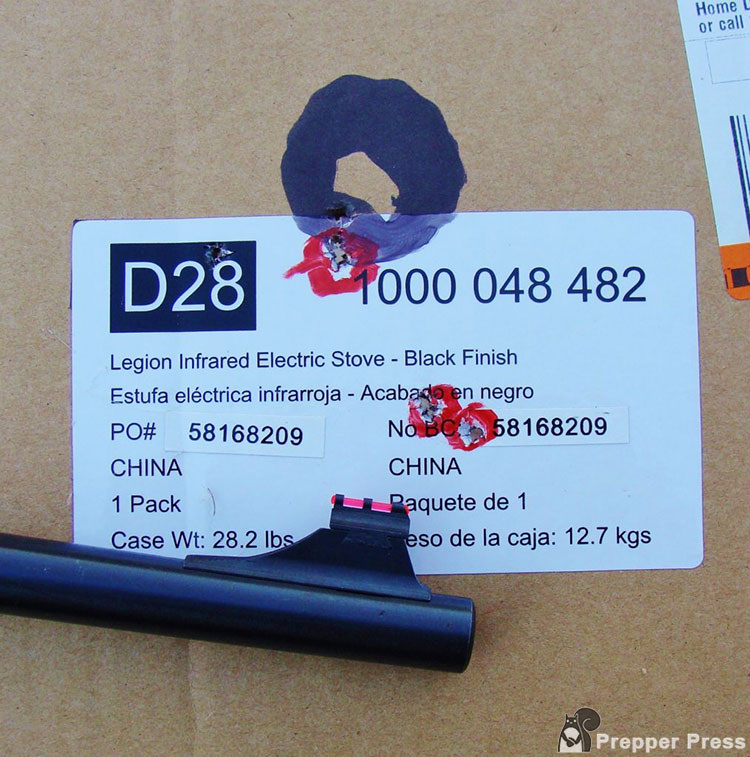
Same test target and distance. The highest unmarked holes were produce with the new sight (no political inference intended). 
Same 40-yard plate, now showing two 3-shot groups. The lower cluster was made with the new sight. Pretty close!
Time to see if my math was correct. The new sights were within a few thousands of the test data so, in theory, the same cardboard box target should yield close results. And, sure enough it did. Same for the 40-yard plate where three more rounds were touching the first group! From there, it was easy to arrive at a final zero, using the receiver sight’s windage and elevation screws.
Final Touches for Peep Sight Accuracy

With success confirmed, I drifted out the rifle’s factory rear sight and tapped in the filler blank for the sake of cosmetics.
A few finishing touches to the rifle included the addition of QD sling swivel studs, and some small applications of cold-blue. Someone in the past had tried this trick on a small pitted area at the rear of the receiver. The pits were still visible though so, on a whim, I cut out a small circle of black adhesive stair-tread and just pressed it on, ostensibly as an “anti-glare measure”.
Was it worth the bother? In this case maybe not. The rifle’s grooved receiver would’ve made scope mounting a breeze, and rudimentary 4X rimfire scopes can be purchased for around $50.00 with a set of 1-inch rings. The receiver sight cost $38. The ramp, front sight, and filler cost another $41. But, I was after a handier and hardier package – one I could grab on the fly without worries over zero shifts.
Regarding optics you’ll pretty much get what you pay for, whereas there’s little to go wrong with iron sights. Thanks to the bright fiber-optic front, I can see ‘em!